When I have leftover rotisserie chicken, I often find myself pondering how to make the most of it. It’s amazing how one roast can lead to so many tasty dishes. I could whip up Chicken Enchiladas or maybe some BBQ Chicken Pizza, but the options don’t stop there. If you’re curious about transforming your leftovers into something delicious, there’s a lot more on the menu that might catch your interest.
Chicken Enchiladas
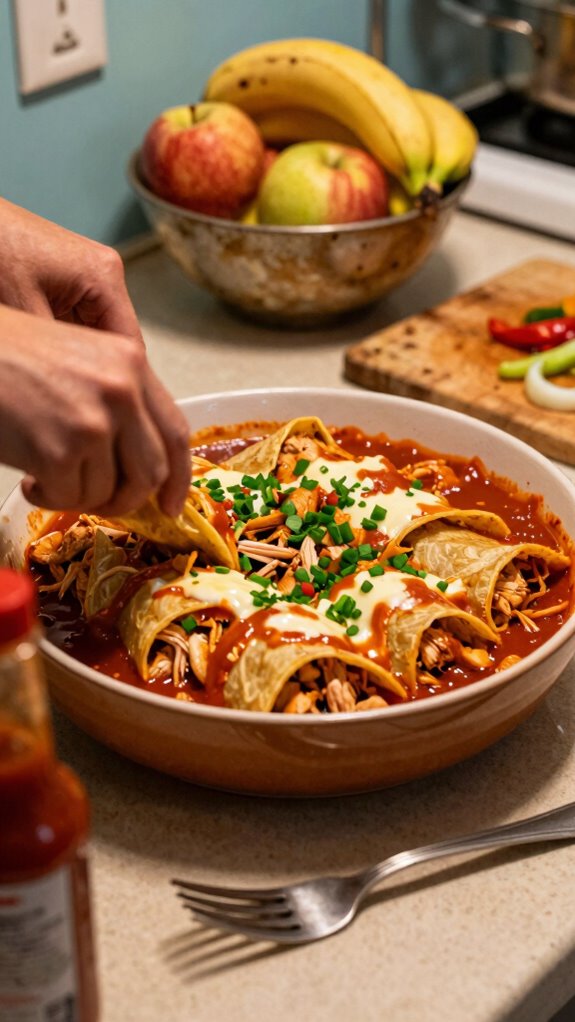
Chicken enchiladas are a delicious and satisfying Mexican dish that combines tender shredded rotisserie chicken with flavorful spices, wrapped in corn tortillas, and topped with enchilada sauce and melted cheese. They are perfect for a quick weeknight dinner or a cozy family gathering.
| Total Time | Difficulty | Number of Servings | Main Ingredient/Unique Feature |
|---|---|---|---|
| 45 minutes | Easy | 4-6 | Shredded rotisserie chicken |
Chicken enchiladas are relatively easy to prepare and require a total cooking time of about 45 minutes, making them ideal for busy weeknights. The preparation involves shredding the rotisserie chicken and assembling the enchiladas. To save time, consider using pre-made enchilada sauce, or feel free to make your own if you have extra time.
| Ingredients | Quantity |
|---|---|
| Rotisserie chicken | 2 cups, shredded |
| Corn tortillas | 8-10 |
| Enchilada sauce | 2 cups |
| Shredded cheese | 1.5 cups |
| Black beans (optional) | 1 cup |
| Diced onions | 1/2 cup |
| Chopped cilantro | 1/4 cup |
| Olive oil | 1 tablespoon |
| Ground cumin | 1 teaspoon |
| Chili powder | 1 teaspoon |
| Salt | To taste |
| Sour cream (for serving) | Optional |
You can customize these enchiladas by swapping ingredients based on your preferences. For instance, consider adding black beans for added protein, or using different types of cheese such as Monterey Jack or pepper jack for a spicy kick. Additionally, feel free to add veggies like bell peppers or corn to enhance the dish further.
| Kitchen Tool | Used For | How to Use |
|---|---|---|
| Baking dish | To bake the enchiladas | Layer the enchiladas in the dish and pour sauce on top before baking. |
| Mixing bowl | To mix the filling ingredients | Combine shredded chicken, beans, onions, and spices here. |
| Skillet | To sauté vegetables (if using) | Sauté onions (and any other veggies) in olive oil before adding to the filling. |
| Cooking spoon | To stir ingredients | Use to combine the filling and sauce evenly. |
| Measuring cups/spoons | For accurately measuring ingredients | Measure the right quantities for perfect flavor balance. |
| Oven | To bake the dish | Preheat and cook the enchiladas until golden and bubbly. |
Cooking Steps
- Preheat your oven to 350°F (175°C).
- In a skillet, heat olive oil over medium heat and sauté the diced onions until they are translucent (about 3-4 minutes).
- In a mixing bowl, combine the shredded rotisserie chicken, sautéed onions, black beans (if using), ground cumin, chili powder, and salt. Mix well.
- Take a corn tortilla and spoon some of the chicken mixture in the center, then roll it tightly and place it seam-side down in a greased baking dish. Repeat this step until all the filling is used.
- Pour enchilada sauce evenly over the top of the rolled tortillas.
- Sprinkle the shredded cheese on top of the sauce.
- Bake in the preheated oven for 20-25 minutes, or until the cheese is melted and bubbly.
- Remove from the oven and let cool for a few minutes before garnishing with chopped cilantro.
Serving and Presentation
To serve, carefully scoop out the enchiladas using a spatula and plate them individually or as a group. Garnish with additional cilantro, a dollop of sour cream, and a drizzle of extra enchilada sauce for a vibrant presentation. Brightly colored napkins and festive dishware can enhance the serving experience.
Pairing Suggestions
These enchiladas pair wonderfully with Mexican rice, refried beans, or a crisp green salad for a complete meal. For drinks, consider serving them with a classic margarita, chilled cerveza, or a refreshing glass of horchata, which complements the flavors of the dish.
BBQ Chicken Pizza

BBQ chicken pizza is a scrumptious, flavorful dish that combines tender rotisserie chicken with zesty barbecue sauce, cheese, and your choice of toppings, all baked on a crispy pizza crust. It’s a crowd-pleaser that’s perfect for parties, movie nights, or casual family dinners.
| Total Time | Difficulty | Number of Servings | Main Ingredient/Unique Feature |
|---|---|---|---|
| 30 minutes | Easy | 4-6 | BBQ sauce and shredded rotisserie chicken |
This BBQ chicken pizza can be prepared in about 30 minutes, making it an excellent choice for a speedy yet delicious meal. The dish is easy to make, as it involves simply assembling ingredients and popping the pizza into the oven. For a quicker prep time, pre-made pizza dough and barbecue sauce can be used, allowing you to focus on customizing your toppings.
| Ingredients | Quantity |
|---|---|
| Rotisserie chicken | 2 cups, shredded |
| Pizza dough | 1 (store-bought or homemade) |
| BBQ sauce | 1 cup |
| Shredded mozzarella cheese | 1.5 cups |
| Red onion (thinly sliced) | 1/2 cup |
| Cilantro (chopped) | 1/4 cup |
| Olive oil | 1 tablespoon |
| Corn (optional) | 1/2 cup |
| Jalapeños (optional) | 1/4 cup, sliced |
| Salt | To taste |
Feel free to customize your BBQ chicken pizza by incorporating different toppings and sauces. You can add ingredients like corn, sliced jalapeños for spice, or even replace mozzarella with other cheeses such as gouda or cheddar for a unique flavor. Additionally, consider using homemade BBQ sauce for a more personalized touch.
| Kitchen Tool | Used For | How to Use |
|---|---|---|
| Oven | To bake the pizza | Preheat oven to the desired temperature before baking. |
| Baking sheet | To bake the pizza | Place the assembled pizza on the sheet to cook. |
| Mixing bowl | To combine chicken and BBQ sauce | Mix shredded chicken with BBQ sauce in this bowl. |
| Rolling pin | To roll out pizza dough | Use to spread and flatten out dough if making homemade. |
| Pizza cutter | To slice the finished pizza | Cut the baked pizza into slices for serving. |
| Spatula | To transfer pizza from baking sheet | Use to carefully lift the pizza from the sheet. |
Cooking Instructions:
- Preheat the oven to 450°F (230°C).
- If you’re using store-bought pizza dough, roll it out on a floured surface until it reaches the desired thickness. If making your own dough, prepare and roll it out accordingly.
- Transfer the rolled-out dough onto a baking sheet lined with parchment paper.
- In a mixing bowl, combine the shredded rotisserie chicken with the BBQ sauce until the chicken is well coated.
- Spread the BBQ chicken mixture evenly over the pizza dough, leaving a small border around the edges.
- Sprinkle shredded mozzarella cheese generously on top of the BBQ chicken.
- Add thinly sliced red onions and any optional ingredients such as corn or jalapeños.
- Drizzle a small amount of olive oil over the top for added flavor.
- Bake in the preheated oven for 12-15 minutes or until the cheese is bubbly and golden brown.
- Remove from the oven and let it cool for a few minutes. Sprinkle chopped cilantro on top before slicing.
To serve your BBQ chicken pizza, cut it into slices with a pizza cutter and arrange them on a large platter or wooden board. For an extra touch, add a small bowl of BBQ sauce on the side for dipping, and garnish with additional cilantro for color.
For a perfect pairing, serve your BBQ chicken pizza with a refreshing garden salad tossed in a light vinaigrette. As for drinks, try serving it with chilled beer, iced tea, or a crisp white wine like Sauvignon Blanc, which complements the flavors of the barbecue sauce beautifully.
Chicken Salad Sandwiches
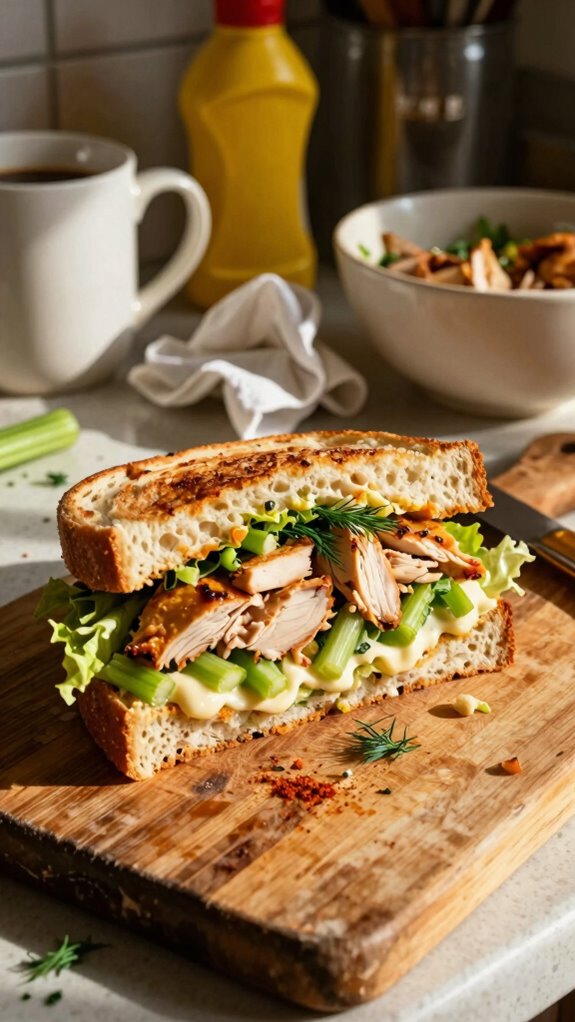
Chicken salad sandwiches are a delightful and versatile meal that’s perfect for lunch or a light dinner. Made with tender shredded rotisserie chicken, a creamy dressing, and a medley of crunchy vegetables, these sandwiches are not only easy to prepare but also packed with flavor. They can be served on your choice of bread or enjoyed as a wrap, making them a fantastic option for picnics, brunch, or quick weekday meals.
| Total Time | Difficulty | Number of Servings | Main Ingredient/Unique Feature |
|---|---|---|---|
| 20 minutes | Easy | 4-6 | Creamy dressing and shredded rotisserie chicken |
This chicken salad sandwich recipe is simple and quick, taking only about 20 minutes to prepare. The dish can be considered easy as it mostly involves mixing ingredients and assembling the sandwich. For a fresh and flavorful twist, feel free to use various types of bread, wraps, or even lettuce leaves for a low-carb option.
| Ingredients | Quantity |
|---|---|
| Rotisserie chicken | 2 cups, shredded |
| Mayonnaise | 1/2 cup |
| Greek yogurt or sour cream | 1/4 cup (optional) |
| Celery (finely chopped) | 1/2 cup |
| Red onion (finely chopped) | 1/4 cup |
| Grapes (halved, optional) | 1/2 cup |
| Dijon mustard | 1 tablespoon |
| Salt and pepper | To taste |
| Bread or wraps | 4-6 slices or wraps |
| Lettuce leaves (optional) | For serving (if desired) |
You can personalize your chicken salad sandwiches by experimenting with different ingredients. For instance, you could add avocado, chopped nuts for crunch, or substitute some mayo with lemon juice for a tangy kick. For a sweeter version, consider mixing in diced apples or craisins instead of grapes.
| Kitchen Tool | Used For | How to Use |
|---|---|---|
| Mixing bowl | To combine ingredients | Use to mix chicken, dressing, and vegetables. |
| Fork | To shred chicken | Use to shred the rotisserie chicken into pieces. |
| Knife | To chop vegetables | Use a sharp knife for cutting celery, onion, etc. |
| Spoon | To mix the salad | Use to thoroughly combine all salad ingredients. |
| Measuring cups and spoons | To measure ingredients | Use to accurately add each ingredient. |
| Spreader or knife | To spread on bread | Use to apply chicken salad onto bread or wraps. |
Cooking Steps Instructions:
- In a mixing bowl, combine the shredded rotisserie chicken, mayonnaise, Greek yogurt (if using), Dijon mustard, celery, red onion, and grapes (if using).
- Season the mixture with salt and pepper according to your personal taste.
- Stir all ingredients until they are evenly mixed, ensuring that the chicken is well coated with the dressing.
- If necessary, adjust seasonings or add more mayo if you prefer a creamier texture.
- Toast your bread or wraps lightly if desired before assembly.
- Spread a generous portion of the chicken salad mixture onto a slice of bread or wrap. Top with lettuce leaves if using bread.
- Place another slice of bread on top or roll the wrap tightly, and cut the sandwich in half if desired.
- Repeat the assembly process for the remaining sandwiches.
For serving, present your chicken salad sandwiches on a platter. You can garnish the plate with some fresh greens, like arugula or spinach, for a pop of color and freshness. Pair the sandwiches with a side of chips or a light salad for a complete meal.
These chicken salad sandwiches pair beautifully with a refreshing side salad or a bowl of soup, such as tomato or vegetable soup. For drinks, consider serving iced tea, lemonade, or even a crisp white wine to complement the flavors of the dish.
Chicken Tacos
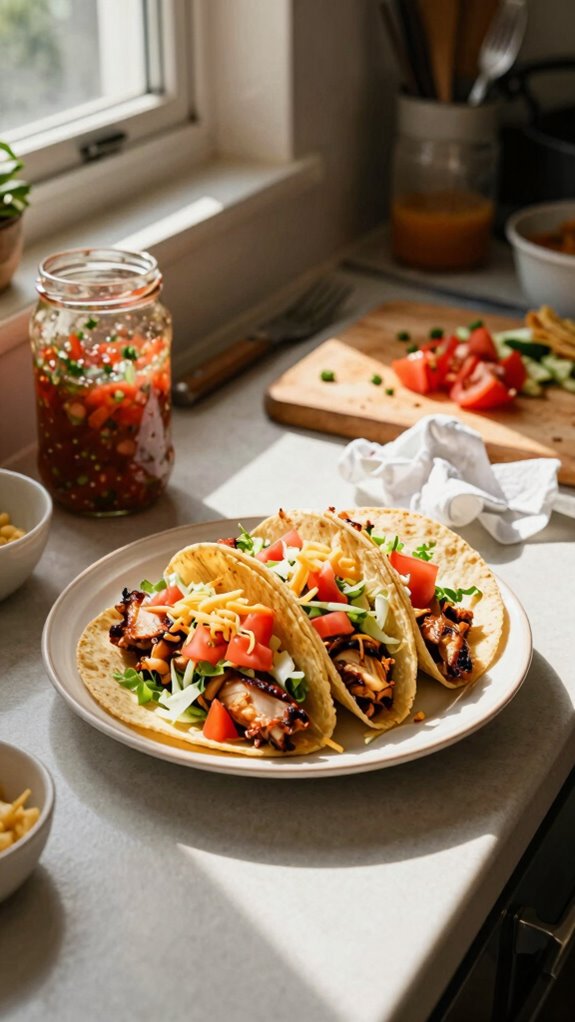
Chicken tacos make for a delicious and customizable meal that is perfect for any occasion. These quick and satisfying tacos feature tender shredded rotisserie chicken and an array of fresh toppings, all wrapped in soft or crunchy tortillas. They are ideal for a casual dinner, a game-day feast, or a festive gathering.
| Total Time | Difficulty | Number of Servings | Main Ingredient/Unique Feature |
|---|---|---|---|
| 30 minutes | Easy | 4-6 | Quick preparation with shredded rotisserie chicken |
This chicken taco recipe is both easy to make and provides a delightful flavor experience. The total preparation time is about 15 minutes, with an additional 15 minutes for cooking and assembling, making it a perfect option for busy weeknights. To save even more time, feel free to use store-bought taco seasoning and pre-washed veggies.
| Ingredients | Quantity |
|---|---|
| Rotisserie chicken | 2 cups, shredded |
| Taco seasoning | 2 tablespoons |
| Olive oil | 1 tablespoon |
| Tortillas (soft or crunchy) | 8 |
| Shredded lettuce | 1 cup |
| Diced tomatoes | 1 cup |
| Shredded cheese | 1 cup |
| Avocado (sliced, optional) | 1 |
| Salsa | 1/2 cup |
| Sour cream (optional) | 1/2 cup |
| Fresh cilantro (chopped, optional) | For garnish |
You can personalize your chicken tacos by experimenting with various toppings and ingredients. Consider adding black beans, corn, jalapeños, or different types of cheese. For a healthier version, try using lettuce wraps instead of tortillas or topping your tacos with a dollop of Greek yogurt instead of sour cream.
| Kitchen Tool | Used For | How to Use |
|---|---|---|
| Skillet | To heat the chicken | Use to sauté the chicken with spices. |
| Mixing spoon | To mix ingredients | Use to stir the chicken and seasoning together. |
| Ladle | To serve salsa and toppings | Use to portion out salsa and other toppings. |
| Knife | To chop vegetables | Use to finely chop toppings such as cilantro. |
| Cutting board | To prepare toppings | Use as a surface to cut vegetables and avocado. |
| Serving platter | To present the tacos | Use to serve the assembled tacos for sharing. |
Cooking Instructions:
- Shred the rotisserie chicken into bite-sized pieces if not already shredded.
- In a skillet, heat the olive oil over medium heat.
- Add the shredded chicken and taco seasoning to the skillet, mixing well until the chicken is evenly coated.
- Cook for about 5-7 minutes until the chicken is heated through.
- While the chicken is cooking, prepare your toppings by chopping the lettuce, tomatoes, and cilantro.
- Warm the tortillas in a separate skillet or microwave for a few seconds until pliable.
- Assemble the tacos by placing a portion of the seasoned chicken in the center of each tortilla.
- Top with shredded lettuce, diced tomatoes, cheese, avocado slices, and any additional toppings you desire.
- Drizzle with salsa and add a dollop of sour cream if using.
- Serve immediately while hot.
To serve chicken tacos beautifully, arrange them on a large serving platter with the various toppings placed in small bowls nearby for easy access. Garnish with additional cilantro for a fresh, vibrant look.
You can pair chicken tacos with side dishes like Mexican rice, black beans, or street corn for a complete meal. As for drinks, consider serving them with a refreshing classic like margaritas, or for a non-alcoholic option, a zesty limeade or iced tea would complement the flavors perfectly.
Creamy Chicken and Rice Casserole
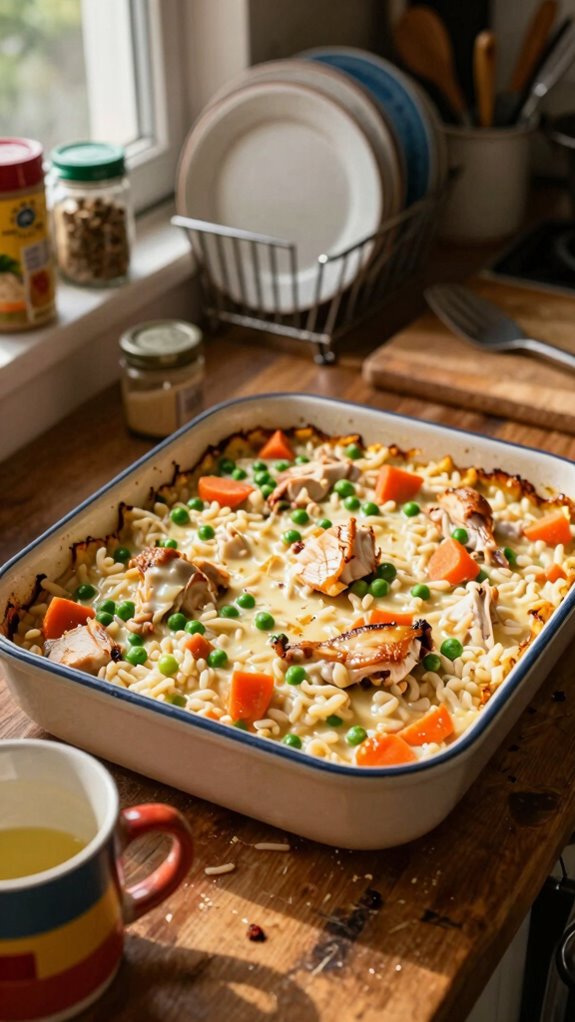
Creamy chicken and rice casserole is a classic comfort dish that is both hearty and satisfying. The combination of tender rotisserie chicken, fluffy rice, and a creamy sauce creates a warm and inviting meal that’s perfect for family dinners or potlucks. This dish is easy to prepare and can be customized with your favorite vegetables or seasonings.
| Total Time | Difficulty | Number of Servings | Main Ingredient/Unique Feature |
|---|---|---|---|
| 1 hour | Easy | 6-8 | Creamy texture with rotisserie chicken |
This recipe is quite accessible for cooks of all skill levels, taking approximately 15 minutes to prepare and 45 minutes to bake. It’s a streamlined process that allows you to quickly combine the ingredients before allowing the oven to do the work. For added convenience, you can use pre-cooked rice or opt for frozen mixed vegetables to save time.
| Ingredients | Quantity |
|---|---|
| Rotisserie chicken | 2 cups, shredded |
| White or brown rice | 1 cup (uncooked) |
| Cream of chicken soup | 1 can (10.5 oz) |
| Chicken broth | 2 cups |
| Frozen mixed vegetables | 1 cup |
| Shredded cheese | 1 cup |
| Olive oil | 1 tablespoon |
| Garlic powder | 1 teaspoon |
| Onion powder | 1 teaspoon |
| Salt | To taste |
| Pepper | To taste |
| Fresh parsley (optional) | For garnish |
You can get creative with your creamy chicken and rice casserole by adding different vegetables such as broccoli, peas, or bell peppers. Alternatively, you could incorporate various seasonings like Italian herbs, paprika, or even a touch of lemon zest for added flavor. For a richer dish, consider adding cream cheese or sour cream to the sauce.
| Kitchen Tool | Used For | How to Use |
|---|---|---|
| Large mixing bowl | To combine all ingredients | Use to toss the chicken, rice, and sauce together. |
| Baking dish | To bake the casserole | Use to hold the ingredients while baking. |
| Measuring cups | To measure rice and liquids | Use to ensure you have the right ratios. |
| Knife | To shred the rotisserie chicken | Use to cut the chicken into smaller pieces. |
| Spoon | To mix ingredients and serve | Use to blend ingredients and portion out servings. |
| Aluminum foil | To cover the dish while baking | Use to prevent the casserole from browning too much on top. |
Cooking Steps:
- Preheat your oven to 350°F (175°C).
- In a large mixing bowl, combine the shredded rotisserie chicken, uncooked rice, cream of chicken soup, chicken broth, and frozen mixed vegetables.
- Add the garlic powder, onion powder, salt, and pepper to the mixture. Mix until all ingredients are well incorporated.
- Pour the chicken and rice mixture into a greased baking dish and spread it evenly.
- Cover the dish tightly with aluminum foil and bake in the preheated oven for 30 minutes.
- After 30 minutes, remove the foil and sprinkle the shredded cheese on top.
- Return the dish to the oven and bake for an additional 15 minutes, or until the cheese is melted and bubbly.
- Once done, remove from the oven and let it cool for a few minutes before serving.
To present the creamy chicken and rice casserole beautifully, serve it directly from the baking dish to maintain its homely charm. Garnish each serving with freshly chopped parsley to add a pop of color and freshness.
For a well-rounded meal, pair this creamy chicken and rice casserole with a simple side salad dressed in a light vinaigrette. A crisp white wine or a refreshing iced tea would complement the dish perfectly, providing balance to the creamy flavors.
Chicken Soup
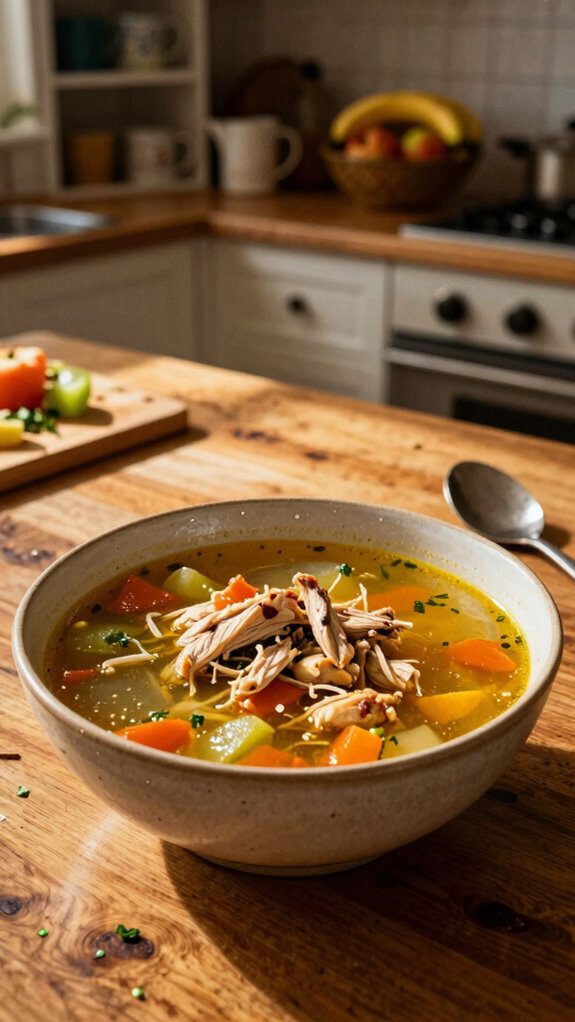
Chicken soup is the ultimate comfort food, perfect for chilly days or when you’re feeling under the weather. This hearty dish combines tender rotisserie chicken, fresh vegetables, and aromatic herbs in a savory broth, resulting in a nourishing and flavorful meal. Not only is it satisfying, but it’s also incredibly easy to make, especially when using pre-cooked chicken.
| Total Time | Difficulty | Number of Servings | Main Ingredient/Unique Feature |
|---|---|---|---|
| 1 hour | Easy | 4-6 | Hearty broth with rotisserie chicken |
This chicken soup recipe is simple and straightforward, taking about 15 minutes to prepare with a cooking time of approximately 45 minutes. It’s a great option for home cooks of all skill levels, plus you can easily adjust the ingredients to suit your taste. For an extra boost of flavor, don’t hesitate to use homemade broth instead of store-bought.
| Ingredients | Quantity |
|---|---|
| Rotisserie chicken | 2 cups, shredded |
| Carrots | 2 medium, diced |
| Celery | 2 stalks, diced |
| Onion | 1 medium, chopped |
| Chicken broth | 6 cups |
| Garlic | 2 cloves, minced |
| Dried thyme | 1 teaspoon |
| Dried parsley | 1 teaspoon |
| Salt | To taste |
| Pepper | To taste |
| Bay leaf | 1 leaf |
You can experiment with your chicken soup by adding different vegetables such as potatoes, green beans, or corn, or substituting the herbs with fresh ones like dill or rosemary for a unique flavor. You might also consider adding noodles or rice for a heartier version while adjusting the broth accordingly.
| Kitchen Tool | Used For | How to Use |
|---|---|---|
| Large pot | To cook the soup | Use to combine all ingredients and simmer. |
| Stirring spoon | To mix the soup | Use to stir ingredients as they cook. |
| Cutting board | For chopping vegetables | Use to prepare veggies before cooking. |
| Knife | To cut meat and vegetables | Use to dice and slice ingredients. |
| Measuring cup | To measure liquids | Use for accurate amounts of broth. |
| Ladle | To serve the soup | Use to scoop soup into bowls. |
Cooking Steps
- Begin by shredding the rotisserie chicken and set it aside.
- In a large pot, heat a splash of olive oil over medium heat.
- Add the chopped onion, carrots, and celery, and sauté for about 5-7 minutes, until the vegetables start to soften.
- Stir in the minced garlic and cook for an additional minute, allowing the aroma to fill the pot.
- Pour in the chicken broth and add the shredded chicken, dried thyme, dried parsley, salt, pepper, and bay leaf.
- Bring the soup to a boil, then reduce to a simmer and let it cook uncovered for about 30-40 minutes.
7.Taste the soup midway through and adjust seasonings as needed. If desired, add noodles or rice during the last 10 minutes of cooking.
8. Once ready, remove the bay leaf and ladle the soup into serving bowls.
Serving and Presentation
To serve chicken soup, ladle it into warm bowls and garnish with fresh parsley or a sprig of thyme for a touch of color and added freshness. Consider providing crusty bread or dinner rolls on the side for dipping, adding to the warmth of the meal.
Pairing Suggestions
Chicken soup pairs wonderfully with a fresh green salad or a simple sandwich for a balanced meal. Beverage-wise, consider serving it with a light white wine like Sauvignon Blanc or a refreshing iced tea for a perfect accompaniment. For a cozy option, a steaming cup of herbal tea can enhance the comfort food experience.
Chicken Quesadillas

Chicken quesadillas are a delightful and versatile dish, perfect for a quick lunch, hearty snack, or a simple dinner. Using rotisserie chicken makes this meal both convenient and flavorful, as it allows you to whip up these cheesy goodness in no time without sacrificing taste. Plus, they can be customized with a variety of ingredients to suit your preferences.
| Total Time | Difficulty | Number of Servings | Main Ingredient/Unique Feature |
|---|---|---|---|
| 30 minutes | Easy | 4-6 | Cheesy, crispy tortillas filled with rotisserie chicken |
This chicken quesadilla recipe is uncomplicated and quick, taking about 10 minutes to prepare with a cooking time of approximately 20 minutes. It is ideal for cooks of all skill levels, and you can add your favorite toppings or sides for a personalized touch.
| Ingredients | Quantity |
|---|---|
| Rotisserie chicken | 2 cups, shredded |
| Flour tortillas | 4 large |
| Cheddar cheese | 1 cup, shredded |
| Monterey Jack cheese | 1 cup, shredded |
| Bell peppers | 1 medium, sliced |
| Onion | 1 medium, sliced |
| Olive oil | 2 tablespoons |
| Taco seasoning | 1 tablespoon |
| Salsa | For serving |
| Sour cream | For serving |
| Green onions | For garnish |
Variations to the classic chicken quesadilla are endless! Feel free to add ingredients such as black beans, corn, jalapeños, or spinach for additional flavor and nutrition. You can also swap in different types of cheese, such as pepper jack for a spicy kick, or use whole wheat or corn tortillas for a different texture.
| Kitchen Tool | Used For | How to Use |
|---|---|---|
| Large skillet | Cooking the quesadillas | Heat the skillet to medium heat for cooking. |
| Spatula | Flipping quesadillas | Use to carefully flip the quesadilla once golden brown. |
| Cutting board | Chopping vegetables | Use to prepare the onions and bell peppers. |
| Knife | Cutting meat and vegetables | Use for slicing bell peppers and onions. |
| Grater | Shredding cheese | Use to shred the cheddar and Monterey Jack cheese. |
| Measuring spoon | Measuring seasonings | Use to measure out taco seasoning accurately. |
- Heat 1 tablespoon of olive oil in a large skillet over medium heat.
- Add the sliced onion and bell peppers, sautéing until they are soft and slightly caramelized, about 5 minutes.
- In a bowl, combine the shredded rotisserie chicken, taco seasoning, sautéed vegetables, and half of the shredded cheese.
- Place a flour tortilla in the skillet and spread a portion of the chicken mixture on half of the tortilla, then top with additional cheese.
- Fold the tortilla in half and cook until the bottom is golden brown, about 3-4 minutes.
- Carefully flip the quesadilla and cook the other side until golden and the cheese is melted, about 2-3 minutes more.
- Remove from the skillet and repeat the process with the remaining tortillas and filling.
- Cut each quesadilla into wedges and serve warm with salsa, sour cream, and a sprinkle of green onions.
To serve your chicken quesadillas in the best way, arrange the wedges on a large platter for sharing. Add small bowls of salsa and sour cream on the side, garnishing the platter with fresh cilantro or sliced jalapeños for an appealing presentation.
Chicken quesadillas pair wonderfully with a simple side salad or guacamole for some fresh crunch. For drinks, consider serving ice-cold beer, sparkling water, or a refreshing margarita to enhance the meal’s Spanish flavors.