As I explored the realm of healthy cooking, I found myself drawn to simple, nutritious dinner ideas for two. These recipes cater to various tastes, showcasing flavorful ingredients without demanding too much time. Whether you’re in the mood for something light or a bit heartier, there’s a dish here that will satisfy both your palate and your health goals. Let’s uncover these delightful options together and see what catches your fancy.
Grilled Lemon Herb Chicken With Quinoa Salad
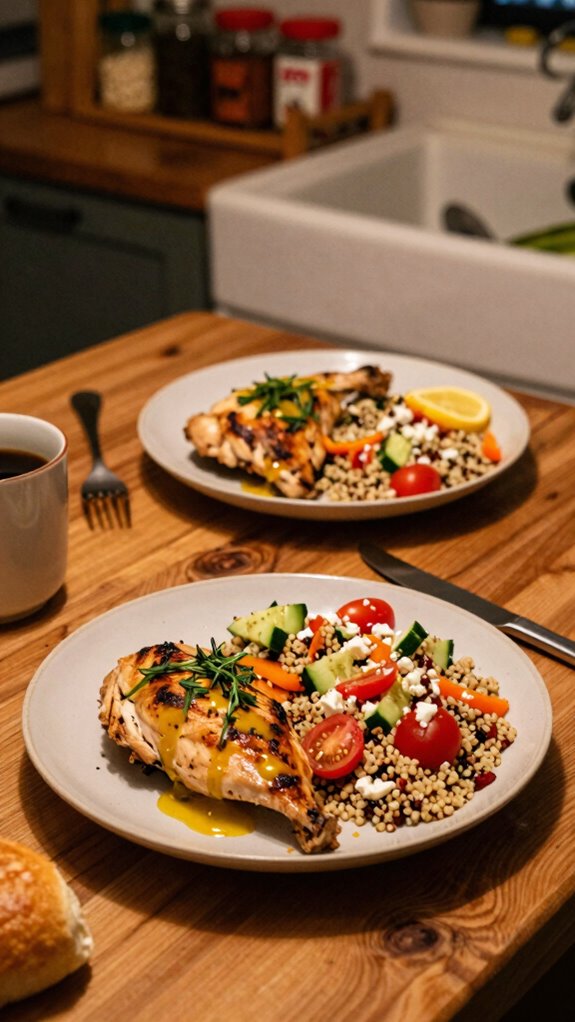
Grilled Lemon Herb Chicken with Quinoa Salad is a delicious and healthy dish that perfectly marries lean protein with a nutritious grain. This vibrant meal is not only satisfying but also packed with flavor from fresh herbs and zesty lemon, making it a delightful choice for a cozy dinner for two.
| Total Time | Difficulty | Number of Servings | Main Ingredient/Unique Feature |
|---|---|---|---|
| 40 minutes | Easy | 2 | Grilled Lemon Herb Chicken |
This dish is quite easy to prepare, requiring a total time of 40 minutes with 10 minutes for preparation and 30 minutes for cooking. Ideal for novice cooks, the step-by-step instructions will guide you through the process effortlessly. To enhance the flavor, marinate the chicken beforehand, and be sure to allow the quinoa to rest for a fluffier texture.
| Ingredients | Quantity |
|---|---|
| Chicken breasts | 2 (about 6 oz each) |
| Olive oil | 2 tablespoons |
| Fresh lemon juice | 2 tablespoons |
| Garlic, minced | 2 cloves |
| Fresh thyme | 1 tablespoon |
| Fresh rosemary | 1 tablespoon |
| Quinoa | 1 cup |
| Vegetable broth (or water) | 2 cups |
| Cherry tomatoes, halved | 1 cup |
| Cucumber, diced | 1 small |
| Red onion, diced | 1/4 small |
| Feta cheese (optional) | 1/4 cup |
| Salt and pepper | To taste |
| Fresh parsley, chopped | For garnish |
Variations of this dish are abundant. For a more Mediterranean flair, consider adding olives to the quinoa salad or substituting the chicken for shrimp. You can also experiment with different herbs, such as oregano or basil. If you’re looking for a vegan option, try replacing chicken with marinated tofu and using vegetable broth for cooking the quinoa.
| Kitchen Tool | Used For | How to Use |
|---|---|---|
| Grill or Grill Pan | Cooking the chicken | Preheat and cook chicken until done |
| Measuring Cups and Spoons | Measuring ingredients | Use for accurate measurement |
| Saucepan | Cooking quinoa | Combine quinoa and broth, bring to boil |
| Mixing Bowl | Marinating chicken and combining salad ingredients | Mix marinade and toss salad together |
| Knife and Cutting Board | Chopping herbs and vegetables | Use to dice and slice ingredients |
| Serving Plates | Presenting the dish | Plate the chicken and quinoa salad beautifully |
Cooking Steps
- Begin by marinating the chicken. In a mixing bowl, combine olive oil, lemon juice, minced garlic, thyme, rosemary, salt, and pepper.
- Add the chicken breasts to the bowl and coat them well. Let them marinate for at least 20 minutes.
- While the chicken marinates, rinse quinoa under cold water. In a saucepan, combine quinoa and vegetable broth. Bring to a boil, then reduce heat, cover, and simmer for 15 minutes until liquid is absorbed.
- Fluff the quinoa with a fork and allow it to cool slightly. In another bowl, mix cherry tomatoes, cucumber, red onion, and feta cheese (if using).
- Combine the cooled quinoa with the vegetable mixture. Season with salt, pepper, and a drizzle of olive oil if desired.
- Preheat the grill or grill pan over medium heat. Remove chicken from marinade and grill for about 6-7 minutes per side until fully cooked and internal temperature reaches 165°F (75°C).
- Let the grilled chicken rest for a few minutes before slicing.
- Serve the sliced chicken on a plate alongside the quinoa salad. Garnish with chopped parsley for added freshness.
To serve, plate the grilled lemon herb chicken elegantly alongside a generous serving of quinoa salad. Make sure to drizzle a little extra lemon juice over the chicken for an additional pop of flavor. Garnish with fresh parsley to elevate the visual appeal.
This grilled lemon herb chicken pairs beautifully with steamed asparagus or roasted seasonal vegetables for a complete meal. For a drink pairing, consider a chilled glass of Sauvignon Blanc or a refreshing sparkling water infused with lemon for a delightful twist.
Zucchini Noodles With Pesto and Cherry Tomatoes
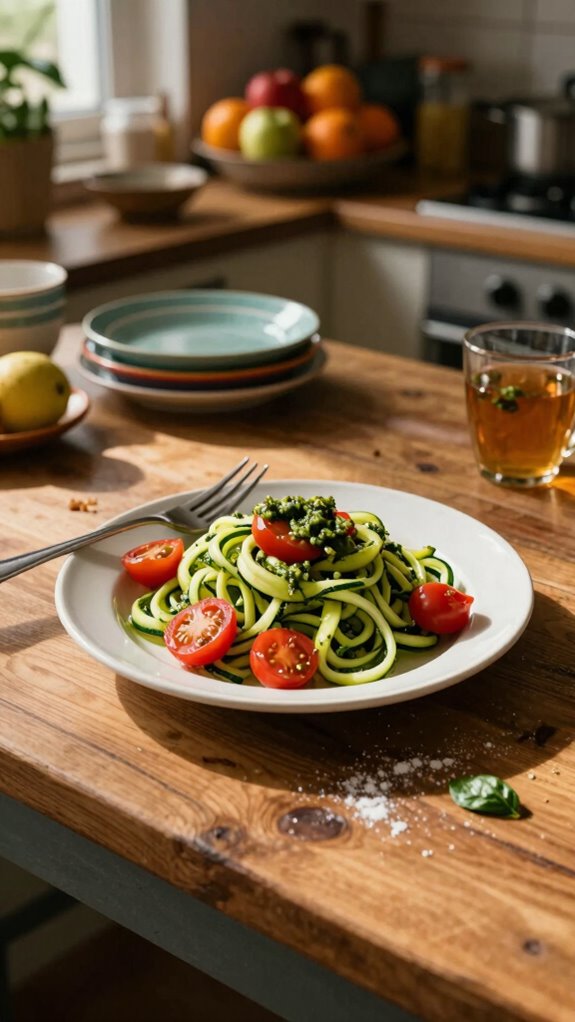
Zucchini Noodles with Pesto and Cherry Tomatoes is a fresh and delicious dish that is perfect for a light dinner for two. This dish, often referred to as “zoodles”, offers a healthy alternative to traditional pasta, pairing perfectly with vibrant basil pesto and juicy cherry tomatoes for a satisfying meal.
| Total Time | Difficulty | Number of Servings | Main Ingredient/Unique Feature |
|---|---|---|---|
| 25 minutes | Easy | 2 | Zucchini Noodles |
This recipe is simple to follow, with a total preparation time of 10 minutes and cooking time of 15 minutes. The zucchini noodles are easy to make using a spiralizer or a vegetable peeler, making this dish approachable for beginners. To enhance flavors, be sure to sauté the tomatoes just until they burst, and toss them with the pesto and zoodles while everything is warm.
| Ingredients | Quantity |
|---|---|
| Zucchini | 2 medium |
| Cherry tomatoes | 1 cup |
| Fresh basil pesto | 1/2 cup |
| Olive oil | 1 tablespoon |
| Garlic, minced | 2 cloves |
| Salt and pepper | To taste |
| Grated Parmesan cheese | 1/4 cup (optional) |
| Pine nuts (optional) | 2 tablespoons |
There are several variations to this dish that you can easily explore. For a protein boost, consider adding grilled chicken or shrimp. You can also swap the pesto for a creamy Alfredo sauce if you prefer a richer flavor. If you’re looking for a vegan option, simply use nutritional yeast in place of Parmesan and check your pesto ingredients to ensure it’s dairy-free.
| Kitchen Tool | Used For | How to Use |
|---|---|---|
| Spiralizer | Making zucchini noodles | Spiralize zucchini into noodles |
| Large Skillet | Cooking the tomatoes and mixing | Heat oil, sauté garlic, and tomatoes |
| Knife and Cutting Board | Chopping ingredients | Slice zucchini and tomatoes as needed |
| Measuring Cups | Measuring pesto & cheese | Use for accurate measurement |
| Wooden Spoon | Stirring ingredients | Mix everything together in skillet |
| Tongs | Tossing zoodles and pesto | Use to combine ingredients evenly |
Cooking Steps:
- Begin by spiralizing the zucchini into noodles using a spiralizer. If you don’t have one, use a vegetable peeler to create wide strips and then slice them into thin noodles.
- In a large skillet, heat the olive oil over medium heat. Add minced garlic and sauté for about 30 seconds, until fragrant.
- Add the cherry tomatoes to the skillet and season with salt and pepper. Cook for about 5–7 minutes, stirring occasionally, until the tomatoes begin to burst but are still juicy.
- In the same skillet, add the zucchini noodles and toss well with the tomatoes, cooking for an additional 2–3 minutes until the zoodles are just tender but still al dente.
- Remove the skillet from heat and stir in the fresh basil pesto until the zoodles are coated evenly.
- Serve immediately, topped with grated Parmesan cheese and pine nuts, if desired.
To present Zucchini Noodles with Pesto and Cherry Tomatoes beautifully, place a generous serving in a shallow bowl or plate. Garnish with fresh basil leaves, a sprinkle of grated Parmesan, and a drizzle of olive oil. You can also add a side of toasted bread to further enhance the presentation and dining experience.
This dish pairs excellently with a simple side salad dressed with a lemon vinaigrette to cleanse the palate. For beverages, a chilled Sauvignon Blanc or a light sparkling water with lemon complements the flavors beautifully. Enjoy this vibrant meal for a cozy, romantic dinner for two!
Spicy Shrimp Tacos With Avocado Crema
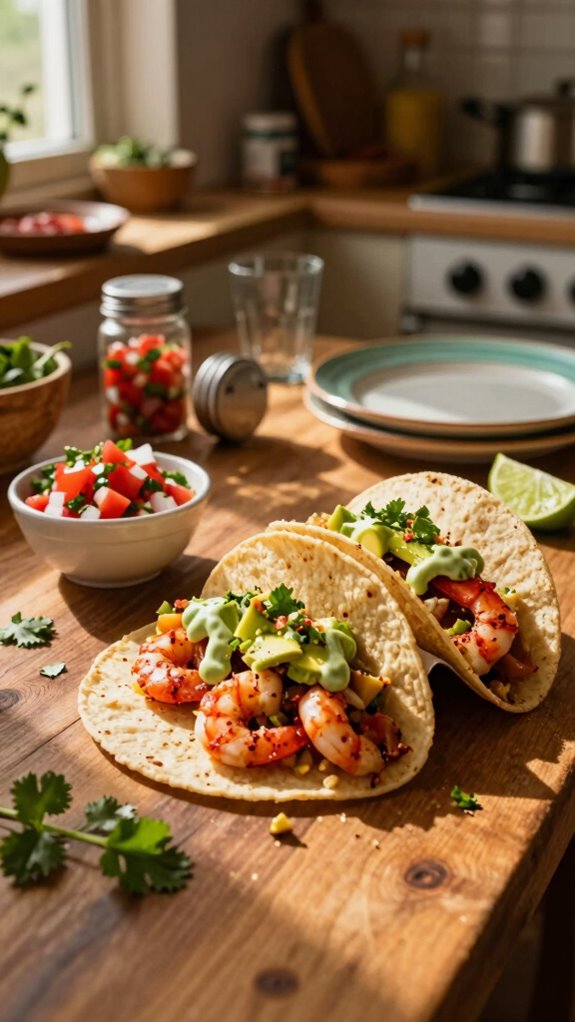
Spicy Shrimp Tacos with Avocado Crema is a zesty and flavorful dish that combines succulent shrimp seasoned with spices and topped with a creamy avocado sauce. This dynamic taco recipe is not only delicious but also offers a delightful twist on traditional flavors, perfect for a warm evening dinner.
| Total Time | Difficulty | Number of Servings | Main Ingredient/Unique Feature |
|---|---|---|---|
| 30 minutes | Easy | 2 | Spicy Shrimp |
This recipe is easy to prepare, taking about 10 minutes for preparation, and 20 minutes for cooking. Ensure to marinate the shrimp for a few minutes to deepen the flavor. Cooking the shrimp until they are just pink will prevent them from becoming tough. Pair the tacos with a refreshing avocado crema to balance the spices.
| Ingredients | Quantity |
|---|---|
| Shrimp (peeled and deveined) | 1 pound |
| Olive oil | 2 tablespoons |
| Chili powder | 1 teaspoon |
| Paprika | 1 teaspoon |
| Cumin | 1 teaspoon |
| Garlic powder | 1 teaspoon |
| Salt | To taste |
| Corn tortillas | 4 |
| Avocado | 1 medium |
| Greek yogurt or sour cream | 1/4 cup |
| Lime | 1 (juiced) |
| Fresh cilantro (optional) | For garnish |
To switch things up, consider adding toppings such as diced pineapple or mango for a fruity contrast. For a vegetarian twist, swap the shrimp with grilled vegetables or black beans. Additionally, you can experiment with different spices or marinades for the shrimp to match your preferred flavor profile.
| Kitchen Tool | Used For | How to Use |
|---|---|---|
| Mixing Bowl | Marinating shrimp | Combine shrimp with spices and oil |
| Skillet | Cooking shrimp | Heat oil and sauté shrimp until cooked |
| Knife and Cutting Board | Chopping avocado and garnishing | Slice avocado, cilantro, and lime |
| Measuring Spoons | Measuring spices and lime juice | Use for accurate measurement |
| Grill or Grill Pan | Optional cooking method for shrimp | Grill shrimp for extra flavor |
| Tongs | Flipping tortillas and shrimp | Use to handle and serve hot items |
Cooking Steps:
- In a mixing bowl, combine the shrimp with olive oil, chili powder, paprika, cumin, garlic powder, and salt. Allow shrimp to marinate for about 10 minutes.
- Heat a skillet over medium-high heat and add the marinated shrimp. Cook for about 3-4 minutes on each side or until they are pink and opaque.
- While the shrimp is cooking, prepare the avocado crema by mashing the avocado in a bowl and mixing it with Greek yogurt or sour cream. Add lime juice and mix until smooth. Season with salt to taste.
- Warm the corn tortillas in the same skillet for about 30 seconds on each side until slightly crispy.
- Assemble the tacos by placing a few shrimp in each tortilla and topping with avocado crema and fresh cilantro if desired.
- Serve immediately with lime wedges on the side for an extra citrus kick.
To best present your Spicy Shrimp Tacos, arrange the assembled tacos on a vibrant plate and garnish with additional cilantro and lime wedges. Serve the avocado crema in a small dish as a dipping sauce on the side.
Pair these tacos with a light and refreshing side like a citrus salad or corn salad. For drinks, consider serving a cold beer or a refreshing margarita to complement the spicy flavors of the dish.
Stuffed Bell Peppers With Ground Turkey and Brown Rice
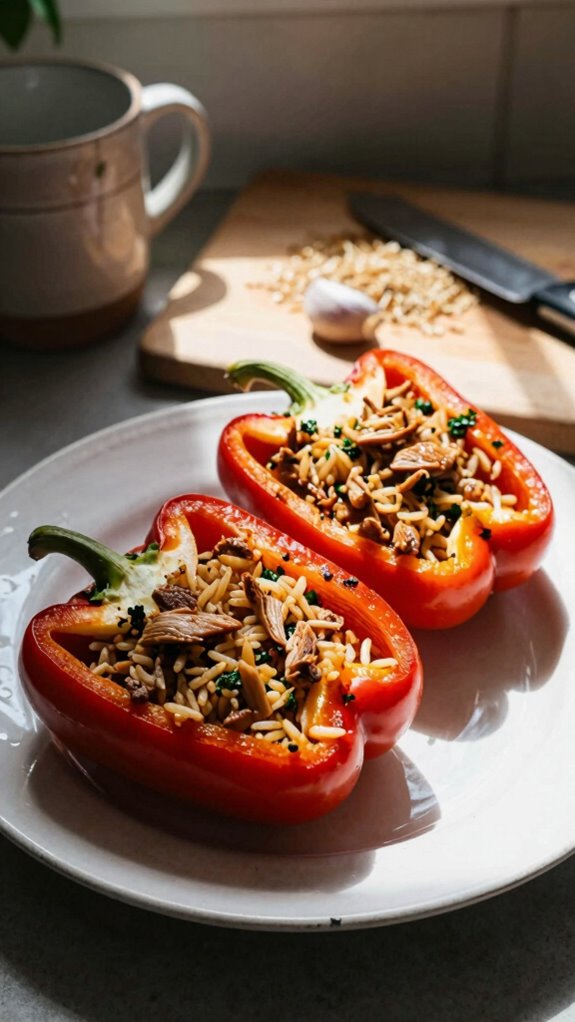
Stuffed Bell Peppers with Ground Turkey and Brown Rice is a nutritious and satisfying dish that combines lean protein with wholesome grains and colorful vegetables. These vibrant bell peppers are filled with a delicious mixture, making them not only visually appealing but also a complete meal packed with flavor and nutrients, perfect for a cozy dinner for two.
| Total Time | Difficulty | Number of Servings | Main Ingredient/Unique Feature |
|---|---|---|---|
| 45 minutes | Easy | 2 | Ground Turkey |
This recipe requires about 15 minutes of preparation and 30 minutes of cooking time. The difficulty level is easy, making it manageable even for beginner cooks. To enhance flavor, you can let the stuffed peppers sit for a few minutes after baking. This helps the flavors meld together beautifully.
| Ingredients | Quantity |
|---|---|
| Bell peppers (any color) | 2 large |
| Ground turkey | 1 pound |
| Brown rice (cooked) | 1 cup |
| Onion (chopped) | 1 small |
| Garlic (minced) | 2 cloves |
| Diced tomatoes (canned) | 1 cup |
| Olive oil | 1 tablespoon |
| Italian seasoning | 1 teaspoon |
| Salt and pepper | To taste |
| Shredded cheese (optional) | 1/2 cup |
| Fresh parsley (for garnish, optional) | A sprinkle |
For variations, you can substitute the ground turkey with ground chicken, beef, or even a plant-based meat alternative for a vegetarian option. Adding black beans, corn, or chopped spinach can enhance the filling even more, making it heartier and more colorful.
| Kitchen Tool | Used For | How to Use |
|---|---|---|
| Skillet | Cooking turkey and vegetables | Brown turkey, add onion and garlic |
| Mixing Bowl | Combining ingredients | Mix ground turkey with rice and seasonings |
| Baking Dish | Baking stuffed peppers | Place stuffed peppers in to bake |
| Knife and Cutting Board | Chopping vegetables | Dice onions, garlic, and peppers |
| Measuring Cups/Spoons | Measuring rice and ingredients | Ensure accurate ingredient quantities |
| Aluminum Foil | Covering peppers while baking | Prevents over-browning |
Cooking Steps:
- Preheat the oven to 375°F (190°C).
- In a skillet, heat olive oil over medium heat. Add chopped onion and garlic, sautéing until softened.
- Add the ground turkey to the skillet, cooking until browned. Season with salt, pepper, and Italian seasoning.
- Stir in the cooked brown rice and diced tomatoes, mixing until combined. Remove from heat.
- Slice the tops off the bell peppers and remove the seeds. Lightly season the insides with salt.
- Stuff each bell pepper with the turkey and rice mixture, packing it in gently.
- Place the stuffed peppers upright in a baking dish, cover with aluminum foil, and bake for 25 minutes.
- Remove the foil, sprinkle shredded cheese on top if desired, and bake for an additional 5-10 minutes, until the cheese is melted and bubbly.
- Once cooked, remove from the oven and let sit for a few minutes before serving.
To present your stuffed bell peppers, place them on a colorful plate and sprinkle with fresh parsley for a pop of color. You can drizzle some extra diced tomatoes or a light sauce around the plate for an inviting touch.
These stuffed bell peppers pair wonderfully with a simple green salad or roasted vegetables on the side to add freshness and crunch. For drinks, consider serving a chilled white wine such as Sauvignon Blanc or a light sparkling water with lemon to complement the flavors of the meal.
Baked Salmon With Asparagus and Lemon
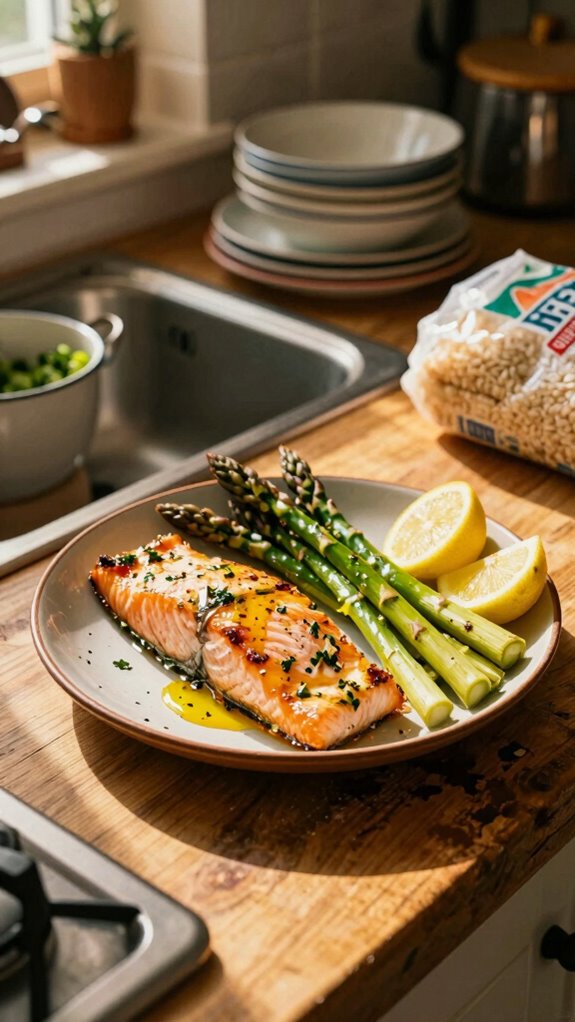
Baked Salmon with Asparagus and Lemon is a light, healthy, and flavorful dish that showcases the freshness of the ingredients. This dish combines succulent salmon fillets with tender asparagus, all brightened by the zing of fresh lemon. It’s a quick and easy meal, making it ideal for a romantic dinner or a nutritious weeknight dinner for two.
| Total Time | Difficulty | Number of Servings | Main Ingredient/Unique Feature |
|---|---|---|---|
| 30 minutes | Easy | 2 | Salmon |
This recipe takes about 10 minutes of preparation time and 20 minutes of cooking time. The difficulty level is easy, ensuring that both novice and experienced cooks can prepare a delicious meal. For the best results, allow the salmon to bake until just cooked through—this keeps it moist and flavorful.
| Ingredients | Quantity |
|---|---|
| Salmon fillets | 2 (6-ounce each) |
| Asparagus spears | 12 |
| Olive oil | 2 tablespoons |
| Lemon (sliced) | 1 medium |
| Garlic (minced) | 2 cloves |
| Salt and pepper | To taste |
| Fresh dill (for garnish, optional) | A sprinkle |
For variations, you can substitute the asparagus with broccoli or green beans, and season the salmon with your favorite herbs like thyme or rosemary. Add a touch of balsamic vinegar for extra flavor, and you could also try using lime instead of lemon for a different citrus twist.
| Kitchen Tool | Used For | How to Use |
|---|---|---|
| Baking Sheet | Baking salmon and asparagus | Line with parchment for easy cleanup |
| Mixing Bowl | Mixing oil and seasoning | Combine olive oil, garlic, salt, and pepper |
| Knife and Cutting Board | Slicing lemon | Cut lemon into thin slices |
| Tongs | Handling asparagus | Turn asparagus for even cooking |
| Measuring Spoons | Measuring oil | Use for accurate measurements |
| Oven | Baking salmon | Preheat and set temperature for baking |
Cooking Instructions:
- Preheat your oven to 400°F (200°C) and line a baking sheet with parchment paper.
- In a mixing bowl, combine the olive oil, minced garlic, salt, and pepper. Mix well.
- Arrange the salmon fillets on one side of the baking sheet and the asparagus spears on the other side.
- Drizzle the olive oil mixture evenly over both the salmon and asparagus.
- Place the lemon slices over the salmon fillets.
- Bake in the preheated oven for about 20 minutes, or until the salmon is opaque and flakes easily with a fork, and the asparagus is tender.
- Optional: Broil for an additional 2-3 minutes for a slightly crispy top on the salmon.
To serve and present this dish beautifully, plate the salmon alongside a generous helping of asparagus. Garnish with a sprinkle of fresh dill or herbs, and add an extra slice of lemon for that touch of brightness.
For a delectable dining experience, pair this baked salmon dish with a light quinoa salad or a fresh mixed green salad topped with a citrus vinaigrette. For drinks, a chilled glass of white wine, such as Sauvignon Blanc or a refreshing sparkling water with lemon, complements the meal perfectly.
Chickpea and Spinach Stew With Feta
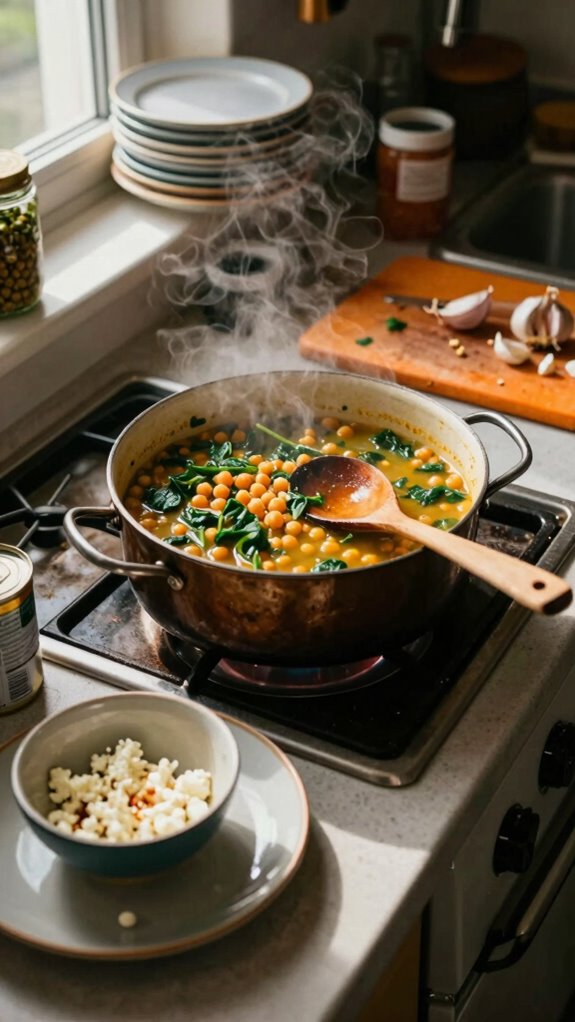
Chickpea and Spinach Stew with Feta is a hearty, nutritious, and comforting dish that is perfect for a quick and healthy dinner for two. This vegetarian stew features protein-packed chickpeas and vibrant spinach simmered in a savory broth, topped with crumbled feta for added creaminess and flavor. It’s an ideal dish for busy weeknights or a cozy dinner at home.
| Total Time | Difficulty | Number of Servings | Main Ingredient/Unique Feature |
|---|---|---|---|
| 35 minutes | Easy | 2 | Chickpeas |
This recipe takes about 10 minutes of preparation time and 25 minutes of cooking time. The difficulty level is easy, making it accessible for both beginner and experienced cooks. For the best results, let the stew simmer long enough to meld the flavors together.
| Ingredients | Quantity |
|---|---|
| Chickpeas (canned, drained) | 1 can (15-ounce) |
| Fresh spinach | 4 cups |
| Onion (chopped) | 1 medium |
| Garlic (minced) | 3 cloves |
| Vegetable broth | 2 cups |
| Olive oil | 2 tablespoons |
| Cumin | 1 teaspoon |
| Paprika | 1 teaspoon |
| Feta cheese (crumbled) | ½ cup |
| Salt and pepper | To taste |
Variations for this dish include adding diced tomatoes for extra acidity, incorporating other vegetables such as bell peppers or zucchini, or using different cheeses like goat cheese instead of feta. You can also spice it up with chili flakes for a bit of heat or add herbs like parsley for freshness.
| Kitchen Tool | Used For | How to Use |
|---|---|---|
| Large Pot | Cooking stew | Place on stovetop and heat ingredients |
| Wooden Spoon | Stirring | Use for mixing vegetables and spices |
| Knife and Cutting Board | Chopping onion and garlic | Cut ingredients to desired sizes |
| Measuring Cups/Spoons | Measuring broth and spices | Use for accurate measurements |
| Can Opener | Opening chickpeas | Open the canned chickpeas |
| Ladle | Serving stew | Scoop and portion out the stew |
Cooking Instructions:
- Heat olive oil in a large pot over medium heat. Add the chopped onion and minced garlic, sautéing until the onion becomes translucent, about 5 minutes.
- Stir in the cumin and paprika, cooking for another minute until fragrant.
- Add the drained chickpeas and vegetable broth to the pot. Bring the mixture to a gentle simmer and let cook for about 15 minutes.
- Gradually add the fresh spinach to the pot, stirring until wilted, which should take about 2-3 minutes.
- Season with salt and pepper to taste. Stir well to combine all the flavors.
- Remove from heat and serve hot, topped with crumbled feta cheese.
To present the dish beautifully, serve the Chickpea and Spinach Stew in shallow bowls. Drizzle a tiny bit of olive oil on top and sprinkle extra feta and fresh herbs for a pop of color. A slice of crusty bread on the side can make it even more inviting.
This stew pairs wonderfully with crusty whole-grain bread or fluffy couscous, making it a satisfying meal. For drinks, consider a glass of white wine or iced herbal tea, as both complement the flavors of the stew without overpowering it.
Cauliflower Fried Rice With Eggs and Vegetables
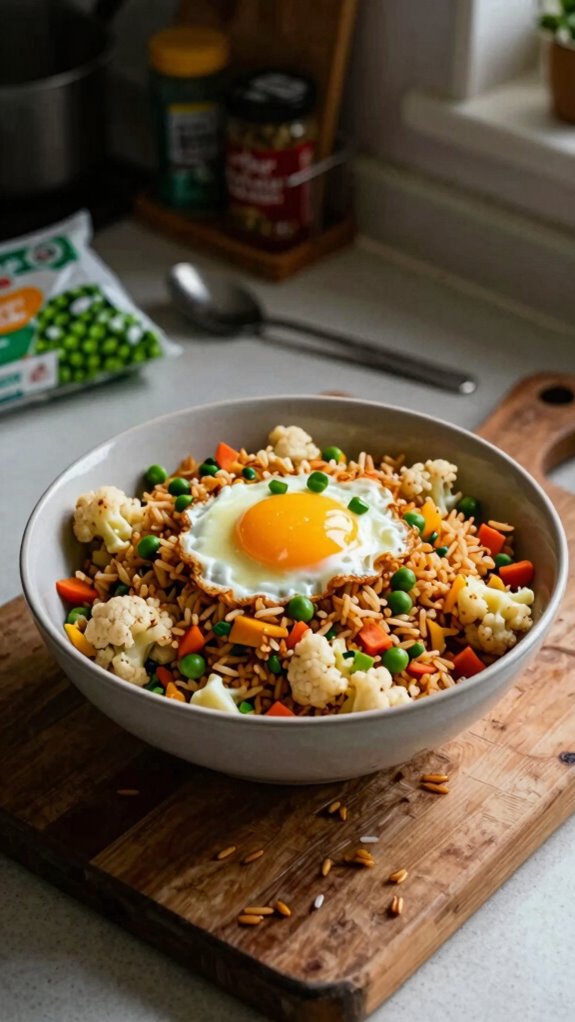
Cauliflower Fried Rice with Eggs and Vegetables is a delicious, low-carb alternative to traditional fried rice. It’s a colorful and satisfying dish packed with nutrients and flavors, making it an excellent option for a healthy dinner for two. The use of cauliflower instead of rice not only reduces calories but also adds a unique texture to this quick and easy meal.
| Total Time | Difficulty | Number of Servings | Main Ingredient/Unique Feature |
|---|---|---|---|
| 25 minutes | Easy | 2 | Cauliflower |
This recipe takes about 10 minutes of preparation time and 15 minutes of cooking time. The difficulty level is easy, allowing anyone, from beginners to proficient cooks, to easily whip up this flavorful dish. To achieve the best results, make sure to finely chop the cauliflower and ensure the eggs are cooked to the desired doneness.
| Ingredients | Quantity |
|---|---|
| Cauliflower | 1 medium head |
| Eggs | 2 |
| Carrot (diced) | 1 medium |
| Peas (fresh or frozen) | ½ cup |
| Green onions (sliced) | 2 tablespoons |
| Soy sauce | 2 tablespoons |
| Sesame oil | 1 teaspoon |
| Olive oil | 1 tablespoon |
| Garlic (minced) | 2 cloves |
| Ginger (minced) | 1 teaspoon |
| Salt and pepper | To taste |
For variations, feel free to add in additional vegetables like bell peppers, corn, or broccoli for extra crunch and flavor. You can also enhance the dish by incorporating proteins such as chicken, shrimp, or tofu. For those who enjoy a bit of spice, consider adding some sriracha or chili paste.
| Kitchen Tool | Used For | How to Use |
|---|---|---|
| Knife and Cutting Board | Chopping vegetables | Cut cauliflower and other veggies |
| Food Processor (optional) | Rice the cauliflower | Pulse cauliflower until it resembles rice |
| Large Skillet or Wok | Cooking stir-fry | Heat oil and cook ingredients |
| Rubber Spatula | Scrambling eggs | Stir and mix ingredients in the skillet |
| Measuring Cups/Spoons | Measuring soy sauce and oil | Use for accurate measurements |
| Serving Bowls | Presenting the fried rice | Portion and serve to each plate |
Cooking Steps
- Begin by ricing the cauliflower. Cut the cauliflower into florets and pulse them in a food processor until they resemble rice or finely chopped grains. If you don’t have a food processor, you can also grate the cauliflower with a box grater.
- Heat olive oil in a large skillet or wok over medium heat. Add the minced garlic and ginger and sauté for about 1-2 minutes, until fragrant.
- Add the diced carrots and peas to the skillet, cooking for another 3-5 minutes until the vegetables are tender.
- Push the vegetables to one side of the skillet. Crack the eggs into the pan and scramble them. Once cooked, mix the eggs with the vegetables.
- Incorporate the riced cauliflower into the mixture and stir well to combine. Pour in the soy sauce and sesame oil, mixing until everything is well coated.
- Cook for an additional 5-7 minutes, allowing the cauliflower to soften and absorb the flavors, stirring occasionally.
- Finally, season with salt and pepper to taste, and toss in the sliced green onions before serving.
To serve and present this dish in the best possible way, scoop the fried cauliflower rice into a lovely bowl or plate and garnish with additional green onions or sesame seeds. For a touch of flair, consider serving it with lime wedges on the side for a fresh citrus burst.
Pair this vibrant dish with a crisp side salad or some steamed vegetables for added nutrition. As for drinks, a light sparkling water with a splash of lemon or a refreshing iced green tea complements the flavors beautifully, making for a balanced and delightful meal.