When it comes to cooking for myself, I often find it challenging to prepare healthy meals that are also easy to manage. I’ve discovered some delightful dinner recipes that are perfect for one person. They not only satisfy my nutritional needs but also keep meal prep enjoyable. Interested in elevating your solo dining experience? Let’s explore these simple yet wholesome options that can transform your evenings.
Quinoa and Black Bean Salad
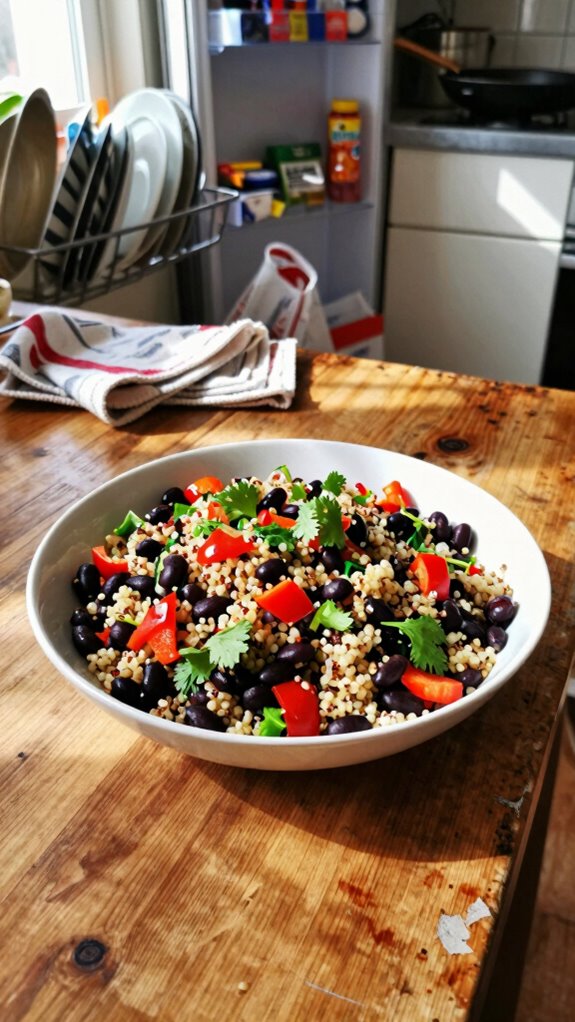
Quinoa and black bean salad is a nutritious, filling dish that is perfect for one. Packed with protein, fiber, and a medley of colorful vegetables, this salad offers a refreshing combination of flavors and textures. It’s easy to prepare and great for a quick dinner or a light lunch, making it a wonderful choice for anyone looking to eat healthfully.
| Total time | Difficulty | Number of servings | Main ingredient/unique feature |
|---|---|---|---|
| 20 minutes | Easy | 1 | Quinoa, a complete protein source |
This quinoa and black bean salad is very easy to prepare, taking just 20 minutes in total. The cooking time for the quinoa is about 15 minutes, while the preparation of vegetables and mixing will only take around 5 minutes. To ensure fluffy quinoa, remember to rinse it before cooking and allow it to cool slightly before adding the rest of the ingredients.
| Ingredient | Quantity |
|---|---|
| Quinoa | 1/2 cup |
| Black beans (canned) | 1/2 cup |
| Bell pepper (chopped) | 1/2 |
| Red onion (chopped) | 1/4 |
| Cherry tomatoes (halved) | 1/2 cup |
| Corn (canned, drained) | 1/4 cup |
| Lime juice | 2 tablespoons |
| Olive oil | 1 tablespoon |
| Cumin | 1/2 teaspoon |
| Salt | To taste |
| Pepper | To taste |
| Fresh cilantro (optional) | To garnish (1 tablespoon) |
To make this dish even more exciting, you can easily vary the ingredients based on your personal preferences or what you have on hand. Swap black beans for chickpeas or kidney beans, add diced avocado for creaminess, or mix in some diced jalapeños for a bit of heat. You can also use different vegetables like spinach, cucumber, or grated carrots to change the texture and flavor profile.
| Kitchen Tool | Use in the Recipe |
|---|---|
| Measuring cups | Measure the quinoa, beans, and vegetables |
| Cutting board | Prepare all the vegetables |
| Sharp knife | Chop vegetables like bell pepper, and onion |
| Cooking pot | Cook the quinoa |
| Mixing bowl | Combine all the ingredients |
| Spoon | Stir the salad and mix the ingredients well |
Cooking Steps:
- Rinse the quinoa under cold water in a fine-mesh strainer to remove any bitterness.
- In a small pot, combine 1/2 cup of quinoa with 1 cup of water. Bring the water to a boil.
- Once boiling, reduce the heat to low, cover the pot, and let it simmer for about 15 minutes or until the quinoa is fluffy and the water is absorbed.
- While the quinoa is cooking, prepare the vegetables: chop the bell pepper, red onion, and halve the cherry tomatoes.
- In a large mixing bowl, combine the black beans (drained and rinsed), corn, diced vegetables, cooked quinoa, lime juice, olive oil, cumin, salt, and pepper.
- Toss all ingredients gently until well mixed. Adjust seasoning as needed.
- If using, chop fresh cilantro and sprinkle it on top before serving.
To serve your quinoa and black bean salad in the best way, transfer it to a clean plate or bowl, and garnish with fresh cilantro. Add a slice of lime on the side for an extra burst of flavor. This vibrant salad not only looks appealing but also promises a wholesome dining experience.
Pair this quinoa and black bean salad with a side of whole-grain crackers or a slice of crusty bread for added texture. As for beverages, a light, crisp white wine or sparkling water with a splash of lime complements this dish perfectly, enhancing the fresh flavors while keeping your meal enjoyable.
Lemon Garlic Shrimp and Asparagus
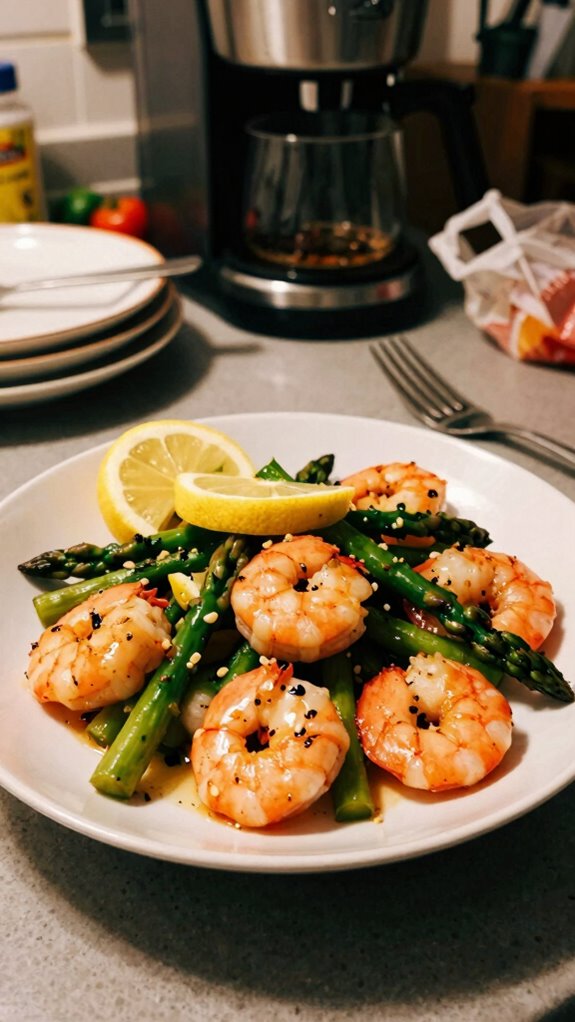
Lemon garlic shrimp and asparagus is a vibrant, flavorful dish that delivers a healthy and satisfying meal for one. The combination of succulent shrimp sautéed with fresh asparagus in a zesty lemon-garlic sauce makes this dish both delicious and easy to prepare. Perfect for a quick weeknight dinner, this dish showcases fresh ingredients and can be made in under 30 minutes.
| Total time | Difficulty | Number of servings | Main ingredient/unique feature |
|---|---|---|---|
| 25 minutes | Easy | 1 | Shrimp with a zesty lemon garlic sauce |
This lemon garlic shrimp and asparagus recipe is straightforward, taking about 10 minutes to prepare and 15 minutes of cooking time. The shrimp cooks quickly, so it’s essential to have all your ingredients ready to go before starting. This dish is not only quick but also ensures that you enjoy a burst of flavors with minimal effort.
| Ingredient | Quantity |
|---|---|
| Shrimp (peeled and deveined) | 1 cup |
| Asparagus (trimmed) | 1 cup |
| Garlic (minced) | 2 cloves |
| Olive oil | 1 tablespoon |
| Lemon juice | 2 tablespoons |
| Lemon zest | 1 teaspoon |
| Salt | To taste |
| Pepper | To taste |
| Fresh parsley (optional) | To garnish |
Feel free to make this dish your own by swapping out ingredients based on your preferences. You can replace shrimp with scallops or chicken for a different protein, while adding vegetables like bell peppers or snap peas can increase the nutritional value. If you’re looking for some spice, consider including red pepper flakes or a dash of hot sauce for an added kick.
| Kitchen Tool | Use in the Recipe |
|---|---|
| Measuring cups | Measure olive oil and lemon juice |
| Cutting board | Prepare garlic and trim asparagus |
| Sharp knife | Mince garlic and trim asparagus |
| Large skillet | Cook shrimp and asparagus |
| Tongs | Flip shrimp while cooking |
| Zester | Zest the lemon |
Cooking Steps:
- Begin by trimming the ends off the asparagus and cutting them into 2-inch pieces.
- Heat olive oil in a large skillet over medium heat.
- Once the oil is hot, add the minced garlic and sauté for about 30 seconds, until fragrant.
- Add the asparagus to the skillet and cook for 2-3 minutes, stirring occasionally until they start to become tender.
- Push the asparagus to the side of the skillet and add the shrimp in a single layer.
- Season the shrimp with salt, pepper, and lemon zest. Cook for about 2 minutes on one side.
- Flip the shrimp, add the lemon juice, and continue to cook until the shrimp are pink and opaque, about 2-3 minutes more.
- Stir the asparagus and shrimp together in the skillet for a final mix.
- Remove from heat and garnish with fresh parsley if desired.
Present the lemon garlic shrimp and asparagus on a clean white plate to highlight the vibrant colors of the dish. You can also add a wedge of lemon on the side for an extra touch. Consider a light drizzle of olive oil or more fresh parsley on top to elevate the presentation.
This dish pairs well with a simple side of rice, quinoa, or a fresh garden salad for a balanced meal. For beverages, a crisp white wine like Sauvignon Blanc or a refreshing iced tea with lemon complements the lemony flavors beautifully. If you prefer non-alcoholic options, sparkling water with a slice of lemon can make for an enjoyable pairing.
Spinach and Feta Stuffed Chicken Breast
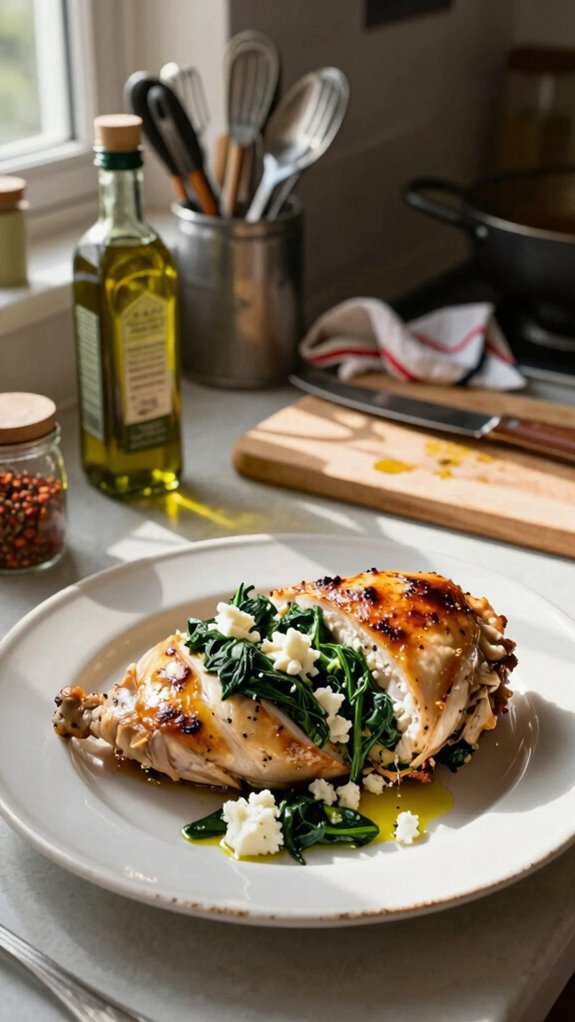
Spinach and feta stuffed chicken breast is a delicious and nutritious meal that makes for a perfect dinner for one. This dish features tender chicken breasts filled with a savory mixture of fresh spinach, creamy feta cheese, and aromatic herbs, resulting in a hearty yet healthy dish that’s easy to prepare. Ideal for anyone looking to impress with minimal effort, it pairs well with a variety of sides.
| Total time | Difficulty | Number of servings | Main ingredient/unique feature |
|---|---|---|---|
| 35 minutes | Easy | 1 | Chicken breast stuffed with spinach and feta |
The recipe can be completed in about 15 minutes of preparation and 20 minutes of cooking time. Although this dish may seem sophisticated, it’s relatively straightforward and accessible for home cooks at any level. To save time, consider preparing the stuffing in advance and just assemble the dish when ready to cook.
| Ingredient | Quantity |
|---|---|
| Chicken breast (boneless, skinless) | 1 large |
| Fresh spinach (chopped) | 1 cup |
| Feta cheese (crumbled) | 1/4 cup |
| Garlic (minced) | 1 clove |
| Olive oil | 1 tablespoon |
| Dried oregano | 1/2 teaspoon |
| Salt | To taste |
| Pepper | To taste |
For personal twists, you can experiment with different cheeses like ricotta or goat cheese instead of feta. Adding sun-dried tomatoes or artichoke hearts can enhance the stuffing’s flavor. If you’re looking for extra zest, consider incorporating some chopped olives or adding fresh herbs like basil or dill.
| Kitchen Tool | Use in the Recipe |
|---|---|
| Measuring cups | Measure feta cheese and olive oil |
| Sharp knife | Cut a pocket into the chicken breast |
| Cutting board | Prepare spinach and garlic |
| Mixing bowl | Combine stuffing ingredients |
| Baking dish | Bake stuffed chicken |
| Meat thermometer | Check chicken’s internal temperature |
Cooking Steps:
- Preheat your oven to 375°F (190°C).
- Start by heating olive oil in a skillet over medium heat. Add minced garlic and sauté for about 1 minute until fragrant.
- Add chopped spinach to the skillet and cook until wilted, about 3 minutes. Remove from heat and let cool slightly.
- In a mixing bowl, combine the cooked spinach and garlic with crumbled feta cheese and dried oregano. Season with salt and pepper to taste.
- Using a sharp knife, carefully cut a pocket into the side of the chicken breast. Be careful not to cut all the way through.
- Spoon the spinach and feta mixture into the pocket of the chicken breast.
- Place the stuffed chicken breast in a baking dish and drizzle with olive oil, then season the outside with salt and pepper.
- Bake in the preheated oven for 20-25 minutes, or until the chicken reaches an internal temperature of 165°F (75°C).
- Once cooked, allow the chicken to rest for a few minutes before slicing for serving.
To present the dish beautifully, slice the stuffed chicken breast slightly to reveal the vibrant green spinach and creamy feta filling. Serve it on a plate with a fresh squeeze of lemon on top and a sprinkle of chopped parsley for color. Accompany with a side of roasted vegetables or a simple green salad for added flavor and texture.
Pair this dish with a light and crisp white wine, such as Sauvignon Blanc or Pinot Grigio, to enhance the flavors of the filling. For a non-alcoholic option, sparkling water with lemon or a refreshing iced herbal tea would complement the meal perfectly.
Chickpea Stir-Fry With Vegetables
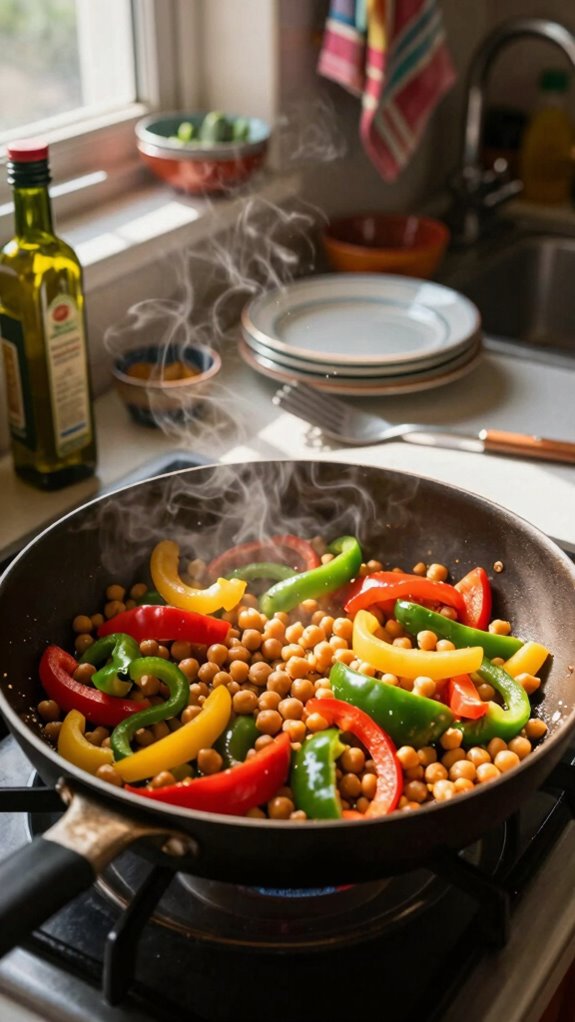
Chickpea stir-fry with vegetables is a vibrant, nutritious, and satisfying dish that can easily be made for a single serving. Packed with protein-rich chickpeas and a colorful array of seasonal vegetables, this dish is a perfect option for a quick and healthy dinner. It’s versatile and can be customized with different spices and sauces, making it an excellent choice for anyone looking to whip up something delicious with minimal fuss.
| Total time | Difficulty | Number of servings | Main ingredient/unique feature |
|---|---|---|---|
| 25 minutes | Easy | 1 | Chickpeas stir-fried with assorted vegetables |
This dish requires around 10 minutes of preparation and 15 minutes of cooking time. It’s simple enough for beginner cooks while providing a satisfying meal that won’t take all evening to make. To save time, you can chop your vegetables ahead of time and use canned chickpeas, which are ready to use.
| Ingredient | Quantity |
|---|---|
| Canned chickpeas (drained and rinsed) | 1 cup |
| Bell pepper (sliced) | 1 medium |
| Broccoli florets | 1 cup |
| Carrot (sliced) | 1 medium |
| Garlic (minced) | 1 clove |
| Soy sauce or tamari | 2 tablespoons |
| Olive oil | 1 tablespoon |
| Dried basil or thyme | 1/2 teaspoon |
| Salt | To taste |
| Pepper | To taste |
You can easily modify this recipe by swapping out the vegetables based on your preferences or what you have on hand. For example, zucchini, snap peas, or mushrooms also work well. Additionally, consider adding a dash of chili flakes for heat or incorporating a teaspoon of curry powder for a flavorful twist. You can also substitute the soy sauce with a gluten-free alternative if needed.
| Kitchen Tool | Use in the Recipe |
|---|---|
| Measuring cups | Measure chickpeas and soy sauce |
| Sharp knife | Slice vegetables |
| Cutting board | Prepare all ingredients |
| Skillet or wok | Stir-fry the ingredients |
| Wooden spoon | Stir and flip ingredients while cooking |
| Serving plate | Plate the finished dish for serving |
Cooking Steps:
- Begin by preparing all your vegetables by slicing the bell pepper, carrot, and breaking the broccoli into small florets.
- Heat olive oil in a skillet or wok over medium heat.
- Add minced garlic to the skillet and sauté for about 30 seconds, until fragrant.
- Add the sliced bell pepper, broccoli florets, and carrot slices into the skillet. Stir-fry for around 5-7 minutes, until the vegetables start to soften.
- Add the drained chickpeas to the skillet along with the soy sauce or tamari, dried basil or thyme, salt, and pepper.
- Continue to cook for another 5 minutes, stirring frequently, until everything is heated through and well combined.
- Taste and adjust seasoning if necessary, then remove from heat.
To best present your chickpea stir-fry, serve it hot on a clean plate or bowl, and consider garnishing it with some chopped fresh herbs (like parsley or cilantro) for a pop of color and flavor. For added flair, you can also squeeze a bit of fresh lemon juice on top for brightness.
This dish pairs wonderfully with a side of quinoa or brown rice, which will complement the protein-rich chickpeas. For drinks, consider serving it with a light and crisp white wine or a refreshing iced green tea for a delightful meal experience.
Zucchini Noodles With Pesto and Cherry Tomatoes
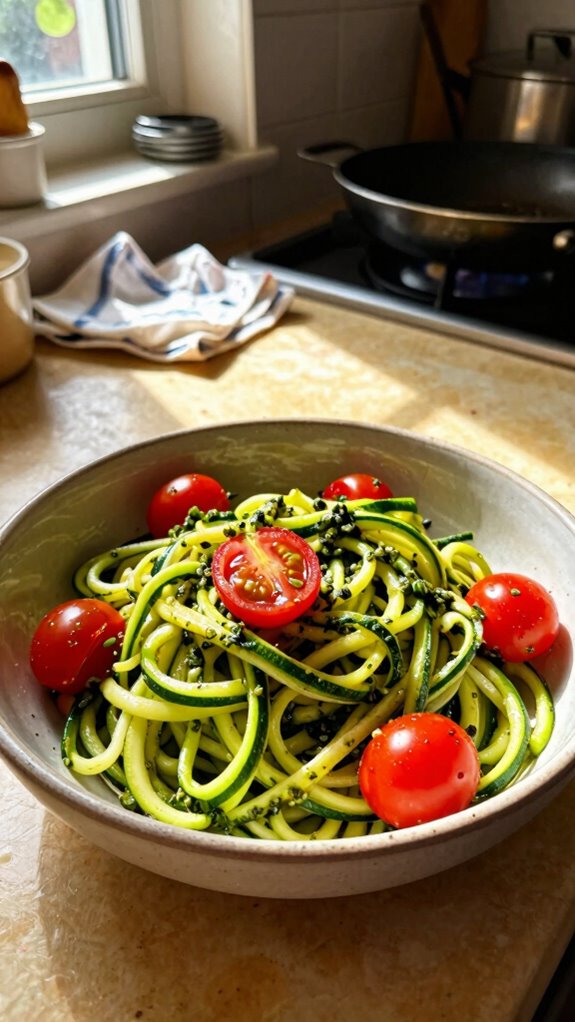
Zucchini noodles with pesto and cherry tomatoes is a refreshing, low-carb dish that’s perfect for a healthy dinner. This simple yet flavorful recipe brings together spiralized zucchini, vibrant cherry tomatoes, and a rich, homemade or store-bought pesto to create a meal that is both satisfying and light. Ideal for a quick weeknight meal or a special dinner, it offers a burst of color and flavors that will entice anyone.
| Total time | Difficulty | Number of servings | Main ingredient/unique feature |
|---|---|---|---|
| 20 minutes | Easy | 1 | Spiralized zucchini with pesto and cherry tomatoes |
This dish can be prepared in about 10 minutes, with an additional 10 minutes for cooking. It’s perfect for novice cooks as it involves minimal cooking techniques and can be made in a single pan. You can save time by using store-bought pesto or preparing your zucchini noodles in advance using a spiralizer.
| Ingredient | Quantity |
|---|---|
| Zucchini | 1 medium |
| Cherry tomatoes | 1 cup |
| Pesto (homemade or store-bought) | 2 tablespoons |
| Olive oil | 1 tablespoon |
| Garlic (minced) | 1 clove |
| Salt | To taste |
| Pepper | To taste |
| Grated parmesan (optional) | For serving |
You can customize this dish by adding protein such as grilled chicken or shrimp or by incorporating other vegetables like spinach or bell peppers for additional texture and nutrition. If you don’t have pesto, consider using a simple olive oil and lemon dressing, or even a creamy avocado sauce for a different twist.
| Kitchen Tool | Use in the Recipe |
|---|---|
| Spiralizer | Create zucchini noodles |
| Sharp knife | Chop cherry tomatoes and garlic |
| Cutting board | Prepare all ingredients |
| Skillet | Sauté the ingredients |
| Wooden spoon | Stir the dish while cooking |
| Serving plate | Plate the finished dish for serving |
Cooking Steps:
- Begin by washing the zucchini and using a spiralizer to create noodles. Set aside.
- Halve the cherry tomatoes and set them aside with the minced garlic.
- Heat olive oil in a skillet over medium heat. Once hot, add the minced garlic and sauté for about 1 minute until fragrant, being careful not to burn it.
- Add the halved cherry tomatoes into the skillet, stirring occasionally until they soften, about 2-3 minutes.
- Add the spiralized zucchini to the skillet and cook for another 3-4 minutes, stirring frequently. The zucchini should be tender yet still slightly crisp.
- Incorporate the pesto into the skillet, mixing well to evenly coat the zucchini and tomatoes. Cook for an additional minute, allowing the flavors to meld.
- Season with salt and pepper to taste.
- Once everything is well combined, remove from heat and transfer it to a serving plate.
- If desired, top with grated parmesan cheese before serving.
To serve and present the dish beautifully, twirl the zucchini noodles onto the plate and arrange the cherry tomatoes around them. Drizzle with additional pesto if desired and sprinkle with grated parmesan cheese for added flavor and visual appeal.
This dish pairs wonderfully with a light salad, such as arugula or mixed greens, tossed with lemon vinaigrette, to add freshness. For drinks, consider a chilled glass of white wine, such as Sauvignon Blanc, or sparkling water with a slice of lemon for a refreshing complement.
Teriyaki Salmon With Broccoli
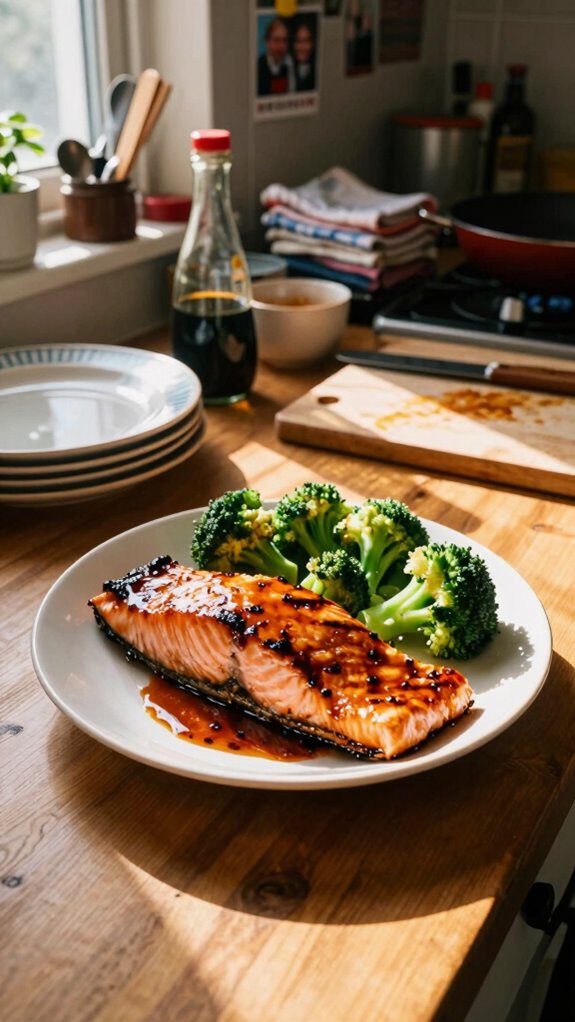
Teriyaki salmon with broccoli is a delicious and healthy dinner option that combines tender salmon fillets coated in a homemade teriyaki sauce with vibrant steamed broccoli. This dish is not only packed with flavor but also provides a great balance of protein and vegetables, making it perfect for a satisfying meal that’s easy to prepare.
| Total time | Difficulty | Number of servings | Main ingredient/unique feature |
|---|---|---|---|
| 25 minutes | Easy | 1 | Salmon fillet glazed with teriyaki sauce |
This recipe takes about 10 minutes to prepare and 15 minutes to cook, making it a quick and nutritious option for weeknight dinners. The steps are simple, and the dish does not require advanced cooking skills. For added convenience, you can use store-bought teriyaki sauce instead of making your own.
| Ingredient | Quantity |
|---|---|
| Salmon fillet | 1 (6-8 oz) |
| Broccoli florets | 1 cup |
| Teriyaki sauce (homemade or store-bought) | 3 tablespoons |
| Olive oil | 1 tablespoon |
| Garlic powder | ½ teaspoon |
| Salt | To taste |
| Pepper | To taste |
| Sesame seeds (optional) | For garnish |
You can easily customize this dish by adding other vegetables such as snap peas, bell peppers, or carrots to the broccoli. Additionally, if you prefer a spicier kick, consider drizzling some sriracha over the salmon before serving. You may also swap the salmon for another protein like chicken or tofu that can equally absorb the teriyaki flavors.
| Kitchen Tool | Use in the Recipe |
|---|---|
| Baking sheet | Bake the salmon |
| Parchment paper | Line the baking sheet for easy cleanup |
| Steamer or pot | Steam the broccoli |
| Medium bowl | Mix the teriyaki sauce and seasonings |
| Whisk | Combine ingredients for sauce |
| Serving plate | Plate the finished dish for serving |
Cooking Steps:
- Preheat your oven to 400°F (200°C) and line a baking sheet with parchment paper for easy cleanup.
- Place the salmon fillet on the baking sheet, skin side down, and season with salt, pepper, and garlic powder.
- Pour the teriyaki sauce over the salmon, ensuring it is well-coated.
- Bake the salmon in the preheated oven for 12-15 minutes, or until it flakes easily with a fork and reaches an internal temperature of 145°F (63°C).
- Meanwhile, in a steamer or pot, steam the broccoli florets for 4-5 minutes until bright green and tender but still crisp.
- Once the salmon is done, remove it from the oven and let it rest for a couple of minutes.
- Serve the teriyaki salmon on a plate with the steamed broccoli on the side, garnished with sesame seeds if desired.
To present this dish beautifully, place the salmon fillet in the center of a plate, arrange the broccoli artistically around it, and sprinkle sesame seeds on top for a touch of elegance. A slice of lemon on the side can provide a fresh garnish.
This teriyaki salmon pairs wonderfully with a bed of brown rice or quinoa for a complete meal. For beverages, consider serving it with a chilled glass of white wine like Sauvignon Blanc or a light, refreshing green tea to complement the flavors.
Cauliflower Fried Rice
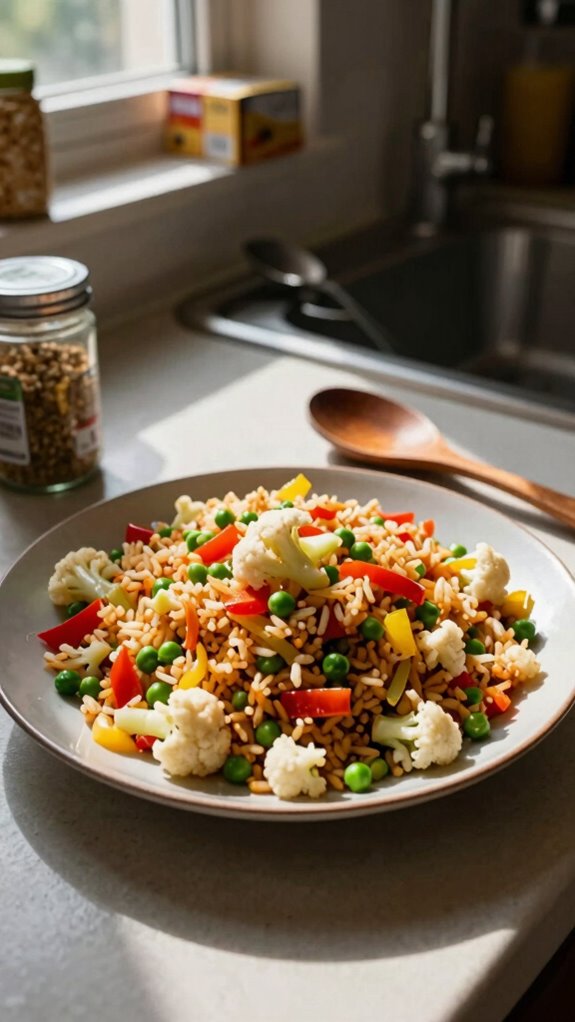
Cauliflower fried rice is a healthy, low-carb twist on traditional fried rice that uses riced cauliflower as a base. This dish is both nourishing and versatile, allowing for a colorful medley of vegetables and proteins to create a quick and satisfying dinner option, perfect for anyone cooking for one.
| Total time | Difficulty | Number of servings | Main ingredient/unique feature |
|---|---|---|---|
| 20 minutes | Easy | 1 | Riced cauliflower instead of rice |
This recipe is quick to prepare, requiring about 10 minutes for chopping vegetables and another 10 minutes for cooking. The steps are straightforward, making it an ideal option for novice cooks. To save time, you can buy pre-riced cauliflower from the grocery store.
| Ingredient | Quantity |
|---|---|
| Riced cauliflower | 1 cup |
| Carrot (diced) | 1 small |
| Peas (frozen or fresh) | ¼ cup |
| Green onion (chopped) | 2 stalks |
| Soy sauce (or tamari for gluten-free) | 2 tablespoons |
| Olive oil or sesame oil | 1 tablespoon |
| Eggs | 1 large |
| Garlic (minced) | 1 clove |
| Salt | To taste |
| Pepper | To taste |
You can easily modify this dish by including other vegetables like bell peppers, corn, or mushrooms. For added protein, consider including chicken, shrimp, or tofu. If you prefer a vegetarian version, you can omit the egg or replace it with scrambled tofu for a vegan alternative.
| Kitchen Tool | Use in the Recipe |
|---|---|
| Wok or large skillet | Stir-fry the ingredients |
| Cutting board | Chop the vegetables |
| Knife | Dice the carrot and green onions |
| Spatula | Stir the mixture while cooking |
| Measuring spoons | Measure the soy sauce and oil |
| Serving bowl | Plate the finished dish for serving |
Cooking Steps:
- Heat the olive oil or sesame oil in a large wok or skillet over medium-high heat.
- Add the minced garlic and diced carrot, sautéing for about 2-3 minutes until the carrot starts to soften.
- Push the garlic and carrot to one side of the pan, then crack the egg into the other side, scrambling it until fully cooked.
- Add the riced cauliflower, peas, and soy sauce to the pan, mixing everything together and frying for another 5-7 minutes until heated through.
- Stir in the chopped green onions, seasoning with salt and pepper to taste.
- Remove from heat and serve immediately in a bowl.
To best present cauliflower fried rice, serve it in a deep bowl garnished with extra chopped green onions or sesame seeds. You can also add a lime wedge on the side for a burst of freshness.
This dish pairs wonderfully with grilled chicken or tofu skewers, providing a complete meal. For beverages, try serving it with chilled green tea or a light-bodied white wine such as Sauvignon Blanc, complementing the flavors without overpowering the dish.