As someone who enjoys exploring healthy dinner options, I’ve found that gluten-free recipes can be both satisfying and flavorful. I often gravitate toward dishes like quinoa stir-fry or lemon herb grilled chicken, which offer a nice balance of nutrients. If you’re curious about how to make these meals, I have a few ideas that might surprise you. Let’s uncover some diverse options that not only cater to dietary needs but also delight the palate.
Quinoa and Black Bean Stir-Fry
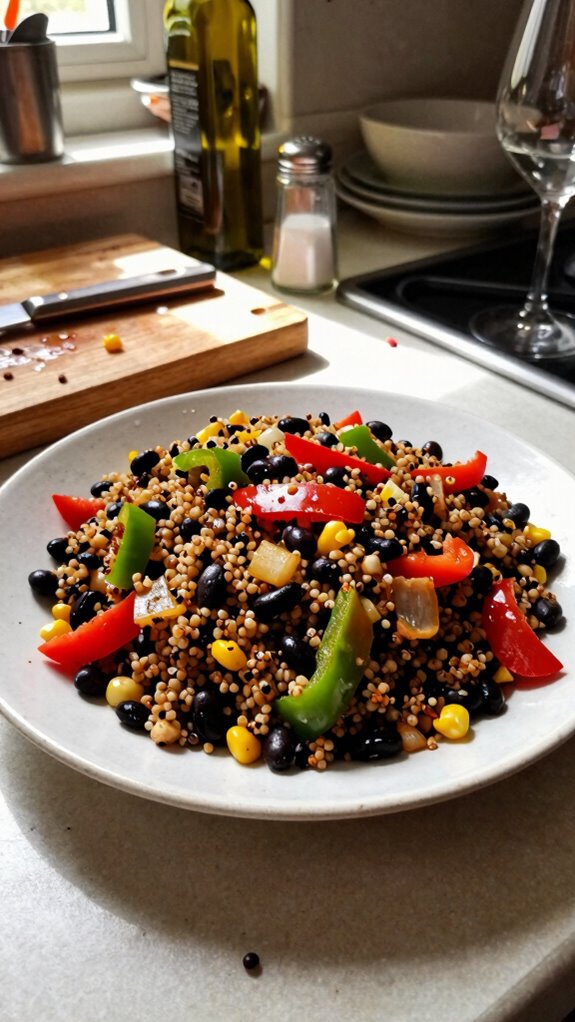
Quinoa and Black Bean Stir-Fry is a vibrant and nutritious dish that blends protein-rich quinoa with hearty black beans and colorful vegetables, all tossed together in a savory stir-fry. This gluten-free recipe is perfect for a quick weeknight dinner or as a pleasing dish to serve at gatherings, offering a satisfying and delicious option for anyone looking to enjoy a healthy meal.
| Total Time | Difficulty | Number of Servings | Main Ingredient/Unique Feature |
|---|---|---|---|
| 30 minutes | Easy | 4 | High-protein quinoa |
This recipe is easy to follow, making it suitable for cooks of all skill levels. With a total preparation and cooking time of about 30 minutes, you can whip up this delightful stir-fry in no time. Beginner cooks will appreciate the straightforward steps, while seasoned chefs can get creative with variations to customize the flavor profile.
| Ingredient | Quantity |
|---|---|
| Quinoa | 1 cup |
| Black beans (canned, rinsed) | 1 can (15 oz) |
| Bell pepper (red or green) | 1, diced |
| Carrot | 1, sliced |
| Zucchini | 1, diced |
| Onion | 1, chopped |
| Garlic | 2 cloves, minced |
| Olive oil | 2 tablespoons |
| Cumin | 1 teaspoon |
| Salt | to taste |
| Black pepper | to taste |
| Fresh cilantro (optional) | for garnish |
For variations, feel free to add other vegetables such as broccoli, snap peas, or corn for added flavor and texture. You can also spice things up by including diced jalapeños for a kick or using different beans like kidney or pinto beans for a change. Consider adding avocado for creaminess or topping the dish with a squeeze of lime juice for an extra burst of flavor.
| Kitchen Tool | Use |
|---|---|
| Large pot | For cooking quinoa according to package instructions. |
| Skillet | To sauté vegetables and stir everything together. |
| Wooden spoon | To stir and mix ingredients evenly. |
| Knife | For chopping vegetables. |
| Cutting board | To prepare and chop vegetables safely. |
| Measuring cups/spoons | To measure quinoa, oil, and spices accurately. |
Cooking Instructions
- Rinse the quinoa under cold water to remove any bitterness.
- In a large pot, combine 1 cup of quinoa with 2 cups of water. Bring to a boil, then reduce to a simmer, cover, and cook for about 15 minutes or until quinoa is fluffy and water is absorbed. Remove from heat and let it sit covered for an additional 5 minutes.
- While the quinoa is cooking, heat 2 tablespoons of olive oil in a large skillet over medium-high heat.
- Add chopped onion and minced garlic to the skillet, and sauté for 2-3 minutes until softened.
- Stir in the diced bell pepper, sliced carrot, and diced zucchini. Cook for an additional 5-7 minutes until the vegetables are tender.
- Add the rinsed black beans to the skillet along with the cooked quinoa. Stir well to combine.
- Season the mixture with cumin, salt, and black pepper. Adjust the seasoning according to your taste.
- Cook for another 2-3 minutes, stirring occasionally, to heat everything through.
- Remove from heat and let cool slightly before serving.
To serve and present the dish at its best, scoop the quinoa and black bean stir-fry into bowls or on plates, and finish with a garnish of fresh cilantro. A sprinkle of lime zest or a wedge of lime on the side can elevate the presentation further.
Pair this scrumptious stir-fry with a fresh side salad or guacamole for a delightful meal. If you desire something to drink, opt for iced tea, a light white wine, or sparkling water to complement the dish without overpowering its flavors.
Zucchini Noodles With Pesto and Cherry Tomatoes
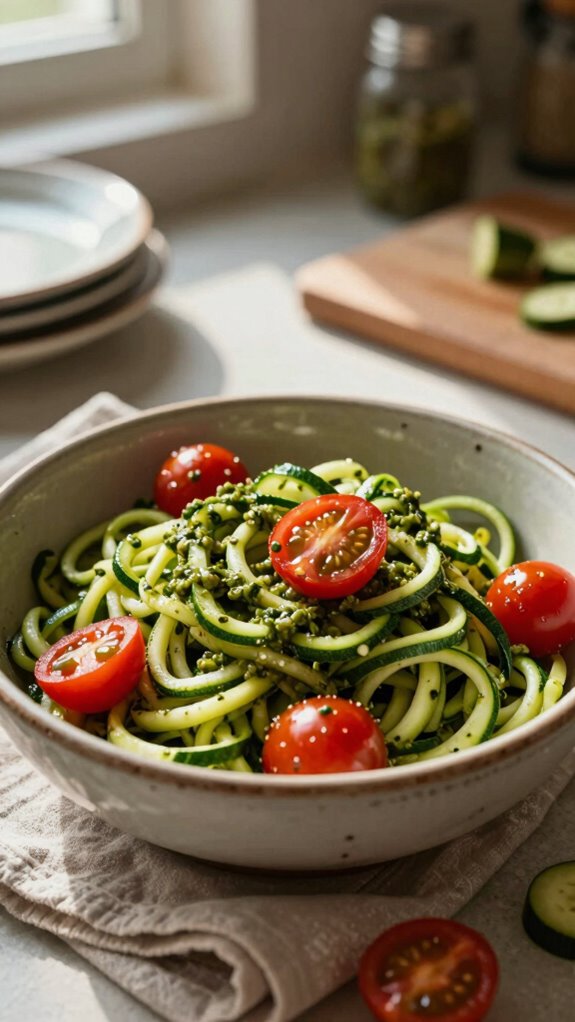
Zucchini Noodles With Pesto and Cherry Tomatoes is a light and refreshing gluten-free dish, perfect for those looking to enjoy a healthy meal without sacrificing flavor. This dish features spiralized zucchini noodles, tossed with a vibrant homemade or store-bought pesto, and topped with juicy cherry tomatoes. It’s a quick and satisfying option for a light dinner or a side dish!
| Total Time | Difficulty | Number of Servings | Main Ingredient/Unique Feature |
|---|---|---|---|
| 20 minutes | Easy | 4 | Zucchini noodles for a low-carb alternative |
This recipe is incredibly easy to prepare, making it suitable for cooks of all levels. With a total preparation and cooking time of about 20 minutes, it’s a perfect choice for busy weeknights. Beginners will find the steps simple to follow, while seasoned chefs can experiment with different pesto variations and toppings.
| Ingredient | Quantity |
|---|---|
| Zucchini | 4 medium-sized |
| Cherry tomatoes | 1 pint |
| Basil pesto (store-bought or homemade) | 1 cup |
| Olive oil | 2 tablespoons |
| Garlic | 2 cloves, minced |
| Salt | to taste |
| Black pepper | to taste |
| Grated Parmesan cheese (optional) | for garnish |
| Fresh basil leaves (optional) | for garnish |
For variations, consider adding protein such as grilled chicken, shrimp, or chickpeas for a more substantial meal. You can also substitute the cherry tomatoes with sun-dried tomatoes or add other vegetables like bell peppers, spinach, or asparagus for added color and nutrition. Additionally, try adding a sprinkle of crushed red pepper flakes for a bit of heat!
| Kitchen Tool | Use |
|---|---|
| Spiralizer | To create zucchini noodles from whole zucchinis. |
| Skillet | To sauté garlic and cherry tomatoes. |
| Wooden spoon | To mix and combine ingredients effectively. |
| Knife | For chopping garlic and optionally slicing any additional vegetables. |
| Cutting board | For safe chopping and preparation of vegetables. |
| Measuring spoons | To measure olive oil and spices accurately. |
Cooking Instructions:
- Start by washing the zucchini thoroughly, then use a spiralizer to create noodles. If you don’t have a spiralizer, you can use a vegetable peeler to make thin strips.
- In a large skillet, heat the olive oil over medium heat. Add the minced garlic and sauté for about 1 minute until fragrant, but not browned.
- Add the cherry tomatoes to the skillet, cooking until they start to soften and burst, about 3-4 minutes.
- Lower the heat, and add the zucchini noodles to the skillet, tossing them gently with the tomatoes and garlic. Cook for an additional 2-3 minutes until the noodles are tender but still slightly crisp.
- Stir in the basil pesto, mixing until the zucchini noodles are well coated. Season with salt and black pepper to taste.
- Remove from heat and serve warm, garnished with grated Parmesan cheese and fresh basil leaves if desired.
To serve and present this dish beautifully, consider placing the zucchini noodles in a large shallow bowl or plate. Drizzle any remaining pesto over the top and sprinkle with grated Parmesan cheese and fresh basil for an appealing look. This vibrant dish makes for a great centerpiece at your dinner table!
Pair this dish wonderfully with protein options such as grilled chicken or fish, which complement the freshness of the zucchini and pesto. For drinks, a chilled glass of white wine, like Sauvignon Blanc, or a refreshing sparkling water with lemon would enhance the flavors beautifully, making for a delightful dining experience.
Lemon Herb Grilled Chicken With Asparagus
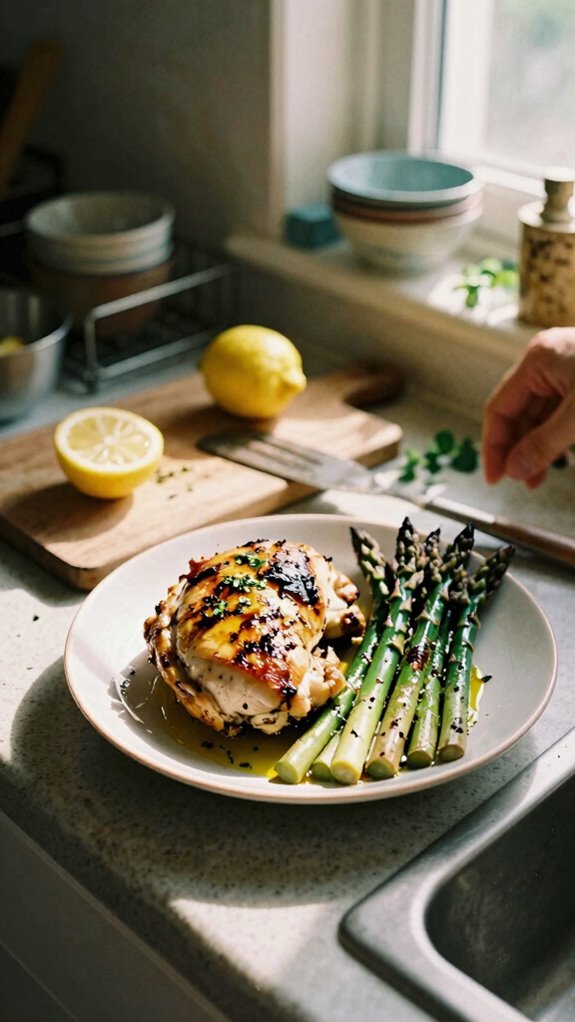
Lemon Herb Grilled Chicken With Asparagus is a bold and flavorful dish that combines juicy, marinated grilled chicken breast with tender asparagus spears, creating a light and satisfying gluten-free dinner. This recipe is perfect for summer barbecues or a cozy weeknight meal and is bursting with fresh herbs and citrus flavor.
| Total Time | Difficulty | Number of Servings | Main Ingredient/Unique Feature |
|---|---|---|---|
| 30 minutes | Easy | 4 | Lemon-herb marinade enhances flavor |
This recipe features a total preparation time of approximately 30 minutes, including marinating time, while the cooking itself is quick and simple. With easy-to-follow instructions, it’s suitable for both novice cooks and experienced chefs. Consider marinating the chicken overnight for even more flavor!
| Ingredient | Quantity |
|---|---|
| Boneless, skinless chicken breasts | 4 (6 oz each) |
| Fresh asparagus | 1 lb |
| Olive oil | 3 tablespoons |
| Lemon juice | 1/4 cup |
| Lemon zest | 1 teaspoon |
| Fresh parsley, chopped | 1/4 cup |
| Fresh thyme, chopped | 1 tablespoon |
| Garlic, minced | 2 cloves |
| Salt | to taste |
| Black pepper | to taste |
For variations, you can swap asparagus with other vegetables such as zucchini, bell peppers, or broccoli for a colorful twist. Additionally, try using different herbs like rosemary or cilantro, or add a touch of honey to the marinade for a slight sweetness.
| Kitchen Tool | Use |
|---|---|
| Grill or grill pan | To cook the chicken and asparagus over high heat. |
| Mixing bowl | For combining the marinade ingredients. |
| Whisk | To mix marinade ingredients thoroughly. |
| Tongs | To turn the chicken and asparagus while grilling. |
| Meat thermometer | To check the doneness of the chicken (165°F internal temperature). |
| Cutting board | For safely chopping herbs and preparing ingredients. |
Cooking Instructions:
- Prepare the Marinade: In a mixing bowl, whisk together olive oil, lemon juice, lemon zest, chopped parsley, thyme, minced garlic, salt, and black pepper until well combined.
- Marinate the Chicken: Place the chicken breasts in a resealable bag or shallow dish. Pour the marinade over the chicken, ensuring all pieces are well coated. Seal and refrigerate for at least 15 minutes or up to overnight for maximum flavor.
- Prepare Asparagus: While the chicken is marinating, trim the tough ends off the asparagus. Drizzle with olive oil, salt, and pepper, and set aside.
- Preheat the Grill: Preheat your grill (or grill pan) to medium-high heat.
- Grill the Chicken: Remove the chicken from the marinade, allowing excess to drip off. Place the chicken on the grill and cook for about 6-7 minutes per side, or until the internal temperature reaches 165°F.
- Grill the Asparagus: Add asparagus to the grill during the last 5-6 minutes of cooking, turning occasionally until tender and lightly charred.
- Rest and Serve: Once chicken and asparagus are cooked, remove from the grill and allow to rest for a few minutes before slicing.
Serving Suggestions:
To present this dish beautifully, slice the grilled chicken diagonally and arrange it on a serving platter alongside the grilled asparagus. Garnish with additional fresh herbs or lemon wedges for an appealing touch.
Pair this delightful meal with a light side salad or quinoa for added nutrition, and serve it with a refreshing white wine, such as Sauvignon Blanc, or a sparkling water with a slice of lemon for a perfect complement to the zesty flavors.
Shrimp Tacos With Cabbage Slaw
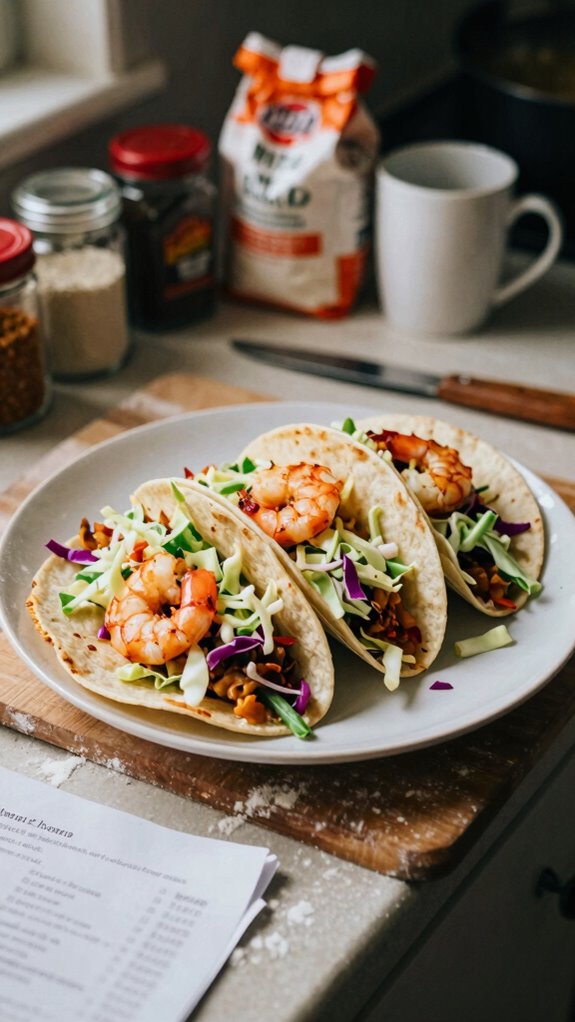
Shrimp Tacos with Cabbage Slaw is a fresh and vibrant dish that combines seasoned shrimp with a crunchy cabbage slaw, all wrapped in soft corn tortillas. This gluten-free meal is perfect for a casual gathering or a fun weeknight dinner, providing a hearty yet light option with bold flavors.
| Total Time | Difficulty | Number of Servings | Main Ingredient/Unique Feature |
|---|---|---|---|
| 25 minutes | Easy | 4 | Quick-cooked shrimp with crunchy slaw |
This recipe takes approximately 25 minutes to prepare and cook, making it an ideal choice for busy weeknights. The difficulty level is easy, ensuring that even novice cooks can successfully create this dish. For optimal flavor, be sure to allow the shrimp to marinate for at least 15 minutes before cooking.
| Ingredient | Quantity |
|---|---|
| Shrimp (peeled and deveined) | 1 lb |
| Corn tortillas | 8 |
| Green cabbage (shredded) | 2 cups |
| Carrot (shredded) | 1 small |
| Fresh cilantro (chopped) | 1/4 cup |
| Lime juice | 2 tablespoons |
| Olive oil | 2 tablespoons |
| Garlic powder | 1 teaspoon |
| Cumin | 1 teaspoon |
| Salt | to taste |
| Black pepper | to taste |
For variations, consider swapping the shrimp for fish or chicken, or adding additional toppings such as avocado, diced tomatoes, or jalapeños for extra flavor and texture. You can also experiment with different slaws by incorporating red cabbage or including fruits like mango for a sweet twist.
| Kitchen Tool | Use |
|---|---|
| Mixing bowl | For combining the marinade and the slaw ingredients. |
| Skillet | To cook the shrimp quickly over medium-high heat. |
| Tongs | To flip the shrimp while cooking. |
| Grater | For shredding carrots if using whole carrots. |
| Knife and cutting board | For chopping cilantro and preparing other ingredients. |
| Serving platter | For presenting the tacos beautifully. |
Cooking Instructions:
- Prepare the Marinade: In a mixing bowl, combine olive oil, garlic powder, cumin, salt, and black pepper. Add the shrimp and toss to coat. Let it marinate for at least 15 minutes.
- Prepare the Slaw: In another bowl, mix together the shredded cabbage, carrot, cilantro, and lime juice. Toss until well combined, then season with salt and pepper to taste.
- Cook the Shrimp: Heat a skillet over medium-high heat. Once hot, add the marinated shrimp in a single layer. Cook for about 2-3 minutes per side, or until the shrimp are pink and cooked through.
- Warm the Tortillas: In a separate skillet, warm the corn tortillas for a few seconds on each side until pliable.
- Assemble Tacos: Place a portion of the cabbage slaw onto each tortilla and top with the cooked shrimp.
- Serve Immediately: Garnish with additional cilantro and squeeze fresh lime juice over the top if desired.
Serving Suggestions
To serve Shrimp Tacos with Cabbage Slaw, arrange the tacos neatly on a platter, garnishing with additional cilantro and lime wedges on the side for a touch of freshness. Consider adding a colorful salsa or guacamole to the table for guests to personalize their tacos.
Pairing Recommendations
These shrimp tacos pair exceptionally well with sides like black beans, cilantro-lime rice, or tortilla chips with salsa. For drinks, consider serving them with a refreshing margarita, cold beer, or sparkling water with lime for a delightful, well-rounded meal experience.
Stuffed Bell Peppers With Turkey and Rice
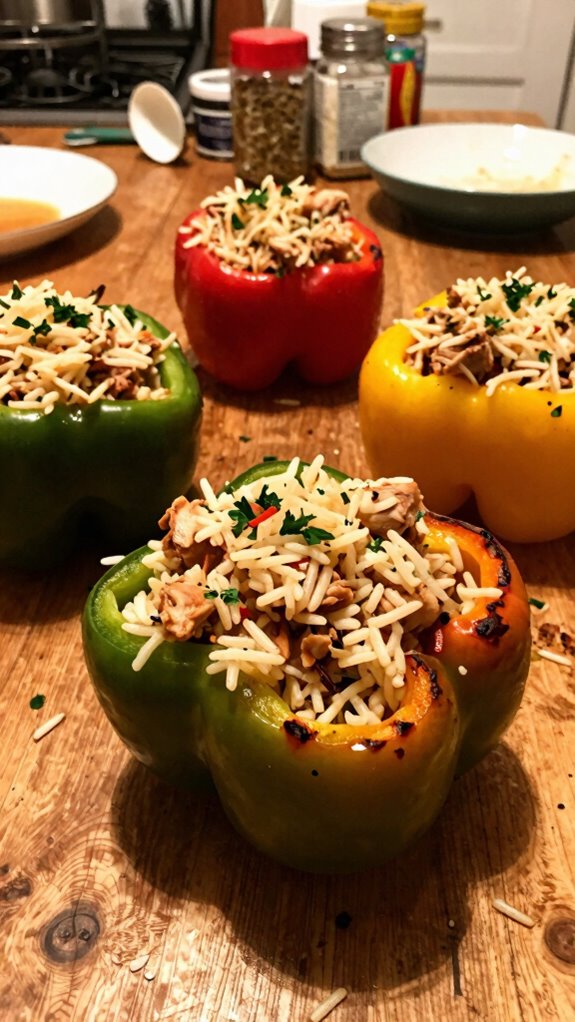
Stuffed Bell Peppers with Turkey and Rice is a wholesome and satisfying dish that brings together the flavors of lean ground turkey, fluffy rice, and aromatic spices, all enveloped within colorful bell peppers. This gluten-free meal is perfect for a family dinner, offering a hearty serving of vegetables alongside a protein-packed filling.
| Total Time | Difficulty | Number of Servings | Main Ingredient/Unique Feature |
|---|---|---|---|
| 50 minutes | Medium | 4 | Ground turkey-filled bell peppers |
This dish requires about 50 minutes to prepare and cook, making it a suitable choice for an engaging weekend meal. The difficulty level is medium, as it involves cooking ingredients separately before assembling but is manageable for most home cooks. To enhance flavor, consider using cooked rice for a quicker preparation, and feel free to season the turkey mixture to your taste.
| Ingredient | Quantity |
|---|---|
| Bell peppers (halved and seeded) | 4 |
| Ground turkey | 1 lb |
| Cooked rice | 1 cup |
| Onion (chopped) | 1 medium |
| Garlic (minced) | 2 cloves |
| Canned diced tomatoes (drained) | 1 cup |
| Italian seasoning | 1 tablespoon |
| Olive oil | 2 tablespoons |
| Salt | to taste |
| Black pepper | to taste |
| Grated cheese (optional) | 1 cup |
For variations, you can swap the ground turkey for ground beef, chicken, or a vegetarian option like lentils or quinoa. Additionally, feel free to include different vegetables in the filling, such as corn, zucchini, or spinach, and mix in your favorite cheese for added creaminess.
| Kitchen Tool | Use |
|---|---|
| Baking dish | For baking the stuffed peppers in the oven. |
| Skillet | To sauté the onion and garlic before mixing in the turkey. |
| Mixing spoon | To combine the filling ingredients effectively. |
| Knife and cutting board | For chopping onions and preparing bell peppers. |
| Measuring cups | To measure rice and other ingredients precisely. |
| Grater | For grating cheese if desired for topping. |
Cooking Instructions:
- Preheat the Oven: Preheat your oven to 375°F (190°C).
- Cook the Aromatics: In a skillet over medium heat, add olive oil. Once hot, sauté the chopped onion and minced garlic until fragrant and translucent, about 3-4 minutes.
- Brown the Turkey: Increase the heat to medium-high and add the ground turkey to the skillet. Cook until browned and fully cooked, breaking it apart with a spatula, around 6-8 minutes.
- Combine Filling Ingredients: Add the cooked rice, drained diced tomatoes, Italian seasoning, salt, and pepper to the turkey mixture, stirring until well combined and heated through.
- Prepare the Peppers: Fill each halved bell pepper generously with the turkey and rice mixture, pressing lightly to pack.
- Bake the Peppers: Place the stuffed peppers upright in a baking dish. Cover with foil and bake in the preheated oven for 25 minutes. Remove the foil, sprinkle with grated cheese (if using), and bake for an additional 10-15 minutes until the peppers are tender and the cheese is bubbly.
- Serve: Carefully remove from the oven and allow to cool for a few minutes before serving.
To serve and present your stuffed bell peppers beautifully, arrange them on a large serving platter. You can garnish with freshly chopped parsley or a dollop of sour cream on the side for an additional touch of flavor and color.
Pair these stuffed bell peppers with a side salad of mixed greens and a light vinaigrette for a refreshing contrast. A glass of chilled white wine, such as Sauvignon Blanc, or a sparkling water with lime makes for a delightful complement to this meal.
Sweet Potato and Chickpea Curry
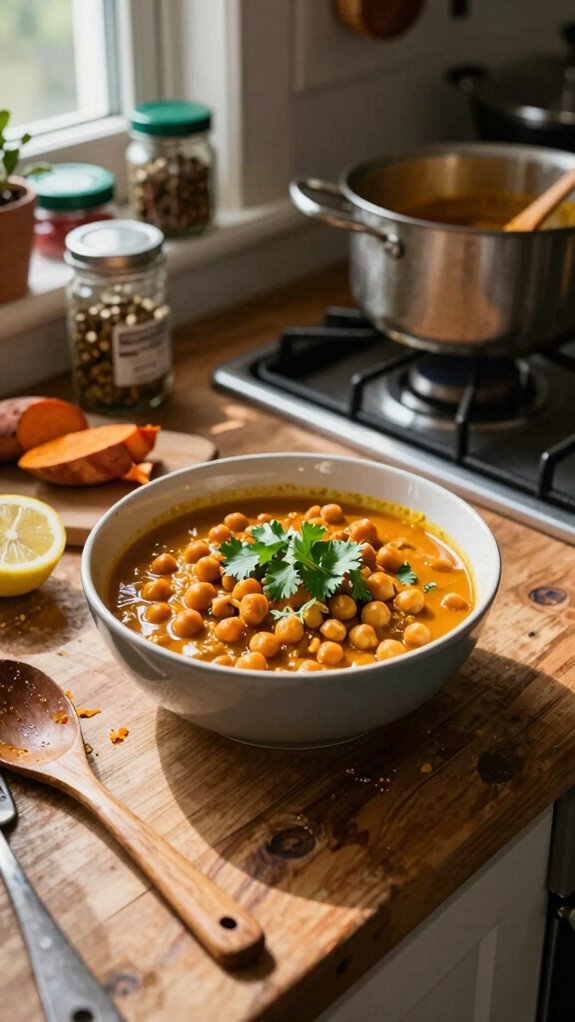
Sweet Potato and Chickpea Curry is a flavorful and nutritious dish that brings together creamy sweet potatoes, hearty chickpeas, and aromatic spices to create a comforting meal. This vegan and gluten-free curry is packed with vibrant flavors and is perfect for those looking for a healthy dinner option.
| Total Time | Difficulty | Number of Servings | Main Ingredient/Unique Feature |
|---|---|---|---|
| 40 minutes | Easy | 4 | Creamy sweet potato and chickpeas |
This dish is simple to prepare, taking about 40 minutes from start to finish, making it ideal for a quick weeknight dinner. With an easy level of difficulty, you only need to chop the vegetables and let everything simmer, allowing you to focus on other tasks in the kitchen. Pro tip: using pre-cooked chickpeas can further speed up the process!
| Ingredient | Quantity |
|---|---|
| Sweet potatoes (peeled and diced) | 2 medium |
| Canned chickpeas (drained and rinsed) | 1 can (15 oz) |
| Coconut milk | 1 can (13.5 oz) |
| Onion (chopped) | 1 medium |
| Garlic (minced) | 3 cloves |
| Ginger (minced) | 1 inch piece |
| Curry powder | 2 tablespoons |
| Vegetable broth | 1 cup |
| Olive oil | 2 tablespoons |
| Salt | to taste |
| Fresh cilantro (for garnish) | Optional |
For variations, feel free to add more vegetables such as bell peppers, spinach, or carrots. You can also substitute chickpeas with lentils for a different texture or use different curry powders to adjust the flavor profile. Additionally, consider adding a squeeze of lime for bright acidity or serving with some cooked quinoa or rice.
| Kitchen Tool | Use |
|---|---|
| Pot | For cooking and simmering the curry. |
| Knife | For chopping the vegetables. |
| Cutting board | To safely chop vegetables and ginger. |
| Measuring cups | To measure liquids and solid ingredients. |
| Wooden spoon | For stirring the curry ingredients. |
| Ladle | To serve the curry into bowls. |
Cooking Instructions:
- In a large pot, heat the olive oil over medium heat.
- Add the chopped onion and sauté for about 3-4 minutes until translucent.
- Stir in the minced garlic and ginger, cooking for an additional minute until fragrant.
- Add the diced sweet potatoes to the pot and mix well.
- Sprinkle the curry powder over the sweet potatoes and stir to coat evenly.
- Pour in the vegetable broth and coconut milk, then bring the mixture to a simmer.
- Stir in the drained chickpeas and season with salt to taste.
- Cover the pot, reduce the heat to low, and let the curry simmer for about 20 minutes, or until the sweet potatoes are tender.
- Remove from heat and garnish with fresh cilantro before serving.
To serve Sweet Potato and Chickpea Curry, ladle the curry into shallow bowls, ensuring a generous amount of both sweet potatoes and chickpeas in each dish. Garnish with fresh cilantro on top for an added pop of color and flavor. Serve it hot to enjoy the creamy, flavorful goodness!
For pairing, this delicious curry goes well with steamed jasmine rice or quinoa to soak up the sauce. Additionally, a side of naan bread can complement the meal perfectly. As for drinks, consider serving it alongside coconut water or a refreshing mango lassi to balance the spices in the curry.
Spinach and Feta Stuffed Portobello Mushrooms
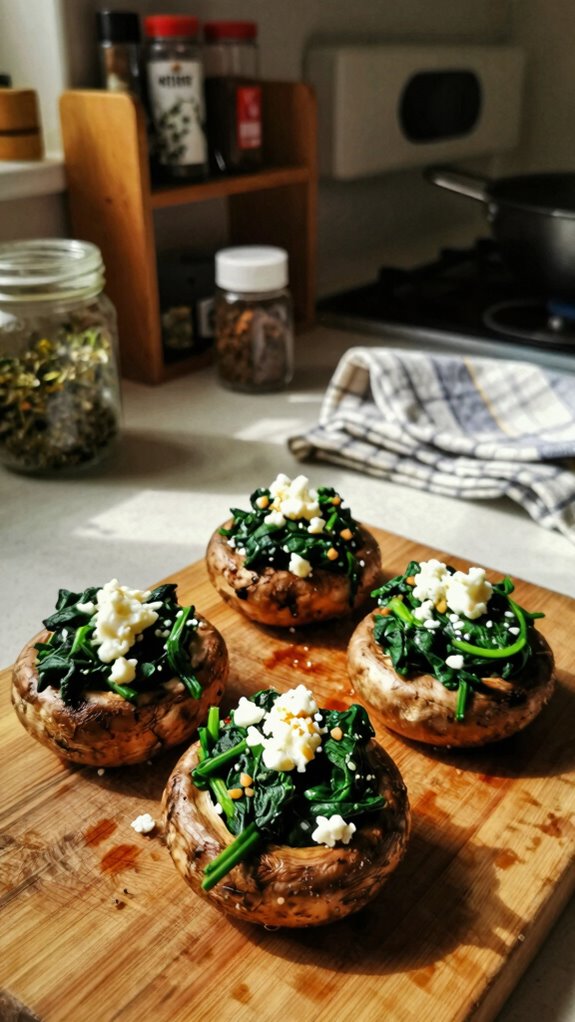
Spinach and Feta Stuffed Portobello Mushrooms are a delicious and satisfying gluten-free dish, featuring large portobello mushroom caps filled with a savory mixture of sautéed spinach, creamy feta cheese, and aromatic herbs. This dish is both vegetarian and gluten-free, making it a perfect choice for anyone looking for a hearty yet healthy meal.
| Total Time | Difficulty | Number of Servings | Main Ingredient/Unique Feature |
|---|---|---|---|
| 30 minutes | Easy | 4 | Stuffed portobello mushrooms with spinach and feta |
This recipe is relatively simple to prepare, with a total time of just 30 minutes. It includes a prep time of about 10 minutes, followed by a cooking time of 20 minutes. For a quicker option, consider washing and prepping the spinach and mushrooms ahead of time.
| Ingredient | Quantity |
|---|---|
| Large portobello mushrooms | 4 |
| Fresh spinach (chopped) | 2 cups |
| Feta cheese (crumbled) | 1 cup |
| Garlic (minced) | 2 cloves |
| Olive oil | 2 tablespoons |
| Onion (chopped) | 1 medium |
| Salt and pepper | to taste |
| Fresh parsley (chopped) | 2 tablespoons |
| Lemon juice | 1 tablespoon |
For variations, you can swap feta cheese for goat cheese or even omit cheese entirely for a vegan option. Additionally, other vegetables such as bell peppers, zucchini, or artichokes can be included in the stuffing mix to add more flavor and texture.
| Kitchen Tool | Use |
|---|---|
| Baking sheet | For roasting the stuffed mushrooms. |
| Knife | For chopping the vegetables. |
| Cutting board | To safely chop the garlic and onion. |
| Mixing bowl | To combine the filling ingredients. |
| Spoon | For stuffing the mushrooms. |
| Oven | For cooking the stuffed mushrooms. |
Cooking Instructions:
- Preheat your oven to 375°F (190°C).
- Clean the portobello mushrooms with a damp cloth, and carefully remove the stems. Place the mushroom caps on a baking sheet, gill side up.
- In a large mixing bowl, combine the chopped spinach, crumbled feta cheese, minced garlic, chopped onion, olive oil, lemon juice, salt, and pepper. Mix well until all ingredients are thoroughly combined.
- Spoon the filling into each portobello mushroom cap, pressing down lightly to ensure the filling is compact.
- Bake the stuffed mushrooms in the preheated oven for about 20 minutes, or until the mushrooms are tender and the filling is heated through.
- Remove mushrooms from oven and let cool for a couple of minutes before serving.
To serve and present Spinach and Feta Stuffed Portobello Mushrooms beautifully, place them on a serving platter. Garnish with freshly chopped parsley and lemon wedges. This not only adds a pop of color but also enhances the dish’s fresh flavors.
For the ideal meal experience, pair these mushrooms with a fresh garden salad or roasted vegetables. A light white wine, like a Sauvignon Blanc, or a refreshing sparkling water with lemon would elevate your dining experience perfectly.