I find canned chicken to be an incredibly convenient ingredient for quick meal solutions. It’s versatile and can be transformed into a variety of dishes, suitable for any occasion. From comforting casseroles to easy sandwiches, the possibilities are endless. If you’re looking for new ways to incorporate this ingredient into your cooking routine, you’re in for a treat. Let’s explore some delicious recipes that might just become your new go-tos.
Canned Chicken Casserole
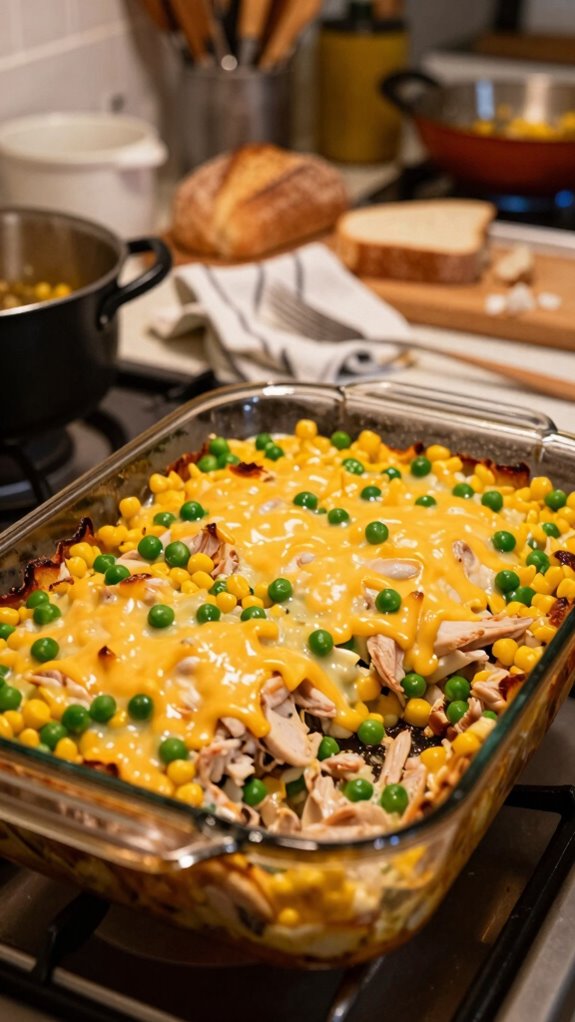
Canned chicken casserole is a hearty and satisfying dish that combines the convenience of canned chicken with creamy sauces, vegetables, and a topping of crunchy breadcrumbs or cheese. Perfect for busy weeknights, this casserole is not only easy to prepare but also versatile, allowing you to customize it with your favorite veggies and seasonings.
| Total Time | Difficulty | Number of Servings | Main Ingredient / Unique Feature |
|---|---|---|---|
| 45 minutes | Easy | 4-6 | Canned Chicken |
This casserole is classified as easy, making it ideal for beginners or anyone looking for a quick meal solution. The total preparation and cooking time is around 45 minutes, making it a great option for busy families. For best results, consider adding extra seasoning or using a mix of fresh and canned vegetables to elevate the dish’s flavor.
| Ingredients | Quantity |
|---|---|
| Canned chicken | 2 (12.5 oz) cans |
| Cream of mushroom soup | 1 can (10.5 oz) |
| Mixed vegetables | 1 cup (frozen or fresh) |
| Shredded cheese | 1 cup |
| Bread crumbs | 1 cup |
| Onion (diced) | 1 small |
| Garlic powder | 1 teaspoon |
| Black pepper | 1/2 teaspoon |
| Olive oil | 1 tablespoon |
| Salt | to taste |
Feel free to experiment with the ingredients based on personal preferences or what you have available in your pantry. You can substitute the cream of mushroom soup with other varieties like chicken or broccoli, use different kinds of cheese, such as cheddar or mozzarella, and add in any vegetables you enjoy, like broccoli, corn, or bell peppers.
| Kitchen Tool | Use in Recipe |
|---|---|
| Casserole dish | Bake and serve the casserole |
| Mixing bowl | Combine all filling ingredients |
| Spoon | Stir ingredients and layer the casserole |
| Measuring cup | Measure out ingredients accurately |
| Knife | Chop onion and any fresh vegetables |
| Oven | Bake until bubbly and golden |
Cooking Instructions:
- Preheat the oven to 350°F (175°C).
- In a mixing bowl, combine the canned chicken (drained), cream of mushroom soup, mixed vegetables, diced onion, garlic powder, salt, and black pepper. Stir until well mixed.
- Grease a casserole dish with olive oil to prevent sticking.
- Pour the chicken mixture into the prepared casserole dish, spreading it evenly.
- Sprinkle the shredded cheese on top of the mixture.
- Evenly distribute the bread crumbs over the cheese layer to create a crunchy topping.
- Bake in the preheated oven for 25-30 minutes, or until the top is golden brown and the filling is bubbling.
- Once finished, remove from the oven and let it cool for a few minutes before serving.
To serve the casserole, scoop generous portions onto plates or into bowls, allowing the bubbling filling and crunchy topping to show through. Pair each serving with a sprinkle of fresh herbs like parsley for a pop of color and added flavor.
For a complete meal, serve this casserole alongside a simple green salad or steamed vegetables. A light, crisp drink like white wine, lemonade, or sparkling water complement the flavors nicely. Opt for a light Riesling or Chardonnay if you prefer wine, as they enhance the richness of the casserole.
BBQ Canned Chicken Sandwiches

BBQ canned chicken sandwiches are a delicious and easy-to-make meal that perfectly combines the smoky flavor of barbeque sauce with tender canned chicken. They serve as a quick lunch or dinner solution, allowing you to enjoy the taste of homemade BBQ without the hassle of cooking chicken from scratch.
| Total Time | Difficulty | Number of Servings | Main Ingredient / Unique Feature |
|---|---|---|---|
| 30 minutes | Easy | 4 | Canned Chicken with BBQ Sauce |
This recipe is classified as easy, making it accessible for all cooking skill levels. With a total preparation and cooking time of only 30 minutes, these sandwiches are ideal for busy weeknights or spontaneous gatherings. For best results, ensure that the canned chicken is well-drained and mix it thoroughly with the BBQ sauce for uniform flavor.
| Ingredients | Quantity |
|---|---|
| Canned chicken | 2 (12.5 oz) cans |
| BBQ sauce | 1/2 cup |
| Onion (finely chopped) | 1/2 medium |
| Celery (finely chopped) | 1 stalk |
| Hamburger buns | 4 |
| Shredded lettuce | 1 cup |
| Pickles (optional) | Slices to taste |
| Salt | to taste |
| Pepper | to taste |
Feel free to mix things up by adding additional ingredients such as diced bell peppers or jalapeños for an extra kick. You might also consider swapping the BBQ sauce for a different flavor profile, such as buffalo sauce or a honey mustard blend, to create a unique twist on the classic sandwich.
| Kitchen Tool | Use in Recipe |
|---|---|
| Mixing bowl | Combine the chicken and other ingredients |
| Spoon | Mix the chicken with BBQ sauce |
| Knife | Chop onions and celery |
| Measuring cup | Measure out BBQ sauce |
| Plate | Serve the assembled sandwiches |
| Grill or skillet | Toast the buns (if desired) |
Cooking Instructions:
- In a mixing bowl, combine the drained canned chicken, BBQ sauce, chopped onion, celery, salt, and pepper. Mix well until the chicken is fully coated with the sauce.
- If you’d like toasted buns, place the hamburger buns on a grill or skillet and toast for about 1-2 minutes, or until they are lightly golden.
- Evenly distribute the BBQ chicken mixture onto the bottom halves of the toasted buns.
- Top with shredded lettuce and pickles, if using.
- Place the top halves of the buns onto the sandwiches and press down gently.
- Serve the sandwiches warm.
To serve, present the BBQ canned chicken sandwiches on a wooden or plastic platter for a rustic feel. You can add a side of potato chips, coleslaw, or a fresh summer salad to complement the meal. Garnishing with a sprinkle of fresh parsley or offering a bowl of extra BBQ sauce on the side can enhance the dining experience.
For the perfect pairing with these BBQ chicken sandwiches, consider serving them with a side of crispy potato fries or a refreshing coleslaw. To drink, a cold glass of sweet tea, lemonade, or a light lager beer works beautifully, as it complements the sweet and savory flavors of the BBQ without overshadowing it.
Chicken Salad With Grapes and Pecans
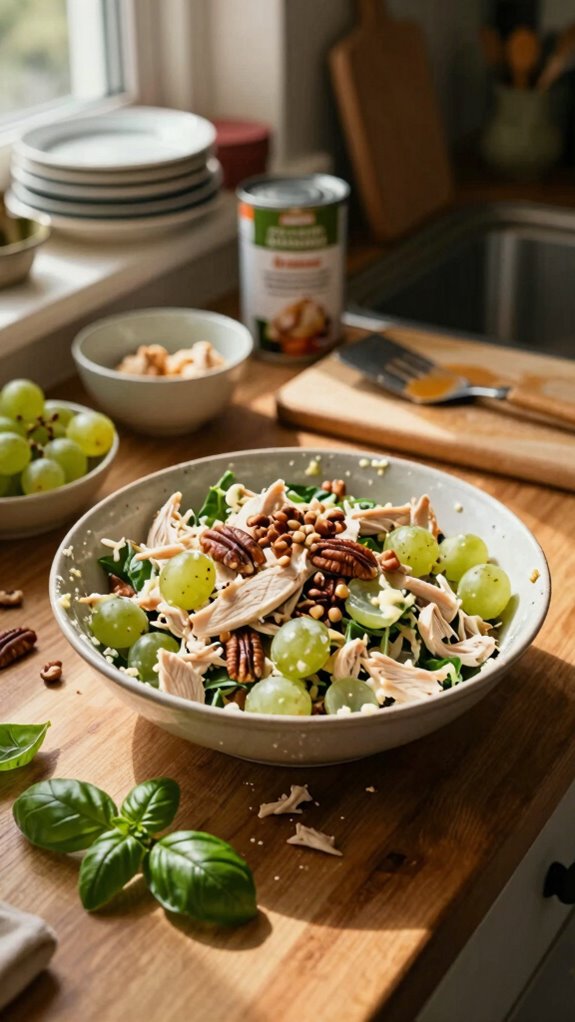
Chicken salad with grapes and pecans is a refreshing and satisfying dish that combines tender canned chicken, sweet grapes, and crunchy pecans. Perfect for a light lunch or as a filling for sandwiches, this salad is both nutritious and delicious, making it a versatile option for any meal.
| Total Time | Difficulty | Number of Servings | Main Ingredient / Unique Feature |
|---|---|---|---|
| 20 minutes | Easy | 4 | Canned Chicken with Grapes and Pecans |
This chicken salad recipe is easy to prepare, taking only 20 minutes in total. It is perfect for both novice cooks and seasoned chefs looking for a quick and tasty meal solution. To achieve the best flavor, ensure you mix the chicken thoroughly with the dressing and other ingredients, allowing the flavors to meld together.
| Ingredients | Quantity |
|---|---|
| Canned chicken | 2 (12.5 oz) cans |
| Red grapes (halved) | 1 cup |
| Pecans (chopped) | 1/2 cup |
| Mayonnaise | 1/2 cup |
| Greek yogurt | 1/4 cup |
| Celery (finely chopped) | 1 stalk |
| Lemon juice | 1 tablespoon |
| Salt | to taste |
| Pepper | to taste |
You can customize this chicken salad by adding different ingredients like apples or dried cranberries for extra sweetness, or substituting walnuts for pecans to alter the flavor. For a tangy twist, consider adding a splash of Dijon mustard or using flavored mayonnaise.
| Kitchen Tool | Use in Recipe |
|---|---|
| Mixing bowl | Combine all ingredients |
| Spoon | Mix salad until evenly coated |
| Knife | Chop celery and fruit |
| Measuring cups | Measure mayonnaise and yogurt |
| Cutting board | Provide a surface for chopping ingredients |
| Serving bowl | Present the final salad |
Cooking Instructions:
- Begin by draining the canned chicken and placing it in a mixing bowl.
- Add the halved grapes, chopped pecans, finely chopped celery, mayonnaise, Greek yogurt, lemon juice, salt, and pepper to the bowl.
- Using a spoon, mix all ingredients together until the chicken is evenly coated with the mayonnaise and yogurt.
- Taste and adjust seasoning if necessary, adding more salt or pepper as desired.
- Cover the bowl and refrigerate the chicken salad for at least 10 minutes to allow the flavors to meld.
- Serve the salad chilled.
To present the chicken salad beautifully, consider serving it on a bed of mixed greens or in halved avocado halves. Garnish with a sprinkle of chopped pecans or fresh herbs for an appealing touch.
This chicken salad pairs wonderfully with whole grain crackers or a side of fresh fruit for a balanced meal. Refreshing drinks like iced tea or lemonade complement the dish perfectly and enhance its lightness.
Cheesy Canned Chicken Quesadillas
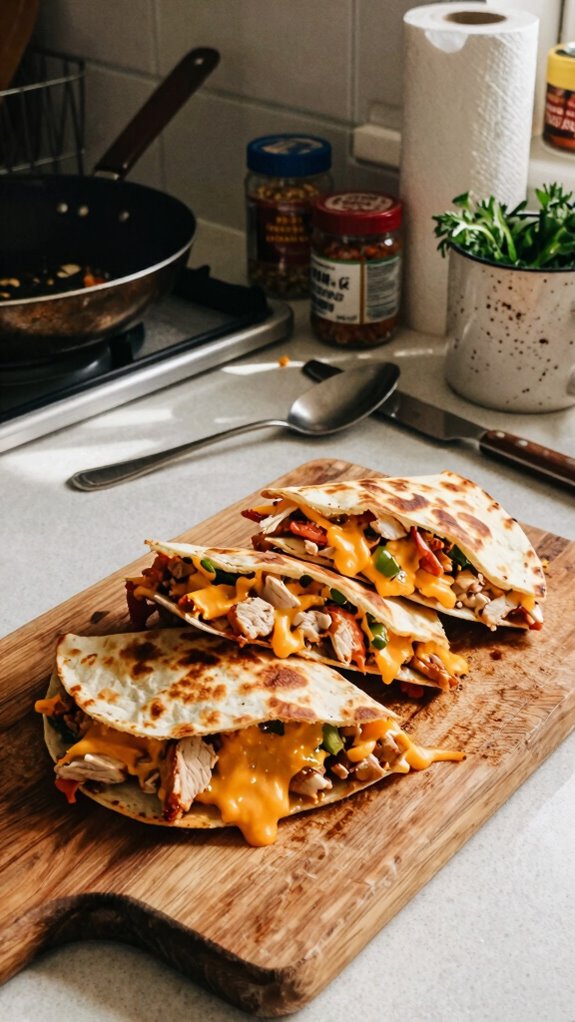
Cheesy canned chicken quesadillas are a delicious and quick meal option that combines tender canned chicken with gooey cheese, all perfectly folded in a crispy tortilla. These quesadillas are not only easy to make but also customizable, making them great for a simple lunch, dinner, or even as an appetizer for gatherings.
| Total Time | Difficulty | Number of Servings | Main Ingredient / Unique Feature |
|---|---|---|---|
| 25 minutes | Easy | 4 | Canned Chicken and Cheese Quesadillas |
This recipe requires 25 minutes total, consisting of only 10 minutes of preparation time and 15 minutes of cooking time. It’s rated easy, making it perfect for any cook, whether you are a beginner or an experienced chef. For the best results, make sure to cook the quesadillas over medium heat to achieve a golden crispy exterior while ensuring the cheese melts beautifully.
| Ingredients | Quantity |
|---|---|
| Canned chicken | 2 (12.5 oz) cans |
| Flour tortillas | 4 large |
| Shredded cheddar cheese | 2 cups |
| Bell pepper (sliced) | 1 medium |
| Onion (sliced) | 1 small |
| Olive oil | 2 tablespoons |
| Taco seasoning | 1 tablespoon |
| Salt | to taste |
| Pepper | to taste |
You can customize these quesadillas by adding different ingredients such as black beans, corn, or jalapeños for extra flavor and spice. Additionally, you can use different types of cheese, such as pepper jack or Monterey jack, to suit your taste preferences.
| Kitchen Tool | Use in Recipe |
|---|---|
| Skillet | Cook the quesadillas |
| Spatula | Flip and remove quesadillas |
| Mixing bowl | Combine canned chicken and seasonings |
| Knife | Slice bell pepper and onion |
| Measuring spoons | Measure olive oil and taco seasoning |
| Serving plate | Present finished quesadillas |
Cooking Instructions:
- Start by draining the canned chicken and placing it in a mixing bowl. Add the taco seasoning, salt, and pepper, then mix until well combined.
- Heat olive oil in a large skillet over medium heat.
- Add sliced onions and bell peppers to the skillet, sautéing until they are soft and slightly caramelized, about 5 minutes. Remove from the skillet and set aside.
- In the same skillet, place one tortilla and sprinkle half of the shredded cheese over one half of the tortilla.
- Layer half of the seasoned canned chicken mixture on top of the cheese, followed by half of the sautéed vegetables. Top with more cheese and fold the tortilla in half.
- Cook the quesadilla for about 3-4 minutes on each side or until golden brown and the cheese is melted. Repeat with the remaining tortillas and filling.
- Once cooked, remove the quesadillas from the skillet and let them cool for a minute before slicing them into wedges.
Serving and Presentation:
To serve the quesadillas, arrange the wedges on a large serving plate, optionally garnishing with fresh cilantro or sliced avocados for added color and flavor. Pair with salsa, guacamole, or sour cream on the side for a delightful dipping experience.
Pairing Suggestions:
These cheesy canned chicken quesadillas pair wonderfully with a refreshing side salad or some tortilla chips. For drinks, consider serving them with a chilled Mexican beer, lemonade, or a vibrant margarita to complement the flavors beautifully.
Creamy Chicken and Rice Skillet

Creamy Chicken and Rice Skillet is a comforting one-pan dish that brings together tender canned chicken, fluffy rice, and a rich, creamy sauce. It’s a perfect solution for busy weeknight dinners, offering a satisfying meal that is both hearty and delicious without requiring extensive cooking skills.
| Total Time | Difficulty | Number of Servings | Main Ingredient / Unique Feature |
|---|---|---|---|
| 30 minutes | Easy | 4 | Creamy rice dish with canned chicken |
This recipe is rated easy and can be prepared in just 30 minutes, with 10 minutes of prep time and 20 minutes of cooking time. It’s perfect for beginners, and while it comes together quickly, make sure to keep an eye on the rice to achieve the perfect creamy consistency without it becoming too soft.
| Ingredients | Quantity |
|---|---|
| Canned chicken | 2 (12.5 oz) cans |
| Long-grain rice | 1 cup |
| Chicken broth | 2 cups |
| Cream of chicken soup | 1 can (10.5 oz) |
| Frozen peas | 1 cup |
| Olive oil | 2 tablespoons |
| Garlic (minced) | 2 cloves |
| Onion (chopped) | 1 small |
| Salt | to taste |
| Pepper | to taste |
| Italian seasoning | 1 teaspoon |
You can vary this dish by incorporating different vegetables, such as carrots or spinach, or adding some herbs like parsley or thyme for extra flavor. For a twist, experiment with different types of canned soups, such as cream of mushroom or cheddar cheese soup.
| Kitchen Tool | Use in Recipe |
|---|---|
| Skillet | Cook the chicken and rice mixture |
| Spatula | Stir the ingredients |
| Measuring cups | Measure rice and chicken broth |
| Measuring spoons | Measure olive oil and seasonings |
| Knife | Chop onion and mince garlic |
| Serving spoon | Serve the creamy chicken and rice |
Cooking Instructions:
- In a large skillet, heat olive oil over medium heat. Add chopped onions and minced garlic, and sauté until the onions are translucent.
- Stir in the uncooked rice, allowing it to toast slightly in the skillet for about 2 minutes.
- Next, pour in the chicken broth and bring the mixture to a boil. Reduce heat to low and cover, allowing it to simmer for 15 minutes or until the rice is cooked and has absorbed the liquid.
- Once the rice is cooked, stir in the canned chicken, cream of chicken soup, frozen peas, Italian seasoning, salt, and pepper. Combine until everything is well incorporated and heated throughout.
- Remove from heat and let the skillet sit, covered, for a few minutes to thicken the sauce.
To serve the Creamy Chicken and Rice Skillet, dish it into bowls or onto plates, and garnish with freshly chopped parsley or a sprinkle of black pepper for added color. For added flair, serve with crusty bread or a side salad.
For the best dining experience, pair this dish with a refreshing green salad or some steamed vegetables. A chilled glass of white wine, like Sauvignon Blanc, or a light lemonade works beautifully to complement the creamy flavors of the dish.
Spicy Buffalo Chicken Dip
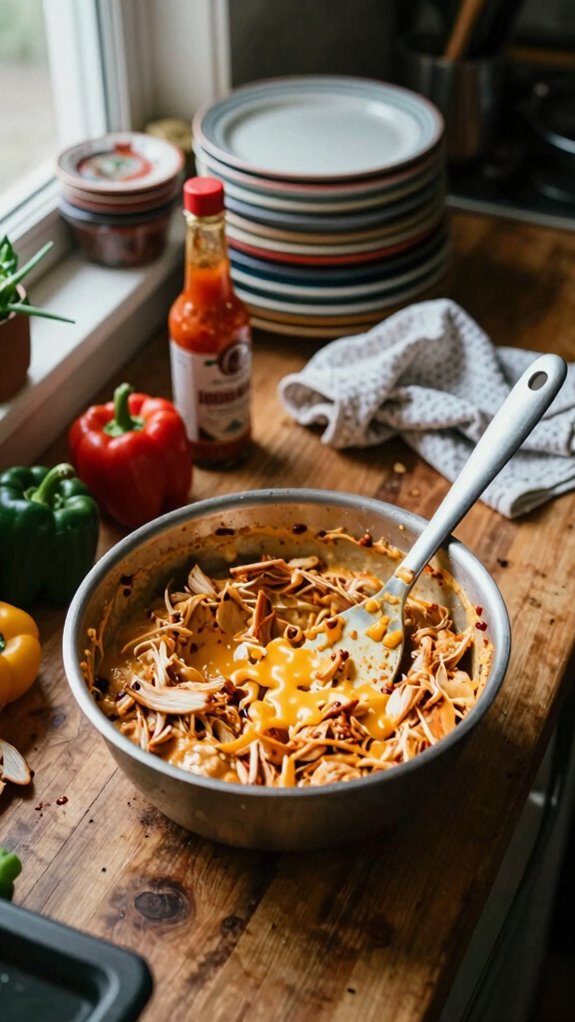
Spicy Buffalo Chicken Dip is a creamy, zesty appetizer that’s perfect for game day or any gathering. It combines the flavors of classic buffalo wings in a dip form, featuring canned chicken, cream cheese, and hot sauce. This dip is perfect for serving with tortilla chips, celery sticks, or crackers, making it a crowd-pleaser that’s easy to prepare.
| Total Time | Difficulty | Number of Servings | Main Ingredient / Unique Feature |
|---|---|---|---|
| 30 minutes | Easy | 6 | Creamy dip with canned chicken and buffalo sauce |
This Spicy Buffalo Chicken Dip is rated easy and can be prepared in just 30 minutes, with 10 minutes of prep time and 20 minutes of cooking time. It’s approachable for beginners, and simple enough that you can easily adjust the level of spiciness to your preference. Keep an eye on the dip as it cooks to ensure it doesn’t become too thick, and stir frequently for an even texture.
| Ingredients | Quantity |
|---|---|
| Canned chicken | 2 (12.5 oz) cans |
| Cream cheese | 1 (8 oz) package |
| Buffalo hot sauce | 1/2 cup |
| Ranch dressing | 1/2 cup |
| Shredded cheddar cheese | 1 cup |
| Green onions (chopped) | 2 tablespoons |
You can customize this dip by incorporating different types of cheese, such as blue cheese or pepper jack for added flavor. Additionally, consider using different heat levels of buffalo sauce, or mix in some finely chopped jalapeños to increase the spice. For a creamier dip, you could add sour cream or Greek yogurt.
| Kitchen Tool | Use in Recipe |
|---|---|
| Mixing Bowl | Combine all ingredients |
| Spatula | Stir and mix the ingredients evenly |
| Measuring Cups | Measure hot sauce and ranch dressing |
| Knife | Chop green onions |
| Baking Dish | Bake the dip in the oven |
| Oven | Cook the dip until bubbly and heated through |
Cooking Instructions:
- Preheat your oven to 350°F (175°C).
- In a mixing bowl, combine the canned chicken (drained), cream cheese, buffalo hot sauce, ranch dressing, and half of the shredded cheddar cheese. Mix until well combined.
- Transfer the mixture to a baking dish and spread it evenly.
- Sprinkle the remaining cheddar cheese on top of the dip.
- Bake in the preheated oven for about 20 minutes or until the dip is bubbling and the cheese is melted.
- Remove from the oven and let it cool for a couple of minutes before serving. Garnish with chopped green onions.
To serve your Spicy Buffalo Chicken Dip, transfer it to a warm serving dish and pair it with an assortment of dippables like tortilla chips, celery sticks, carrot sticks, or pita chips. You can also provide small bowls for guests to scoop their portions.
This hearty dip pairs beautifully with a variety of sides and beverages. Consider serving it alongside crunchy vegetable platters for a fresh contrast. For drinks, light beers or cocktails such as a classic mojito or a tangy margarita balance out the dip’s spice and richness, making for a deliciously satisfying spread.
Canned Chicken Tacos
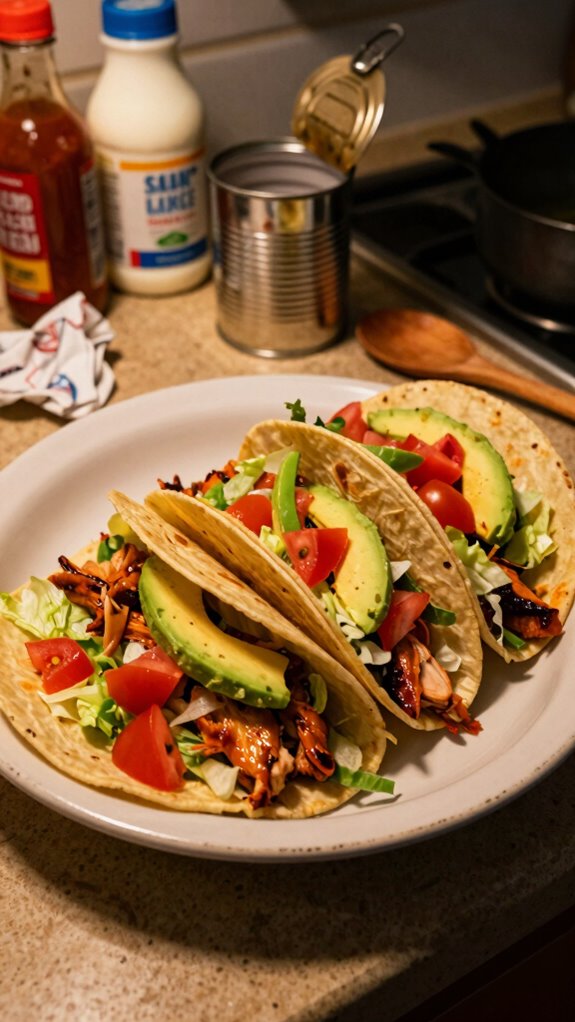
Canned Chicken Tacos are a quick and convenient meal option that’s perfect for busy weeknights. Using canned chicken, this recipe combines a variety of fresh ingredients to create flavor-packed tacos that are not only easy to make, but also customizable to suit everyone’s taste preferences. Serve them with your favorite toppings for a satisfying meal in minutes.
| Total Time | Difficulty | Number of Servings | Main Ingredient / Unique Feature |
|---|---|---|---|
| 20 minutes | Easy | 4 | Quick tacos with canned chicken and fresh toppings |
This recipe is rated easy, requiring just 10 minutes of prep time and 10 minutes of cooking time. It’s perfect for beginners, and the quick assembly makes it suitable for anyone looking to whip up a delicious meal in no time. Feel free to be creative with toppings and seasonings to make the dish truly your own.
| Ingredients | Quantity |
|---|---|
| Canned chicken | 2 (12.5 oz) cans |
| Taco seasoning | 1 packet (1 oz) |
| Tortillas | 8 (soft or hard) |
| Shredded lettuce | 1 cup |
| Diced tomatoes | 1 cup |
| Shredded cheese | 1 cup |
| Sour cream | 1/2 cup |
| Salsa | 1/2 cup |
| Avocado (optional) | 1, sliced |
For variations, you can add or substitute ingredients based on personal preference. Consider using corn, beans, or different types of cheese such as feta or pepper jack. You could also mix in some sautéed peppers and onions for extra flavor. If you’re looking for a healthier option, try using whole wheat tortillas or a lettuce wrap instead of traditional taco shells.
| Kitchen Tool | Use in Recipe |
|---|---|
| Skillet | Heat the canned chicken and seasonings |
| Mixing Spoon | Stir ingredients together |
| Measuring Cup | Measure sour cream and salsa |
| Cutting Board | Chop vegetables and toppings |
| Knife | Slice avocado and other toppings |
| Serving Plate | Present the assembled tacos |
Cooking Instructions:
- Drain the canned chicken and place it in a skillet over medium heat.
- Add the taco seasoning and a splash of water to the skillet, mixing well to combine.
- Heat the mixture for about 5-7 minutes until it is warmed through and slightly thickened, stirring occasionally.
- While the chicken is heating, prepare your toppings: chop the lettuce, dice the tomatoes, and slice the avocado if using.
- Warm the tortillas in a separate pan or microwave until pliable, about 30 seconds.
- Assemble the tacos by placing the chicken mixture on each tortilla and adding your desired toppings (lettuce, tomatoes, cheese, sour cream, salsa, and avocado).
- Serve immediately, garnishing with any additional toppings if desired.
To serve Canned Chicken Tacos in the best way, present the tacos on a colorful platter, arranged neatly with each ingredient available for guests to customize their own tacos. You can also add a sprinkle of fresh cilantro or lime wedges on the side for an extra pop of freshness.
Canned Chicken Tacos pair well with side dishes like Mexican-style rice, black beans, or corn salad for a complete meal. For drinks, consider serving them with a refreshing margarita, iced tea, or a light Mexican beer for a delightful experience that complements the flavors of the tacos.