I’ve been thinking a lot about healthy light dinners lately. It’s easy to fall into the same routine, but there are so many delicious options that can provide a refreshing change. From protein-packed dishes to vibrant veggie creations, I’ve compiled a few recipes that not only nourish but also satisfy. If you’re curious to discover these flavorful options and transform your dinner game, keep following along.
Grilled Lemon Herb Chicken With Quinoa Salad
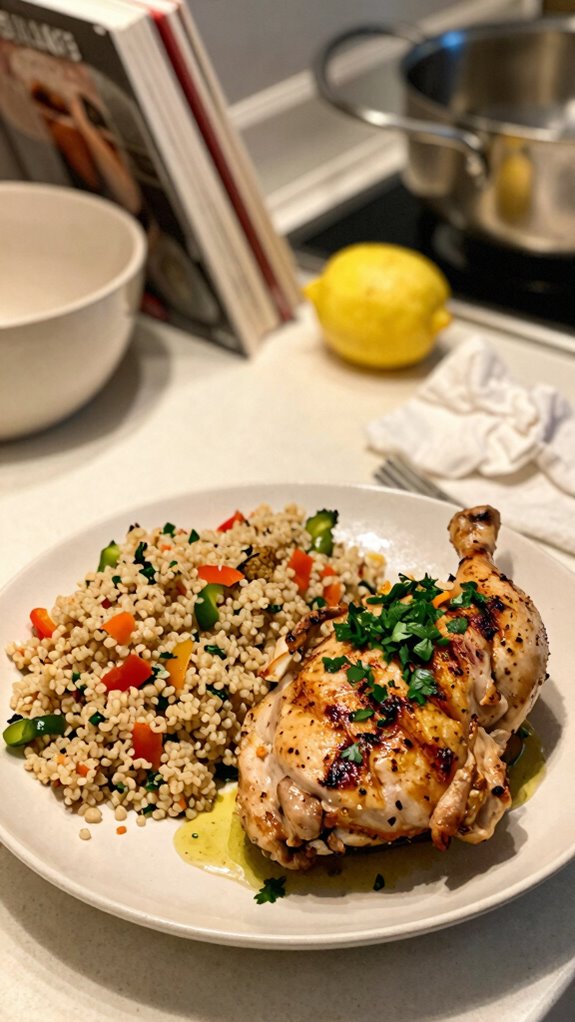
This recipe for Grilled Lemon Herb Chicken with Quinoa Salad is a flavorful and healthy dish that combines the bright zest of lemon and aromatic herbs with juicy grilled chicken. Paired with a nutritious quinoa salad, it’s a perfect dinner option that’s both satisfying and refreshing.
| Total time | Difficulty | Number of servings | Main ingredient/unique feature |
|---|---|---|---|
| 40 minutes | Easy | 4 | Grilled chicken marinated in lemon and herbs |
This recipe is of easy difficulty, making it accessible for home cooks of all skill levels. The total preparation and cooking time is 40 minutes, with 15 minutes for prep and 25 minutes for cooking. For best results, marinate the chicken for at least 30 minutes prior to grilling to enhance the flavors.
| Ingredients | Quantity |
|---|---|
| Chicken breasts | 4 (about 1.5 lbs) |
| Quinoa | 1 cup |
| Olive oil | 3 tablespoons |
| Lemon juice | 2 tablespoons |
| Garlic | 2 cloves, minced |
| Fresh herbs (parsley, thyme, or basil) | 1/4 cup, chopped |
| Salt | 1 teaspoon |
| Black pepper | 1/2 teaspoon |
| Cherry tomatoes | 1 cup |
| Cucumber | 1, diced |
| Red onion | 1/2, diced |
For variations, you can try using different proteins like shrimp or tofu in place of chicken, or switch up the quinoa salad by adding ingredients like feta cheese, bell peppers, or avocado for added flavor and texture.
| Kitchen Tool | Purpose |
|---|---|
| Grill | For cooking the chicken to achieve smokey flavors. |
| Mixing bowl | To combine marinade and salad ingredients. |
| Measuring cups | To accurately measure quinoa and liquid ingredients. |
| Knife | For chopping herbs and vegetables. |
| Cutting board | To provide a safe surface for cutting. |
| Pot | For cooking quinoa on the stove. |
Cooking Steps Instructions
- Prepare the Marinade: In a mixing bowl, combine olive oil, lemon juice, minced garlic, chopped herbs, salt, and black pepper.
- Marinate the Chicken: Place the chicken breasts in the bowl with the marinade, coat well, and let sit for at least 30 minutes (or up to 2 hours in the fridge).
- Cook the Quinoa: In a pot, add 1 cup of quinoa and 2 cups of water. Bring to a boil, reduce heat, cover, and let simmer for 15 minutes until water is absorbed. Fluff with a fork and let it cool.
- Grill the Chicken: Preheat the grill to medium-high heat. Grill the marinated chicken for about 6-7 minutes on each side or until fully cooked and juices run clear.
- Prepare the Salad: In a large bowl, combine cooled quinoa, cherry tomatoes, diced cucumber, and red onion. Drizzle with olive oil and lemon juice, season with salt and pepper, and toss lightly.
- Serve Together: Slice the grilled chicken and serve it atop the quinoa salad, garnishing with extra herbs if desired.
To serve and present the dish elegantly, plate the quinoa salad in a large, shallow bowl and arrange the grilled chicken slices on top. Drizzle with any remaining marinade or a light lemon vinaigrette for added flavor, and consider garnishing with fresh herbs or lemon wedges.
This Grilled Lemon Herb Chicken pairs beautifully with side dishes such as steamed broccoli, grilled asparagus, or a light mixed greens salad. For drinks, a crisp white wine like Sauvignon Blanc or a refreshing iced herbal tea would complement the flavors of the dish nicely.
Zucchini Noodles With Pesto and Cherry Tomatoes
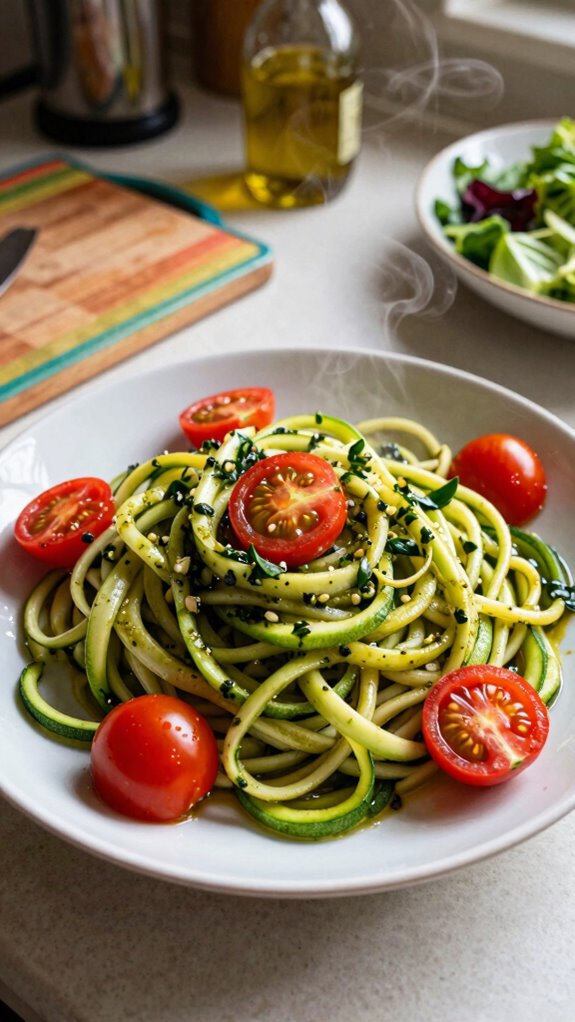
Zucchini Noodles with Pesto and Cherry Tomatoes is a light and refreshing dish that makes for a perfect healthy dinner option. This recipe features spiralized zucchini, also known as “zoodles,” which serve as a low-carb alternative to traditional pasta. Tossed with vibrant pesto and sweet cherry tomatoes, this dish is not only flavorful but also visually appealing.
| Total time | Difficulty | Number of servings | Main ingredient/unique feature |
|---|---|---|---|
| 30 minutes | Easy | 4 | Zucchini noodles topped with fresh pesto |
This recipe is straightforward and easy, making it suitable for cooks of any level. The total preparation and cooking time is about 30 minutes, consisting of 10 minutes for prep and 20 minutes for cooking. For the best flavor, use freshly made pesto if possible, and remember not to overcook the zucchini to maintain its texture.
| Ingredients | Quantity |
|---|---|
| Zucchini | 4 medium |
| Olive oil | 2 tablespoons |
| Pesto | 1 cup |
| Cherry tomatoes | 1 cup |
| Salt | To taste |
| Black pepper | To taste |
| Grated Parmesan cheese | 1/4 cup |
| Fresh basil | For garnish |
To add variations to this dish, consider adding cooked shrimp or grilled chicken for added protein. You can also substitute different vegetables such as bell peppers or spinach, and experiment with different varieties of pesto, like sun-dried tomato pesto or spinach pesto.
| Kitchen Tool | Purpose |
|---|---|
| Spiralizer | For creating zucchini noodles. |
| Knife | For chopping cherry tomatoes and herbs. |
| Cutting board | To provide a stable surface for cutting. |
| Skillet | For sautéing the zoodles and heating the pesto. |
| Measuring cups | For accurately measuring coat ingredients. |
| Ladle | For serving the finished dish. |
Cooking Steps Instructions
- Spiralize the Zucchini: Use a spiralizer to turn the zucchini into noodles. If you don’t have a spiralizer, you can use a vegetable peeler to create thin ribbons.
- Prepare the Skillet: Heat olive oil in a large skillet over medium heat.
- Sauté the Zoodles: Add the spiralized zucchini to the skillet and sauté for about 2-3 minutes. Make sure they’re tender but still slightly crisp.
- Add Pesto and Tomatoes: Stir in the pesto and cherry tomatoes, cooking for additional 2-3 minutes until heated through.
- Season: Add salt and black pepper to taste, combining everything evenly.
- Serve: Remove from heat and sprinkle with grated Parmesan cheese before serving.
To serve and present the Zucchini Noodles with Pesto and Cherry Tomatoes, place the noodles on a plate or in a bowl, and garnish with fresh basil leaves for a pop of color and flavor. Drizzle a little olive oil on top for added richness, and scatter extra Parmesan cheese.
This dish pairs well with a light side salad or some crispy garlic bread for a more complete meal. As for beverages, a chilled glass of Sauvignon Blanc or even sparkling water with lemon can complement the fresh flavors beautifully.
Quinoa-Stuffed Bell Peppers
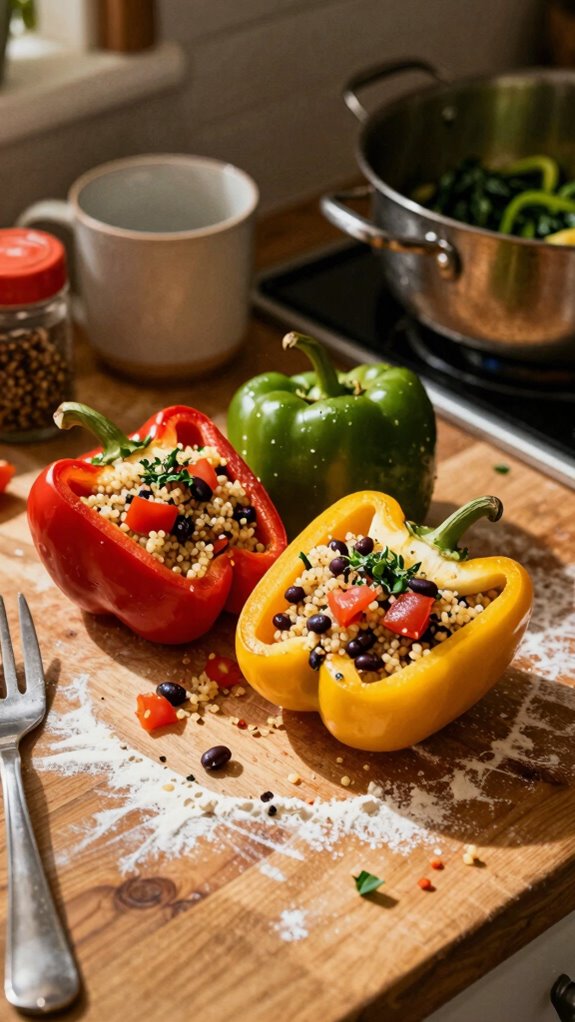
Quinoa-Stuffed Bell Peppers are a nutritious and colorful dish that makes for an excellent healthy dinner choice. This recipe combines hearty quinoa with a medley of vegetables and spices, all packed within bell peppers that are baked to perfection. It’s a complete meal that is not only satisfying but also rich in protein, fiber, and essential vitamins.
| Total time | Difficulty | Number of servings | Main ingredient/unique feature |
|---|---|---|---|
| 45 minutes | Easy | 4 | Bell peppers stuffed with quinoa and vegetables |
This recipe is quite simple, making it suitable for cooks of all skill levels. The total preparation time is about 15 minutes, followed by a cooking time of around 30 minutes. To enhance the flavor, ensure that you season the quinoa mixture well and feel free to experiment with different spices and herbs to personalize the dish.
| Ingredients | Quantity |
|---|---|
| Bell peppers | 4 large |
| Quinoa | 1 cup (uncooked) |
| Vegetable broth | 2 cups |
| Onion | 1, diced |
| Garlic | 2 cloves, minced |
| Black beans | 1 can (15 oz), drained and rinsed |
| Corn | 1 cup |
| Cumin | 1 teaspoon |
| Chili powder | 1 teaspoon |
| Salt | To taste |
| Black pepper | To taste |
| Olive oil | 1 tablespoon |
| Fresh cilantro | For garnish |
| Cheese (optional) | 1/2 cup, shredded |
For variations, you may add additional vegetables like diced tomatoes or spinach to the quinoa mixture. You can also change up the protein by incorporating ground turkey or beef instead of black beans for a heartier option. Consider using different types of cheese, such as feta or mozzarella, for different flavor profiles.
| Kitchen Tool | Purpose |
|---|---|
| Oven | For baking the stuffed peppers at the end. |
| Pot | For cooking the quinoa in vegetable broth. |
| Skillet | For sautéing onions and garlic. |
| Spoon | For mixing the stuffing ingredients. |
| Knife | For chopping vegetables. |
| Baking dish | For holding the stuffed peppers while baking. |
Cooking Steps Instructions
- Cook the Quinoa: In a pot, bring the vegetable broth to a boil and add the quinoa. Reduce heat, cover, and simmer for 15 minutes until the quinoa is fluffy.
- Preheat Oven: Preheat your oven to 375°F (190°C).
- Sauté Aromatics: In a skillet, heat olive oil over medium heat. Add the diced onion and minced garlic, cooking until translucent.
- Combine Ingredients: In a large bowl, combine the cooked quinoa, sautéed onions and garlic, black beans, corn, cumin, chili powder, salt, and pepper. Mix well.
- Prepare Bell Peppers: Slice the tops off the bell peppers and remove the seeds. Place them upright in a baking dish.
- Stuff the Peppers: Spoon the quinoa mixture into each bell pepper until they are filled to the top.
- Bake: Cover the dish with foil and bake in the preheated oven for 25 minutes. Remove the foil and bake for an additional 5-10 minutes to slightly char the tops if desired.
- Garnish: Remove from the oven, and sprinkle fresh cilantro over the stuffed peppers. Add cheese on top if using, allowing it to melt slightly.
To present the dish in the best possible way, arrange the stuffed peppers upright on a serving platter. Drizzle a little olive oil around the base and garnish with some additional fresh cilantro or a side salad for color and freshness.
For an enjoyable dining experience, pair the quinoa-stuffed bell peppers with a refreshing side salad and a light herbal tea or sparkling water. If you prefer a wine pairing, opt for a crisp white wine like Sauvignon Blanc that complements the flavors without overpowering them.
Baked Salmon With Asparagus and Lemon
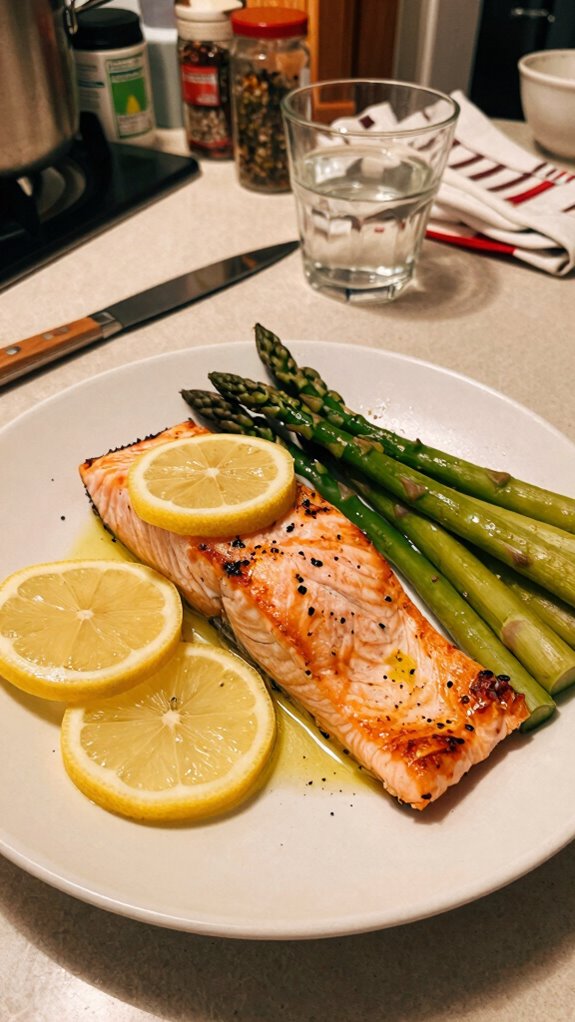
Baked Salmon with Asparagus and Lemon is a delightful and healthy dish that combines the rich flavors of salmon and the crispness of asparagus, all enhanced with the bright notes of fresh lemon. This one-pan meal is not only quick to prepare but is also packed with omega-3 fatty acids, vitamins, and minerals, making it a perfect choice for a nutritious dinner.
| Total time | Difficulty | Number of servings | Main ingredient/unique feature |
|---|---|---|---|
| 30 minutes | Easy | 2 | Salmon baked with asparagus and lemon |
The recipe is very straightforward, making it accessible for cooks of all skill levels. With approximately 10 minutes of preparation time followed by a cooking time of 20 minutes, you can have this healthy dish ready in half an hour. For best results, ensure that the salmon is seasoned well and keep an eye on the asparagus to avoid overcooking.
| Ingredients | Quantity |
|---|---|
| Salmon fillets | 2 (about 6 oz each) |
| Asparagus | 1 bunch |
| Olive oil | 2 tablespoons |
| Lemon | 1, juiced and sliced |
| Garlic | 2 cloves, minced |
| Salt | To taste |
| Black pepper | To taste |
| Fresh parsley | For garnish |
For variations, you can add different vegetables such as cherry tomatoes or bell peppers to the baking sheet for an extra burst of color and flavor. Additionally, you might consider marinating the salmon in different herbs or spices beforehand, such as dill, rosemary, or a soy sauce mixture, to add new dimensions to the taste.
| Kitchen Tool | Purpose |
|---|---|
| Baking sheet | For baking the salmon and asparagus together. |
| Parchment paper | To line the baking sheet for easy cleanup. |
| Knife | For slicing lemon and trimming asparagus. |
| Cutting board | To chop garlic and prepare ingredients. |
| Mixing bowl | For mixing olive oil, garlic, and seasonings. |
| Tongs | For flipping or removing the asparagus and salmon. |
Cooking Steps:
- Preheat your oven to 400°F (200°C).
- Line a baking sheet with parchment paper for easy cleanup.
- Place the asparagus on the baking sheet, and drizzle with 1 tablespoon of olive oil. Toss to coat and arrange in a single layer.
- In a small mixing bowl, combine the remaining olive oil, minced garlic, salt, and black pepper.
- Pat the salmon fillets dry, then brush the olive oil mixture over the top and sides.
- Lay the seasoned salmon fillets on top of the asparagus on the baking sheet.
- Squeeze the juice of half the lemon over the salmon and asparagus, then place the lemon slices on top of the salmon.
- Bake in the preheated oven for 15-20 minutes, or until the salmon is cooked through and flakes easily with a fork.
- Remove from the oven and garnish with fresh parsley.
Serving Suggestions:
To present the dish beautifully, serve the baked salmon and asparagus on a large platter, ensuring the bright lemon slices are visible for a pop of color. You can also drizzle any remaining juices from the baking sheet over the dish for added flavor and moisture. Consider serving it alongside a wedge of lemon for guests to add more zest.
Pairing Suggestions:
Baked Salmon with Asparagus and Lemon pairs well with sides such as a fresh garden salad, steamed brown rice, or quinoa. For drinks, crisp white wines like Sauvignon Blanc or a light Pinot Grigio complement the flavors of the salmon beautifully, while sparkling water with lemon provides a refreshing non-alcoholic option.
Moroccan Chickpea Stew
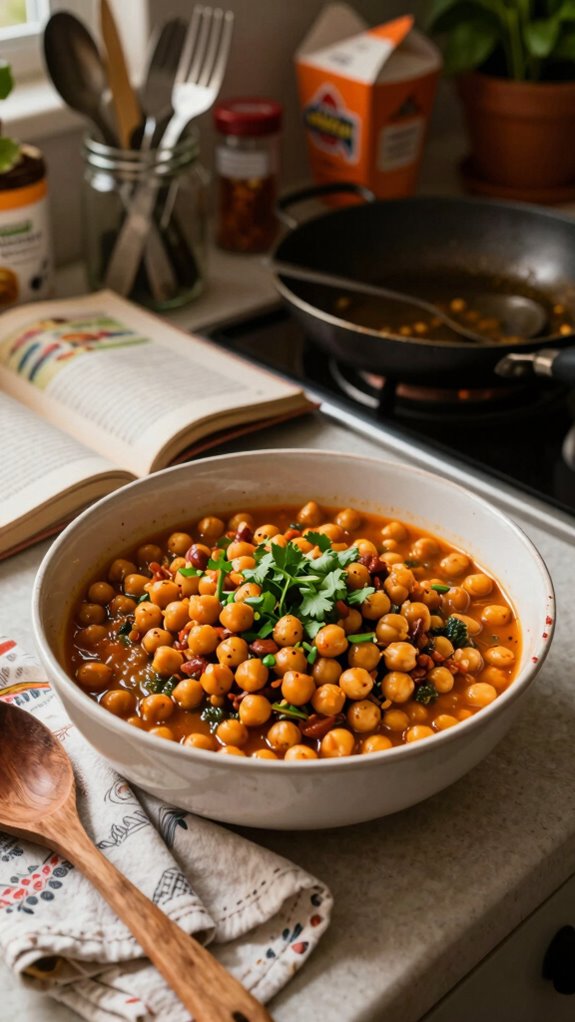
Moroccan Chickpea Stew is a wholesome and aromatic dish brimming with vibrant spices and hearty vegetables. Perfect for a light dinner, this stew is packed with plant-based protein from chickpeas and fiber from various vegetables, making it both satisfying and nourishing. With a rich blend of spices such as cumin, coriander, and cinnamon, this dish transports your taste buds to North Africa.
| Total time | Difficulty | Number of servings | Main ingredient/unique feature |
|---|---|---|---|
| 40 minutes | Easy | 4 | Chickpeas in a spiced tomato base |
This Moroccan Chickpea Stew is easy to prepare and perfect for all cooking levels. With only about 10 minutes needed for prep and 30 minutes for cooking, you can have this delicious meal ready in under an hour. To enhance the flavor, let the stew simmer so that the spices meld beautifully. It’s essential to taste and adjust the seasonings for a dish that’s perfectly suited to your palate.
| Ingredients | Quantity |
|---|---|
| Olive oil | 2 tablespoons |
| Onion | 1, chopped |
| Garlic | 3 cloves, minced |
| Carrot | 1, diced |
| Bell pepper | 1, diced |
| Canned chickpeas | 2 cans (15 oz each), drained and rinsed |
| Diced tomatoes | 1 can (15 oz) |
| Vegetable broth | 2 cups |
| Cumin | 1 tablespoon |
| Ground coriander | 1 teaspoon |
| Ground cinnamon | 1/2 teaspoon |
| Salt | To taste |
| Black pepper | To taste |
| Fresh cilantro | For garnish |
For variations, consider adding sweet potatoes or zucchini for added texture; you can also incorporate different spices such as smoked paprika or harissa for an extra kick. Adjusting the liquid by adding coconut milk can give the stew a creamier consistency, while adding a handful of spinach or kale towards the end of cooking will boost the nutritional value.
| Kitchen Tool | Purpose |
|---|---|
| Large pot | For cooking the stew. |
| Wooden spoon | For stirring ingredients as they cook. |
| Knife | For chopping vegetables. |
| Cutting board | For preparing ingredients. |
| Measuring cups | For accurately measuring liquid ingredients. |
| Ladle | For serving the stew. |
Cooking Steps:
- Heat olive oil in a large pot over medium heat.
- Add chopped onion and sauté until translucent, about 3-4 minutes.
- Stir in minced garlic and cook for an additional minute until fragrant.
- Add diced carrot and bell pepper to the pot, cooking for 5-7 minutes until softened.
- Stir in the drained chickpeas, diced tomatoes, and vegetable broth.
- Mix in cumin, coriander, cinnamon, salt, and black pepper.
- Bring the stew to a simmer, then reduce to low heat and cover. Let it cook for 20-25 minutes, stirring occasionally.
- Taste and adjust seasonings as needed, then garnish with fresh cilantro before serving.
To serve and present the Moroccan Chickpea Stew, ladle the stew into deep bowls and sprinkle with fresh cilantro for a pop of color. This dish pairs beautifully with a slice of crusty bread or over a bed of fluffy couscous or quinoa, allowing for a satisfying meal.
Pair this comforting stew with a light salad such as a simple cucumber and tomato salad dressed with lemon juice, or serve alongside Moroccan flatbread. For drinks, a refreshing mint tea or a chilled glass of white wine would complement the dish perfectly.
Cauliflower Fried Rice
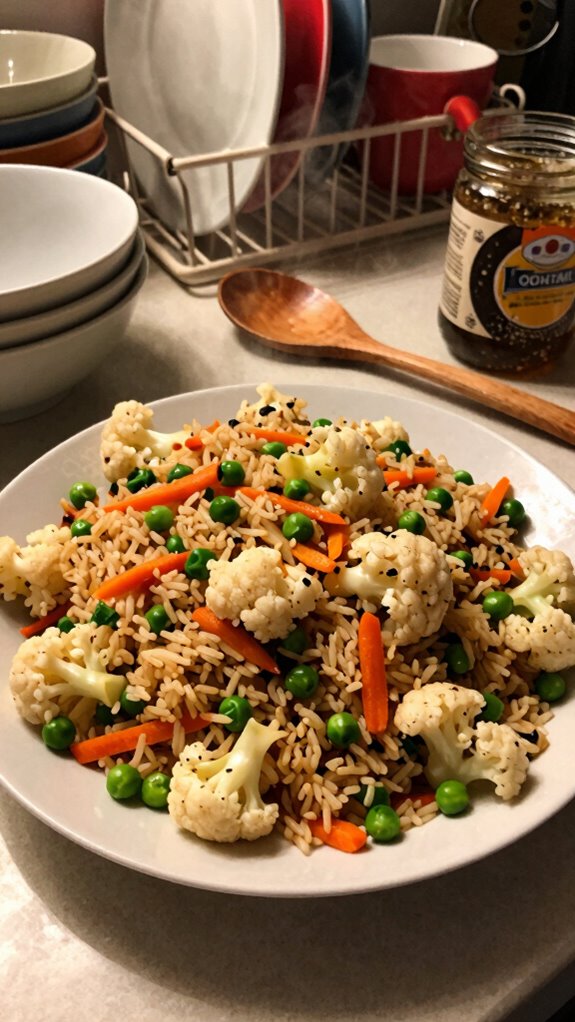
Cauliflower Fried Rice is a healthy twist on the classic fried rice dish, providing a light and nutritious alternative that is low in carbohydrates. Made from riced cauliflower instead of traditional rice, this dish offers a delightfully satisfying texture while packed with vegetables for added flavor and nutrients. It’s easy to customize with your favorite proteins, making it a versatile option for any dinner table.
| Total time | Difficulty | Number of servings | Main ingredient/unique feature |
|---|---|---|---|
| 30 minutes | Easy | 4 | Cauliflower as a rice substitute |
This recipe for Cauliflower Fried Rice is very accessible, designed for cooks of all skill levels. It takes about 10 minutes to prepare your ingredients and 20 minutes to cook, totaling just half an hour. The key to achieving the best flavor and texture is to cook the cauliflower until tender but still slightly crisp to avoid a mushy consistency.
| Ingredients | Quantity |
|---|---|
| Cauliflower | 1 large head |
| Olive oil | 2 tablespoons |
| Onion | 1, chopped |
| Garlic | 2 cloves, minced |
| Carrot | 1, diced |
| Peas | 1 cup |
| Green onions | 2, chopped |
| Soy sauce | 2 tablespoons |
| Eggs | 2, lightly beaten |
| Salt | To taste |
| Black pepper | To taste |
For variations, you can add your favorite proteins like cooked chicken, shrimp, or tofu to make the dish heartier. Feel free to mix in other colorful vegetables like bell peppers, broccoli, or snap peas to enhance both flavor and nutritional value. You may also substitute soy sauce with tamari or coconut aminos for a gluten-free option.
| Kitchen Tool | Purpose |
|---|---|
| Food processor | To rice the cauliflower quickly. |
| Large skillet | For sautéing and frying the ingredients. |
| Wooden spoon | For stirring the ingredients as they cook. |
| Knife | For chopping vegetables. |
| Cutting board | For preparing ingredients safely. |
| Bowls | For holding prepped ingredients and eggs. |
Cooking Steps:
- Prepare Cauliflower: Remove leaves and stem from the cauliflower, and cut it into florets. Using a food processor, pulse the florets until they resemble rice grains.
- Heat Oil: In a large skillet, heat olive oil over medium heat.
- Sauté Aromatics: Add chopped onion and minced garlic, sautéing until the onion is translucent and fragrant, about 3 minutes.
- Add Vegetables: Stir in the diced carrot and peas, cooking for an additional 3-4 minutes to soften.
- Cook Cauliflower Rice: Add the riced cauliflower to the skillet, stirring to combine. Cook for 5-7 minutes, or until the cauliflower is tender but still crisp. Season with salt and black pepper.
- Incorporate Eggs: Push the cauliflower mixture to one side of the skillet. In the empty space, pour the beaten eggs and scramble until fully cooked.
- Mix Together: Combine the scrambled eggs with the cauliflower mixture and stir in the green onions and soy sauce. Cook for another 2 minutes to heat through.
- Serve: Remove from heat and adjust seasonings if needed.
To serve this Cauliflower Fried Rice, spoon it onto a plate or into a bowl, garnishing with additional green onions for a pop of color. A drizzle of sesame oil or sprinkle of sesame seeds can also enhance the presentation and flavor.
Pair this dish with grilled chicken or shrimp for a complete meal. Refreshing beverages like iced green tea, a light white wine, or a citrus-infused sparkling water complement the flavors of the Cauliflower Fried Rice beautifully, making for a delightful and balanced dinner experience.
Spinach and Feta Omelette
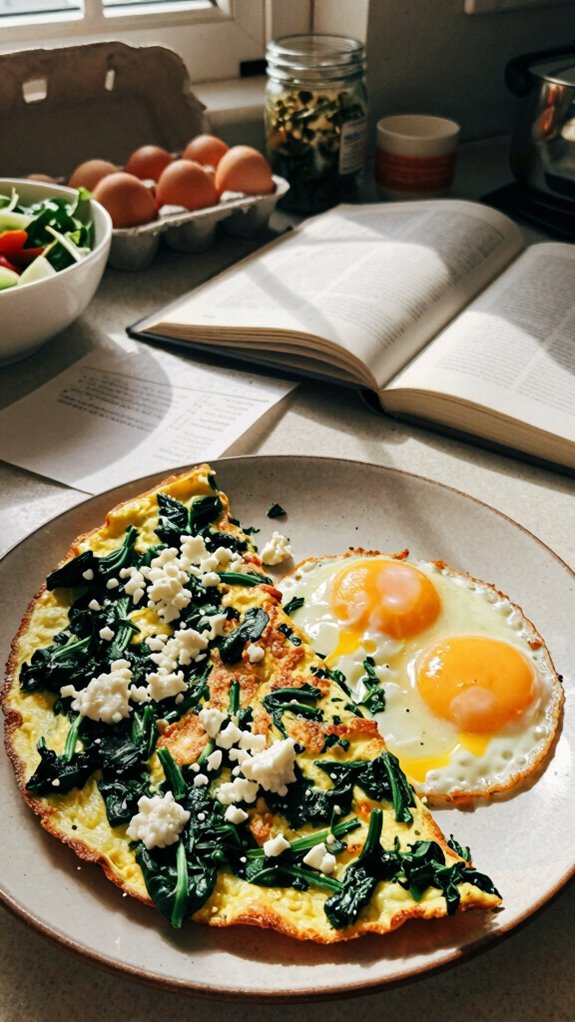
A Spinach and Feta Omelette is a light and nutritious dish, perfect for a healthy dinner option. This quick and simple recipe combines fresh spinach with creamy feta cheese and fluffy eggs, creating a delightful meal that is both satisfying and easy to prepare. It’s an excellent source of protein, vitamins, and minerals, making it an ideal choice for anyone looking for a healthy yet delicious option.
| Total time | Difficulty | Number of servings | Main ingredient/unique feature |
|---|---|---|---|
| 15 minutes | Easy | 2 | Spinach and feta cheese |
This Spinach and Feta Omelette is very easy to prepare, taking approximately 5 minutes to prep and 10 minutes to cook. The overall time from start to finish is just 15 minutes. Even beginners in the kitchen can successfully whip this up. For the best texture, cook the omelette on medium-low heat to ensure it cooks evenly without over-browning.
| Ingredients | Quantity |
|---|---|
| Eggs | 4 large |
| Fresh spinach | 2 cups, chopped |
| Feta cheese | 1/2 cup, crumbled |
| Olive oil | 1 tablespoon |
| Salt | To taste |
| Black pepper | To taste |
For variations, feel free to add other ingredients such as diced tomatoes, bell peppers, or cooked mushrooms for added flavor and nutrients. You can also swap feta with goat cheese or a dairy-free alternative if desired. For an extra kick, consider adding some herbs like oregano or basil.
| Kitchen Tool | Purpose |
|---|---|
| Mixing bowl | To whisk and combine the eggs. |
| Whisk | For mixing ingredients smoothly. |
| Non-stick skillet | For frying the omelette without sticking. |
| Spatula | For flipping and serving the omelette. |
| Knife | To chop spinach and other optional toppings. |
| Cutting board | For safe preparation of vegetables. |
Cooking Steps:
- Prepare the Ingredients: Chop the fresh spinach and crumble the feta cheese. Set aside.
- Whisk the Eggs: In a mixing bowl, crack the eggs, and add a pinch of salt and black pepper. Whisk until combined.
- Heat the Skillet: Place a non-stick skillet over medium-low heat and add olive oil, swirling it around to coat the surface.
- Cook the Spinach: Add the chopped spinach to the skillet and sauté for about 1-2 minutes, until wilted.
- Add the Eggs: Pour the whisked eggs over the sautéed spinach and let it cook undisturbed for about 2-3 minutes.
- Add Feta: Sprinkle the crumbled feta cheese on top of the eggs and gently fold the omelette in half using a spatula.
- Finish Cooking: Allow the omelette to cook for another 2-3 minutes, or until the eggs are set but still soft.
- Serve: Slide the omelette onto a plate and let it cool slightly before serving.
To serve the Spinach and Feta Omelette in the best possible way, plate it nicely by adding an extra sprinkle of crumbled feta on top and a few leaves of fresh spinach for garnish. You can also cut the omelette in half to display the vibrant green color of the spinach.
Pair this omelette with a light side salad, sliced avocado, or whole-grain toast for a complete meal. A glass of fresh orange juice or a light herbal tea would make a perfect beverage to complement the flavors of the dish.