As summer approaches, I find myself drawn to the simplicity of crockpot cooking. It’s a relief to prepare delicious meals without spending hours in the kitchen, especially during those hot days. I’ve gathered seven recipes that highlight fresh, seasonal ingredients. Each dish, from BBQ pulled pork sandwiches to a refreshing peach crisp, promises to enhance any outdoor gathering. Curious about how to transform your summer dinners with minimal effort? Let’s explore these flavorful options together.
BBQ Pulled Pork Sandwiches
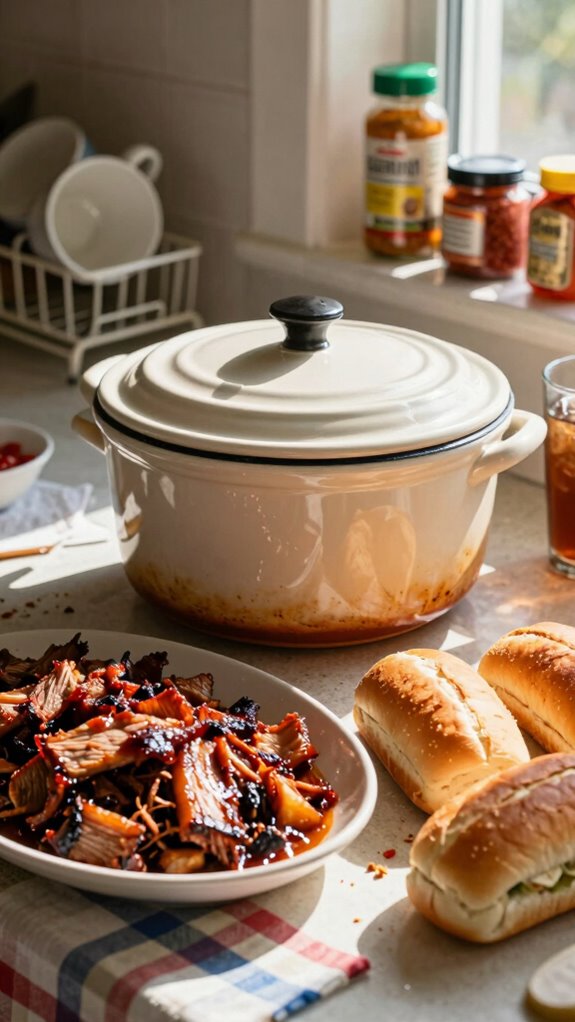
BBQ Pulled Pork Sandwiches are a classic summer dish that combines tender, flavor-infused shredded pork with tangy barbecue sauce. This dish is perfect for gatherings and can easily be made using a crockpot, allowing you to savor the delicious taste of slow-cooked meat without spending hours at the grill.
| Total Time | Difficulty | Number of Servings | Main Ingredient |
|---|---|---|---|
| 8 hours | Easy | 6 | Pork shoulder |
This recipe is easy to make, with a total preparation time of only 10 minutes, followed by 8 hours of slow cooking in the crockpot. The dish is beginner-friendly, requiring minimal cooking skills. For the best results, ensure your pork is well-seasoned and shredded after cooking for that perfect pull-apart texture.
Ingredients
| Ingredient | Quantity |
|---|---|
| Pork shoulder | 3-4 pounds |
| BBQ sauce | 2 cups |
| Onion | 1 medium, sliced |
| Garlic powder | 1 tablespoon |
| Paprika | 1 tablespoon |
| Salt | 1 teaspoon |
| Black pepper | 1 teaspoon |
| Hamburger buns | 6 |
| Pickles (optional) | For serving |
| Coleslaw (optional) | For serving |
Variations of this dish can include using different types of pork, such as pork loin or tenderloin, for a leaner version. You can also experiment with homemade BBQ sauces using varying spices and sweeteners, or even try different types of buns such as whole wheat or gluten-free options.
Kitchen Tools
| Tool | Purpose |
|---|---|
| Crockpot | Slow-cooks the pork for tender, juicy results |
| Meat thermometer | Checks internal temperature for doneness |
| Cutting board | Provides a surface for shredding pork |
| Knife | Used for slicing onions and shredding pork |
| Serving spoon | For mixing and serving pulled pork |
| Tongs | Useful for handling the hot pork |
Cooking Instructions
- Prepare the Pork: Trim excess fat from the pork shoulder and place it in the crockpot.
- Season the Meat: Sprinkle garlic powder, paprika, salt, and black pepper evenly over the pork.
- Add Onions: Layer the sliced onions on top of the pork.
- Add BBQ Sauce: Pour the BBQ sauce over the pork and onions, ensuring it’s well-coated.
- Cook: Cover the crockpot and set it to low heat for 8 hours, or until the pork is tender and easily shredded.
- Shred the Pork: Once cooked, remove the pork from the crockpot and place it on a cutting board. Use two forks to shred the meat.
- Mix with Sauce: Return the shredded pork to the crockpot and mix it with the remaining sauce.
- Prepare the Buns: Lightly toast the hamburger buns if desired.
- Serve: Spoon the pulled pork onto the buns and top with pickles or coleslaw if desired.
To serve BBQ Pulled Pork Sandwiches in the best possible way, pile generous portions of the flavorful pulled pork onto the buns and add a sprinkle of fresh coleslaw for added crunch and flavor. Arrange the sandwiches on a serving platter and garnish with extra pickles for a zesty touch.
For the perfect meal pairing, serve BBQ Pulled Pork Sandwiches with classic sides like coleslaw or potato salad. As for drinks, opt for iced tea, lemonade, or even a chilled lager to complement the rich flavors of the BBQ.
Creamy Slow Cooker Chicken Tacos
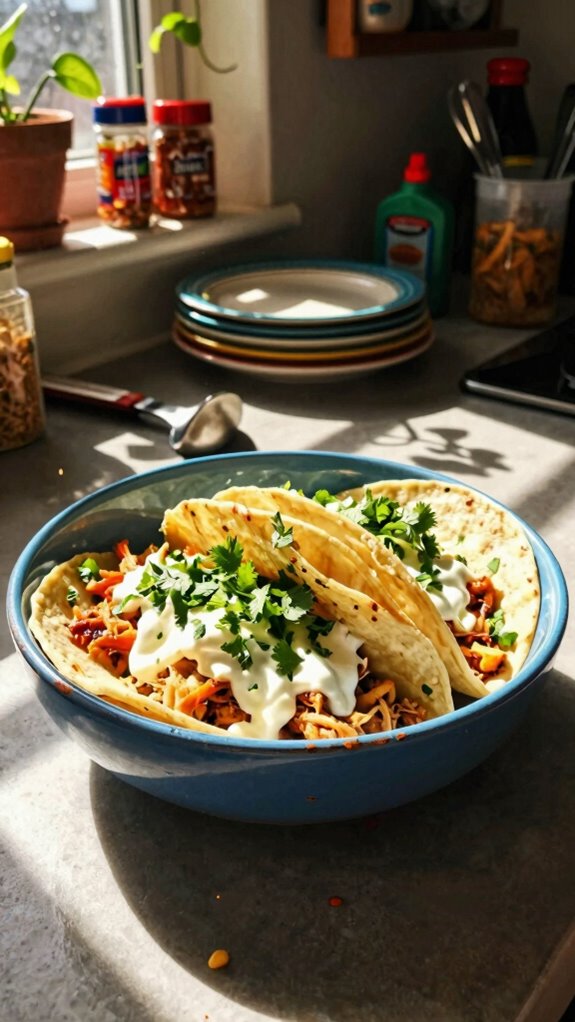
Creamy Slow Cooker Chicken Tacos are a delicious, hassle-free meal that combines tender, seasoned chicken in a rich, creamy sauce, making them perfect for a summer get-together or a weekday dinner. With the convenience of a slow cooker, you can set it and forget it, allowing the flavors to meld beautifully while you enjoy your day.
| Total Time | Difficulty | Number of Servings | Main Ingredient |
|---|---|---|---|
| 6 hours | Easy | 8 | Chicken breast |
This dish is incredibly easy to prepare, taking roughly 10 minutes of prep time with a total cooking time of 6 hours. It’s perfect for beginners; just add all the ingredients to the slow cooker and let it do the work. For optimal flavor, consider using fresh herbs and spices, and adjust the seasoning to your preference as it cooks.
Ingredients
| Ingredient | Quantity |
|---|---|
| Chicken breasts | 2 pounds |
| Cream cheese | 8 ounces |
| Taco seasoning | 1 packet (1 ounce) |
| Salsa | 1 cup |
| Black beans | 1 can (15 oz), drained |
| Corn (frozen or canned) | 1 cup |
| Shredded cheese | 1 cup |
| Tortillas | 8 |
| Avocado (optional) | 1, sliced |
| Cilantro (optional) | For garnish |
Variations on this dish include swapping out chicken for shredded beef or pork, using different types of cheese (like pepper jack for a spicy kick), or adding additional veggies, such as bell peppers or diced jalapeños, for more flavor and texture.
Kitchen Tools
| Tool | Purpose |
|---|---|
| Slow cooker | Cooks the chicken slowly, ensuring tenderness |
| Measuring cups | For measuring ingredients accurately |
| Spoon | For stirring and serving |
| Knife | Used for slicing ingredients |
| Cutting board | Provides a surface for cutting |
| Can opener | Opens canned black beans and corn |
Cooking Instructions
- Prepare Chicken: Place the chicken breasts in the bottom of the slow cooker.
- Add Cream Cheese: Cut the cream cheese into cubes and distribute evenly over the chicken.
- Season: Sprinkle the taco seasoning over the chicken and cream cheese.
- Add Salsa: Pour salsa over all the ingredients to help create a flavorful sauce.
- Add Beans and Corn: Add the drained black beans and corn on top, layering them evenly.
- Cook: Cover and cook on low for 6 hours or high for 3 hours, until the chicken is tender and shredded easily.
- Shred Chicken: Before serving, shred the chicken in the slow cooker using two forks and mix with all the sauce ingredients.
To serve and present the dish, spoon the creamy chicken mixture into warm tortillas and top with sliced avocado and fresh cilantro for added color and flavor.
For the perfect pairing, enjoy these tacos with a side of Mexican rice or a fresh green salad. A light beer or a refreshing margarita can complement the flavors beautifully, enhancing your summer dining experience.
Summer Vegetable Ratatouille
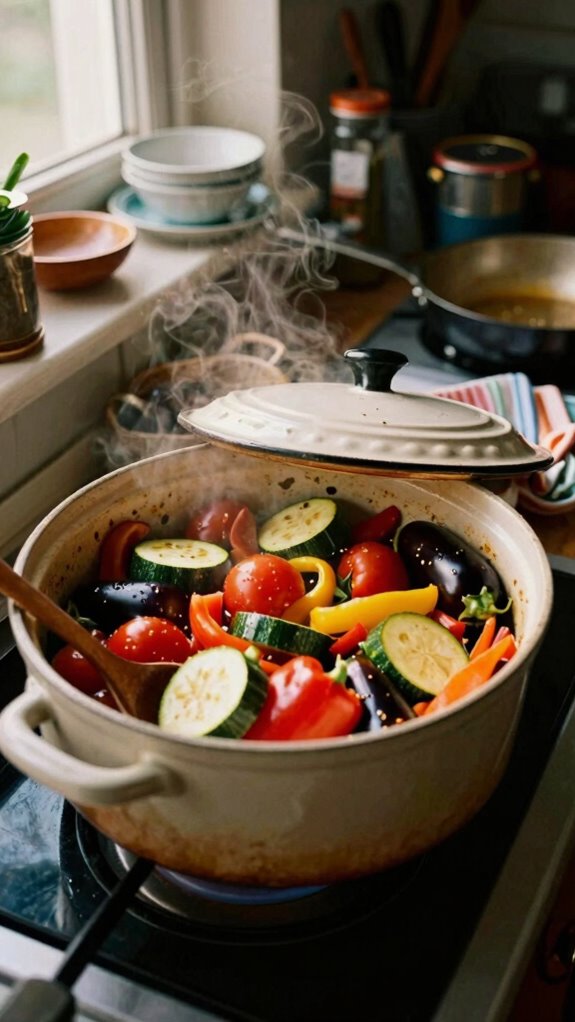
Summer Vegetable Ratatouille is a vibrant and hearty dish that celebrates the fresh flavors of summer produce. Bursting with colorful vegetables like zucchini, eggplant, and bell peppers, this comforting French stew can be enjoyed on its own or as a flavorful side dish. It’s a fantastic way to utilize seasonal ingredients while keeping your kitchen cool in the summer months.
| Total Time | Difficulty | Number of Servings | Main Ingredient |
|---|---|---|---|
| 1 hour | Easy | 6 | Mixed Vegetables |
This dish is straightforward to prepare, taking about 15 minutes of prep time and 45 minutes of cooking time. It’s perfect for cooks of all levels, making it accessible even for beginners. The slow cooking allows the vegetables to soften and meld their flavors beautifully, and you can adjust the seasoning to your liking.
Ingredients
| Ingredient | Quantity |
|---|---|
| Zucchini | 2 medium, sliced |
| Eggplant | 1 medium, diced |
| Bell peppers | 2 (red and yellow), diced |
| Onion | 1 large, chopped |
| Garlic | 3 cloves, minced |
| Canned diced tomatoes | 1 can (14.5 oz) |
| Olive oil | 2 tablespoons |
| Fresh basil | 1/4 cup, chopped |
| Thyme (fresh or dried) | 1 teaspoon |
| Salt | To taste |
| Pepper | To taste |
Variations of Ratatouille are plentiful; you can swap in other seasonal vegetables like yellow squash or mushrooms, increase the herbs for more freshness, or even add lentils for extra protein. For a twist, consider incorporating some spices such as smoked paprika or cumin to the mix to enhance the overall flavor profile.
Kitchen Tools
| Tool | Purpose |
|---|---|
| Large skillet | For sautéing vegetables |
| Cutting board | Provides a surface for chopping |
| Knife | Used for slicing and dicing ingredients |
| Spatula | For mixing and serving |
| Measuring spoons | To measure herbs and spices |
| Serving dish | To present the finished Ratatouille |
Cooking Instructions
- Prepare Vegetables: Start by washing and slicing all the vegetables into even pieces for uniform cooking.
- Sauté Onions and Garlic: In a large skillet, heat olive oil over medium heat. Add chopped onions and minced garlic, cooking until the onions are translucent (about 5 minutes).
- Add Vegetables: Add the sliced zucchini, diced eggplant, and bell peppers to the skillet. Sauté for another 10 minutes, stirring occasionally until vegetables begin to soften.
- Add Tomatoes: Pour in the canned diced tomatoes along with their juices. Stir to combine.
- Season: Sprinkle in the thyme, salt, and pepper, then mix thoroughly.
- Simmer: Lower the heat and cover the skillet. Allow the ratatouille to simmer for 25-30 minutes, stirring occasionally, until the vegetables are tender.
- Add Basil: Just before serving, stir in the fresh chopped basil for an added burst of flavor.
Serving Suggestions
To present Summer Vegetable Ratatouille beautifully, spoon it into a shallow serving dish and garnish with additional fresh basil leaves. A drizzle of olive oil on top adds both flavor and an appealing sheen, making it visually stunning for your guests.
Pairing Suggestions
Ratatouille pairs excellently with crusty French bread or over a bed of fluffy quinoa or rice for a full meal. As for drinks, a chilled glass of white wine such as Sauvignon Blanc or a light-bodied rosé complements the dish perfectly, enhancing its summery flavors while refreshing your palate.
Coconut Curry Chicken

Coconut Curry Chicken is a luscious and aromatic dish that beautifully combines the flavors of tender chicken with a rich coconut milk curry sauce. This dish is perfect for summer evenings, providing a comforting yet refreshing meal that takes full advantage of the zesty flavors often found in tropical cuisine. It’s a crowd-pleaser that can be served over rice or with naan for a delicious, satisfying dinner.
| Total Time | Difficulty | Number of Servings | Main Ingredient |
|---|---|---|---|
| 1 hour | Easy | 4 | Chicken |
This dish is beginner-friendly, with a total preparation time of about 15 minutes and a cooking time of 45 minutes. The easy steps and manageable ingredients make it accessible for cooks of all levels. To elevate the flavors, consider marinating the chicken for an hour before cooking or serve it with a sprinkle of fresh cilantro right before serving.
Ingredients
| Ingredient | Quantity |
|---|---|
| Chicken breast | 1 lb, cut into cubes |
| Coconut milk | 1 can (14 oz) |
| Curry paste | 3 tablespoons |
| Onion | 1 medium, chopped |
| Garlic | 2 cloves, minced |
| Ginger | 1 tablespoon, minced |
| Bell pepper | 1 medium, sliced |
| Spinach | 2 cups, roughly chopped |
| Olive oil | 2 tablespoons |
| Salt | To taste |
| Pepper | To taste |
For variations, you can add vegetables such as broccoli or snap peas for extra nutrition and color. Additionally, if you want to make it vegetarian, substitute the chicken with tofu or chickpeas, and use vegetable broth instead of chicken broth for cooking.
Kitchen Tools
| Tool | Purpose |
|---|---|
| Large skillet | For sautéing chicken and vegetables |
| Cutting board | Provides a surface for chopping ingredients |
| Knife | Used for cutting chicken and vegetables |
| Spatula | For stirring and serving |
| Measuring spoons | For measuring curry paste and spices |
| Serving dish | To present the finished Coconut Curry Chicken |
Cooking Instructions
- Prepare Ingredients: Start by washing and cutting the chicken into cubes, and chop the onion, garlic, ginger, and bell pepper.
- Sauté Chicken: In a large skillet, heat olive oil over medium heat. Add the cubed chicken and season with salt and pepper. Cook until browned and cooked through, about 5-7 minutes.
- Add Aromatics: Add the chopped onion, minced garlic, and ginger to the skillet. Cook for another 2-3 minutes until the onions are translucent.
- Incorporate Curry Paste: Stir in the curry paste and mix well, allowing the spices to become fragrant, about 1 minute.
- Pour Coconut Milk: Add the coconut milk to the skillet, stirring to combine everything, then bring the mixture to a simmer.
- Add Vegetables: Incorporate the sliced bell pepper and spinach. Cook for an additional 5-10 minutes until the vegetables are tender and the sauce has thickened slightly.
- Taste and Adjust: Taste the curry and adjust salt and pepper as needed. If desired, add a little water to thin the sauce or more curry paste for extra spice.
Serving Suggestions
To serve Coconut Curry Chicken, spoon the fragrant dish over a bed of fluffy white rice or alongside warm naan bread. A sprinkle of freshly chopped cilantro or green onions on top enhances the presentation and adds a burst of fresh flavor. Don’t forget to drizzle some lime juice over the top for an extra zing!
Pairing Recommendations
Coconut Curry Chicken pairs beautifully with steamed basmati rice or cauliflower rice for a lighter option. For a refreshing drink, serve it with iced mango tea or a light, crisp lager, as these options will complement the curry’s rich and creamy flavors without overpowering them.
Zesty Lemon Herb Quinoa Salad
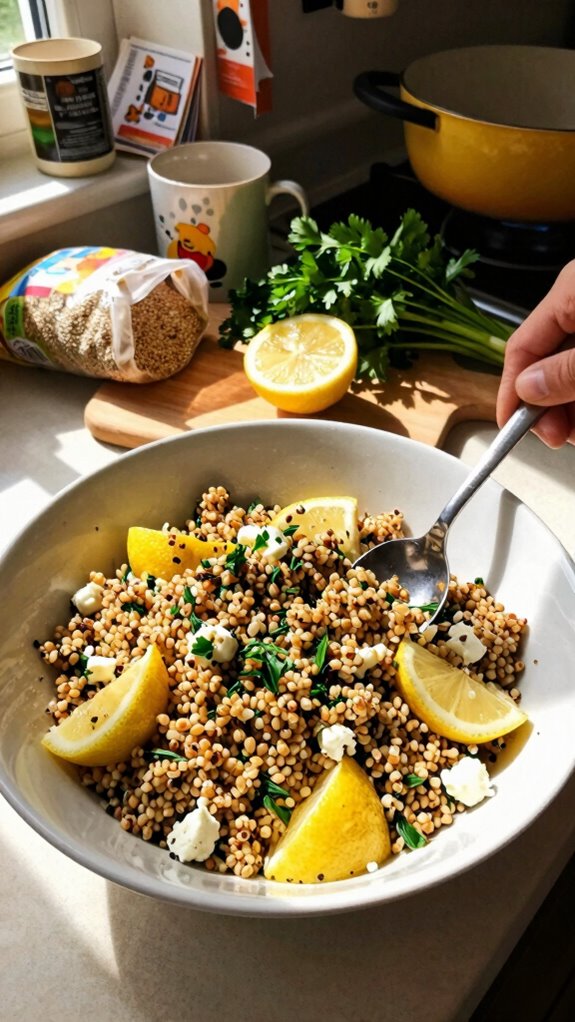
Zesty Lemon Herb Quinoa Salad is a vibrant and refreshing dish that showcases the nutty flavor of quinoa paired with bright, zesty lemon and fresh herbs. Perfect for summer picnics, barbecues, or as a light main course, this salad is not only delicious but also packed with nutrients, making it a great choice for health-conscious diners.
| Total Time | Difficulty | Number of Servings | Main Ingredient |
|---|---|---|---|
| 30 minutes | Easy | 4 | Quinoa |
This salad is a breeze to prepare, requiring just 10 minutes for preparation and 20 minutes for cooking. With simple steps and easily accessible ingredients, novice cooks will find this recipe approachable. You can enhance the flavors by letting the salad marinate for an additional 15-30 minutes in the refrigerator before serving.
Ingredients
| Ingredient | Quantity |
|---|---|
| Quinoa | 1 cup |
| Water | 2 cups |
| Cherry tomatoes | 1 cup, halved |
| Cucumber | 1 medium, diced |
| Red onion | ½ medium, finely chopped |
| Fresh parsley | ¼ cup, chopped |
| Fresh mint | ¼ cup, chopped |
| Lemon juice | 2 tablespoons |
| Olive oil | 3 tablespoons |
| Salt | To taste |
| Black pepper | To taste |
For variations, consider adding diced bell peppers for color, crumbled feta cheese for creaminess, or chickpeas for added protein. You can also swap in different herbs like basil or cilantro depending on your flavor preference.
Kitchen Tools
| Tool | Purpose |
|---|---|
| Medium pot | For cooking quinoa |
| Cutting board | Provides a surface for chopping ingredients |
| Knife | Used for cutting vegetables and herbs |
| Measuring cups | For measuring quinoa and water |
| Large bowl | To mix all the ingredients together |
| Spoon | For serving and mixing |
Cooking Instructions
- Rinse Quinoa: Start by rinsing the quinoa under cold water in a fine mesh strainer to remove its bitter coating.
- Cook Quinoa: In a medium pot, combine the rinsed quinoa and water. Bring to a boil, then reduce heat to low, cover, and simmer for 15 minutes, or until the quinoa is fluffy and water is absorbed. Remove from heat and let sit for 5 minutes.
- Prepare Vegetables: While the quinoa is cooking, chop the cherry tomatoes, cucumber, red onion, parsley, and mint.
- Mix Ingredients: In a large bowl, combine the cooked quinoa, cherry tomatoes, cucumber, red onion, parsley, and mint.
- Make Dressing: In a small bowl, whisk together lemon juice, olive oil, salt, and black pepper to create a dressing.
- Combine Salad: Drizzle the dressing over the quinoa mixture and toss until well combined. Adjust seasoning if necessary.
Serving Suggestions
Serve the Zesty Lemon Herb Quinoa Salad chilled or at room temperature. For an appealing presentation, consider garnishing the salad with additional fresh herbs or lemon slices. Serve it in a large bowl or on a platter for a beautiful summer dish that invites sharing among guests.
Pairing Suggestions
This salad pairs wonderfully with grilled chicken or fish for a complete meal. For drinks, consider refreshing options such as lemonade, iced tea, or a light white wine like Sauvignon Blanc, which complements the zesty flavors of the salad beautifully.
Slow Cooker Chili
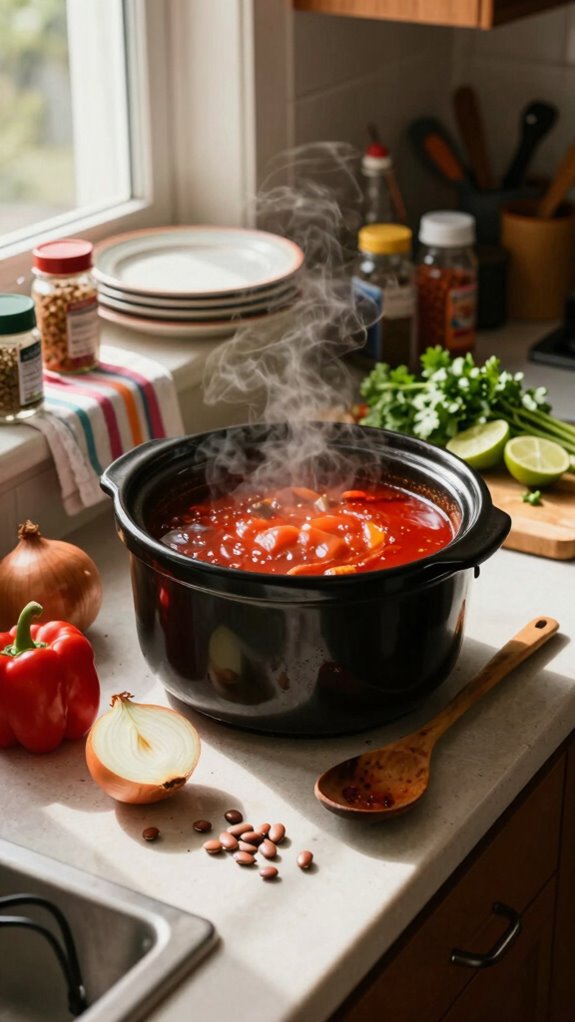
Slow Cooker Chili is a hearty and comforting dish that is perfect for warm summer evenings or chilly fall nights. It’s packed with flavor, featuring tender beans, juicy tomatoes, and a blend of spices that come together effortlessly in your slow cooker. This dish is not only satisfying but also offers a healthy option for family meals or gatherings.
| Total Time | Difficulty | Number of Servings | Main Ingredient |
|---|---|---|---|
| 6 hours | Easy | 6 | Ground Beef |
Making this dish is simple enough for anyone to try. With a total preparation time of just 15 minutes and a cooking time of 6 hours, you can set it and forget it while the flavors meld together beautifully. To enhance the taste, let it sit for a few extra minutes after cooking before serving.
Ingredients
| Ingredient | Quantity |
|---|---|
| Ground beef | 1 pound |
| Onion | 1 medium, diced |
| Garlic | 3 cloves, minced |
| Bell pepper | 1 medium, diced |
| Canned diced tomatoes | 2 (14.5 ounce) cans |
| Kidney beans | 1 (15 ounce) can, drained and rinsed |
| Black beans | 1 (15 ounce) can, drained and rinsed |
| Chili powder | 2 tablespoons |
| Cumin | 1 tablespoon |
| Salt | To taste |
| Black pepper | To taste |
For variations, consider adding additional vegetables like corn or zucchini for extra nutrition, or switch up the beans for more variety. You can also add a splash of hot sauce for those who prefer extra spice, or even some shredded cheese on top when serving.
Kitchen Tools
| Tool | Purpose |
|---|---|
| Slow cooker | For cooking the chili |
| Cutting board | Provides a surface for chopping ingredients |
| Knife | Used for cutting vegetables |
| Measuring spoons | For measuring spices |
| Spoon | For mixing and serving |
| Can opener | For opening canned ingredients |
Cooking Instructions
- Brown the Beef: In a skillet over medium heat, brown the ground beef until cooked through. Drain excess fat and transfer to the slow cooker.
- Prepare Vegetables: Add diced onion, minced garlic, and diced bell pepper to the slow cooker with the beef.
- Add Canned Ingredients: Pour in the canned diced tomatoes, drained kidney beans, and black beans.
- Season: Sprinkle in the chili powder, cumin, salt, and black pepper. Stir well to combine all ingredients.
- Cook: Close the lid of the slow cooker. Set it on low and cook for 6 hours, allowing the flavors to meld together.
- Serve: After 6 hours, taste and adjust seasoning if necessary, then serve hot.
To present your Slow Cooker Chili, ladle it into bowls, and optionally top with shredded cheese, sour cream, or fresh cilantro for added flavor and color. Accompany with fresh cornbread or tortilla chips on the side for extra crunch.
This dish pairs beautifully with a side of cornbread or a light green salad for balance, and for beverages, consider serving it with a cold beer, iced tea, or a refreshing margarita to complement the richness of the chili.
Peach Crisp With Oat Topping
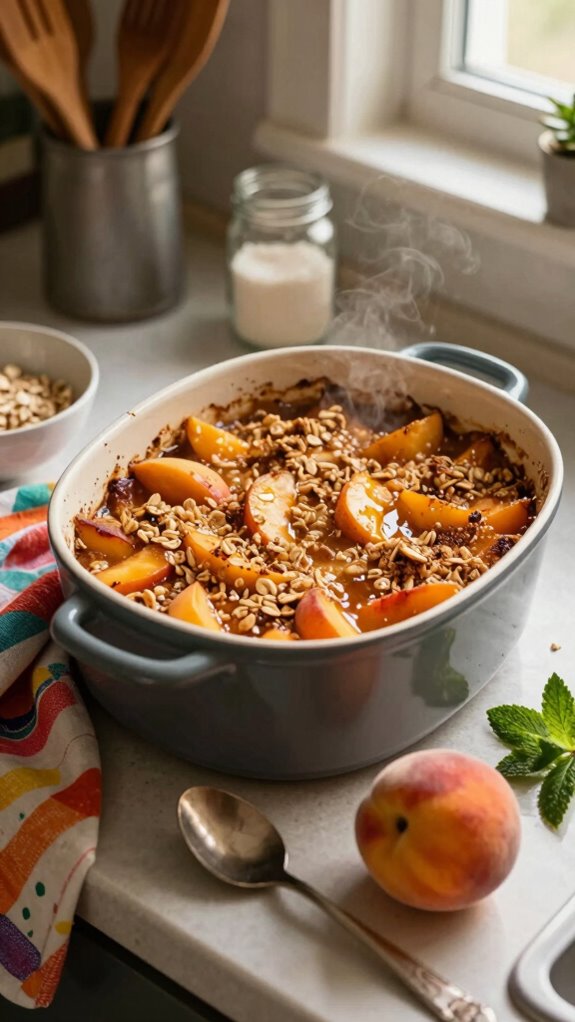
Peach Crisp with Oat Topping is a delectable summer dessert that showcases the sweet and juicy flavors of fresh peaches, complemented by a crunchy oat topping. It’s an easy-to-make dish that brings together the perfect combination of sweetness and texture, making it an ideal treat for backyard gatherings or a cozy family dinner.
| Total Time | Difficulty | Number of Servings | Main Ingredient |
|---|---|---|---|
| 1 hour | Easy | 8 | Fresh Peaches |
This Peach Crisp is very straightforward to prepare, taking only 15 minutes from prep to cooking, with a total cooking time of 45 minutes. To achieve the best flavor and texture, allow the dish to cool slightly before serving. For an extra boost of flavor, consider serving it with a scoop of vanilla ice cream or a dollop of whipped cream.
Ingredients
| Ingredient | Quantity |
|---|---|
| Fresh peaches | 6 cups, sliced |
| Granulated sugar | ¾ cup |
| Brown sugar | ½ cup |
| All-purpose flour | ½ cup |
| Oats (old-fashioned) | 1 cup |
| Cinnamon | 1 teaspoon |
| Unsalted butter | ½ cup, melted |
| Salt | ¼ teaspoon |
| Lemon juice | 1 tablespoon |
For variations, you can mix in other fruits like blueberries or berries for a mixed fruit crisp. You might also experiment with different types of oats, such as quick oats for a different texture, or substitute some of the butter with coconut oil for a dairy-free option.
Kitchen Tools
| Tool | Purpose |
|---|---|
| Baking dish | For baking the peach crisp |
| Mixing bowl | For combining the topping ingredients |
| Knife | Used for slicing peaches |
| Measuring cups | For measuring sugar and flour |
| Wooden spoon | For mixing ingredients |
| Spoon | For serving the crisp |
Cooking Instructions
- Preheat Oven: Begin by preheating your oven to 350°F (175°C).
- Prepare Peaches: In a large bowl, toss the sliced peaches with granulated sugar, lemon juice, and a pinch of salt. Transfer the peach mixture into a baking dish.
- Make the Topping: In a separate mixing bowl, combine oats, brown sugar, flour, cinnamon, and melted butter. Stir until everything is evenly mixed and crumbly.
- Assemble and Bake: Evenly sprinkle the oat mixture over the peaches in the baking dish. Bake in the preheated oven for 30-35 minutes, or until the topping is golden brown and the peaches are bubbly.
- Cool: Remove the crisp from the oven and let it cool for about 10-15 minutes before serving.
To serve Peach Crisp beautifully, scoop generous portions into bowls and consider adding a scoop of vanilla ice cream on top. The melting ice cream will create a delightful contrast with the warm, fruity filling.
For a delightful meal pairing, serve the Peach Crisp with a light summer salad or grilled meats for a balanced meal. As for drinks, consider pairing it with a refreshing glass of iced tea, lemonade, or a light white wine like Riesling to complement the sweetness of the dessert.