As someone who’s always looking for healthy dinner options that my kids will actually eat, I know how tricky it can be. It’s not just about nutrition; it’s about flavor and presentation too. I’ve come across some fantastic recipes that balance health and taste perfectly. From colorful quinoa bowls to fun veggie-packed pizzas, there’s something for every palate. Let’s explore these options that could transform dinner time into a more enjoyable experience.
Veggie-Packed Mini Pizzas
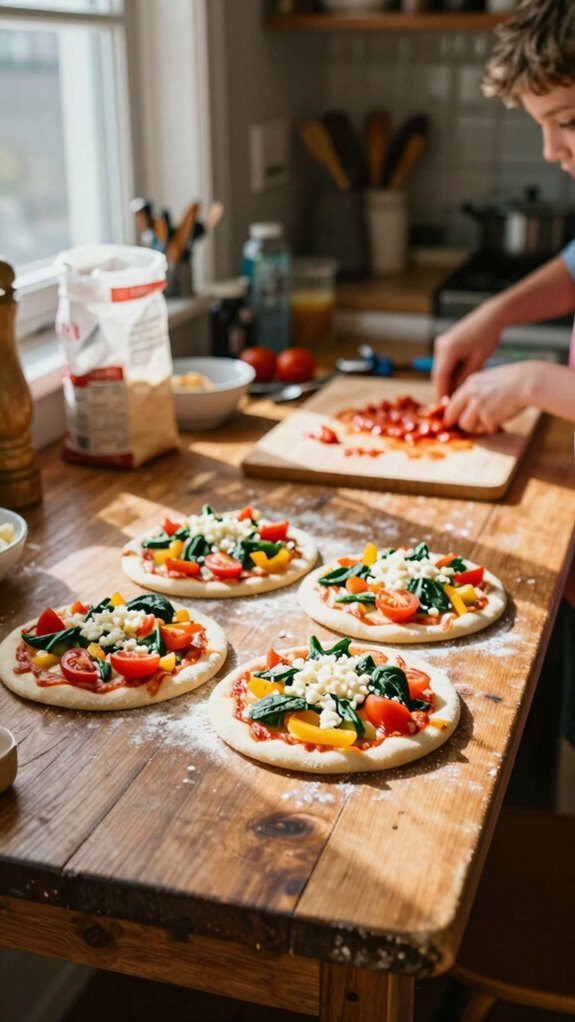
Veggie-Packed Mini Pizzas are delicious and fun bite-sized treats that kids will love! These cute, personalized pizzas are not only tasty but also loaded with colorful vegetables, making them a great option for a healthy dinner. You can easily customize toppings based on your kids’ preferences or what you have on hand, ensuring everyone gets a pizza they love.
| Total Time | Difficulty | Number of Servings | Main Ingredient/Unique Feature |
|---|---|---|---|
| 30 minutes | Easy | 4 | Cauliflower pizza crust |
This recipe is easy and takes just about 30 minutes from start to finish, including preparation and cooking time. With simple ingredients and straightforward steps, even beginner cooks can make these mini pizzas with ease. For a quicker preparation, consider pre-chopping your veggies or using store-bought pizza crusts.
| Ingredients | Quantity |
|---|---|
| Cauliflower (riced) | 2 cups |
| Shredded mozzarella | 1 cup |
| Egg | 1 |
| Italian seasoning | 1 teaspoon |
| Tomato sauce | ½ cup |
| Bell pepper | ½, diced |
| Cherry tomatoes | ½ cup, halved |
| Spinach | 1 cup, chopped |
| Mushroom | ½ cup, sliced |
| Olive oil | 1 tablespoon |
You can easily modify the ingredients based on what your kids like or what you have available. Add ingredients like pepperoni, olives, or different cheeses for variety. You can also swap out the base for a whole wheat or gluten-free crust if needed, making it adaptable for different dietary preferences.
| Kitchen Tools | Use in Recipe |
|---|---|
| Baking sheet | For baking the mini pizzas |
| Parchment paper | To line the baking sheet |
| Mixing bowl | To combine riced cauliflower and other ingredients |
| Spoon | For spreading sauce and toppings |
| Knife | For chopping vegetables |
| Grater | For shredding cheese (if using block) |
Cooking Steps:
- Preheat your oven to 400°F (200°C).
- Rinse and drain the riced cauliflower if using frozen. If using fresh, steam it until soft, then let it cool.
- In a mixing bowl, combine the riced cauliflower, shredded mozzarella, egg, and Italian seasoning. Mix until well combined.
- Line a baking sheet with parchment paper. Scoop out portions of the cauliflower mixture and form small round pizza bases on the sheet.
- Bake the crusts in the preheated oven for 15 minutes or until they are golden and firm.
- Remove the crusts from the oven and spread a layer of tomato sauce over each mini pizza.
- Add desired veggies as toppings, followed by a sprinkle of additional cheese on top.
- Return to the oven and bake for an additional 10 minutes or until the cheese is melty and bubbly.
- Let them cool slightly before serving to ensure they hold together well.
To serve and present these Veggie-Packed Mini Pizzas, place them on a colorful platter or wooden cutting board. You can garnish with a sprinkle of fresh basil or a drizzle of olive oil to enhance their visual appeal. Encourage kids to enjoy them with a variety of dipping sauces, such as marinara or ranch dressing!
Pair these mini pizzas with a fresh side salad or carrot sticks for a balanced meal. For drinks, consider serving them with water infused with slices of lemon or a light fruit juice to keep it refreshing and healthy. This combination will not only appeal to kids but make for a wholesome dinner option.
Rainbow Pasta Salad
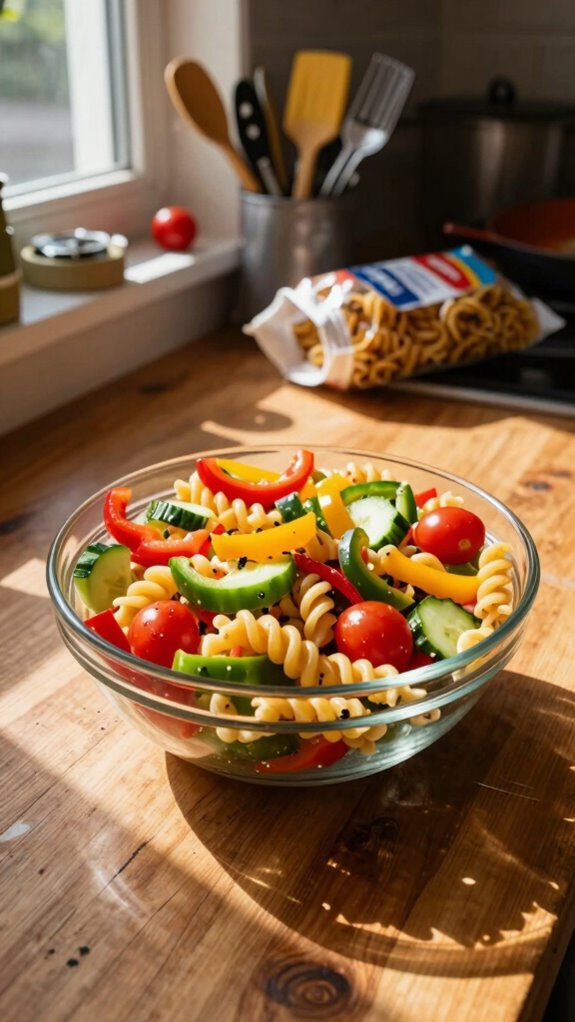
Rainbow Pasta Salad is a vibrant and colorful dish that kids will adore! Packed with a variety of fresh vegetables and whole grain pasta, this salad not only looks appealing but also provides essential nutrients. It’s a great way to introduce new flavors to children while allowing them to enjoy a fun and finger-friendly meal that can be served cold or at room temperature.
| Total Time | Difficulty | Number of Servings | Main Ingredient/Unique Feature |
|---|---|---|---|
| 25 minutes | Easy | 4 | Whole grain pasta with fresh vegetables |
This dish is straightforward and requires only about 25 minutes from start to finish, making it perfect for busy weeknights. Simple preparation steps allow even novice cooks to whip up this delightful salad with ease. A great tip to save time is to cook the pasta ahead of time and store it in the refrigerator until you’re ready to toss everything together.
| Ingredients | Quantity |
|---|---|
| Whole grain pasta | 8 ounces |
| Cherry tomatoes | 1 cup, halved |
| Bell pepper (red and yellow) | 1 of each, diced |
| Cucumber | 1, diced |
| Carrots | 2, grated |
| Fresh basil | ½ cup, chopped |
| Olive oil | 2 tablespoons |
| Lemon juice | 2 tablespoons |
| Salt | To taste |
| Pepper | To taste |
You can easily modify this Rainbow Pasta Salad based on what your family enjoys. You can add proteins like grilled chicken or chickpeas, swap out vegetables according to the season or availability, or even incorporate different dressings for a unique flavor twist. For a creamier version, consider adding a dollop of Greek yogurt or a sprinkle of cheese.
| Kitchen Tools | Use in Recipe |
|---|---|
| Pot | For boiling the pasta |
| Colander | To drain the cooked pasta |
| Mixing bowl | To combine cooked pasta and veggies |
| Knife | For chopping and dicing vegetables |
| Grater | For grating carrots |
| Measuring spoons | For measuring oil and lemon juice |
Cooking Steps:
- Bring a pot of salted water to a boil and cook the whole grain pasta according to package instructions until al dente. Drain and rinse under cold water to cool.
- While the pasta is cooking, prepare the vegetables by dicing the bell peppers, halving the cherry tomatoes, and dicing the cucumber.
- In a mixing bowl, combine the cooled pasta, prepared vegetables, grated carrots, and fresh basil.
- In a small bowl, whisk together the olive oil, lemon juice, salt, and pepper to create the dressing.
- Pour the dressing over the pasta and vegetable mixture, and toss until everything is well coated.
- Taste and adjust seasoning, adding more salt or pepper if desired.
- Chill in the refrigerator for about 10 minutes before serving for the flavors to meld.
Rainbow Pasta Salad has a delightful presentation. Serve it in a large bowl or individual colorful plates, garnished with a sprinkle of fresh basil or parsley. For younger children, consider plating in fun shapes or using cookie cutters to create engaging designs.
This pastel dish pairs wonderfully with grilled chicken, turkey meatballs, or a side of fruit skewers. For drinks, consider serving milk, fruit smoothies, or water infused with slices of citrus fruits for a refreshing and healthy complement to the meal.
Colorful Quinoa Bowls
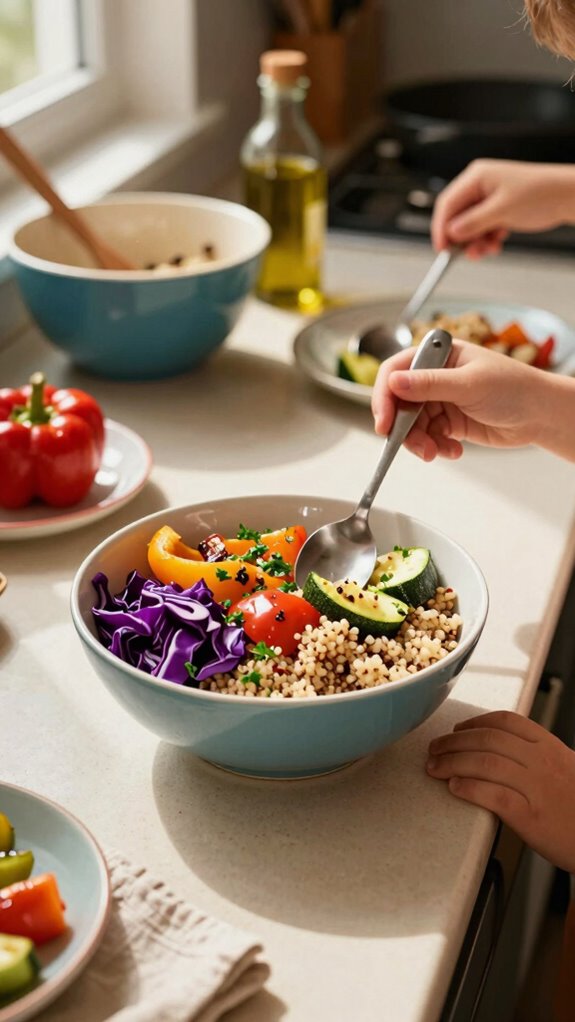
Colorful Quinoa Bowls are a nutritious and vibrant dish that kids will love! This meal is not only visually appealing but also packed with protein, fiber, and essential vitamins. Made with fluffy quinoa and a rainbow of fresh vegetables, it offers a delightful combination of textures and flavors. These bowls are versatile, allowing children to customize their own meals with their favorite toppings, making dinnertime both healthy and fun!
| Total Time | Difficulty | Number of Servings | Main Ingredient/Unique Feature |
|---|---|---|---|
| 30 minutes | Easy | 4 | Quinoa and colorful vegetables |
This recipe is easy to prepare, requiring only about 30 minutes total, which includes 15 minutes for cooking the quinoa and another 15 minutes for chopping and assembling the ingredients. It is an ideal choice for busy families. A helpful tip is to prep the veggies ahead of time, so that making this dish becomes a quick and enjoyable process when it’s time for dinner.
| Ingredients | Quantity |
|---|---|
| Quinoa | 1 cup |
| Vegetable broth (or water) | 2 cups |
| Cherry tomatoes | 1 cup, halved |
| Bell pepper (red and yellow) | 1 of each, diced |
| Cucumber | 1, diced |
| Avocado | 1, sliced |
| Corn (frozen or canned) | 1 cup |
| Black beans (canned) | 1 can, rinsed |
| Fresh cilantro | ¼ cup, chopped |
| Olive oil | 2 tablespoons |
| Lime juice | 2 tablespoons |
| Salt | To taste |
| Pepper | To taste |
Feel free to modify your Colorful Quinoa Bowls by incorporating different vegetables based on what is in season, or your children’s preferences. You might try adding roasted sweet potatoes, shredded carrots, or other proteins like grilled chicken, tofu, or chickpeas. For an added crunch, toss in some pumpkin seeds or nuts.
| Kitchen Tools | Use in Recipe |
|---|---|
| Pot | For cooking the quinoa |
| Strainer | To rinse the beans and drainage |
| Cutting board | For chopping vegetables |
| Knife | For cutting veggies and slicing avocado |
| Mixing bowl | For combining quinoa and other ingredients |
| Measuring cups and spoons | For measuring quinoa and liquids |
Cooking Steps:
- Rinse the quinoa under cold water to remove residue. In a pot, combine the rinsed quinoa and vegetable broth (or water) and bring to a boil. Reduce the heat to low, cover, and simmer for about 15 minutes until the liquid is absorbed. Remove from heat and let it sit covered for 5 minutes, then fluff with a fork.
- While the quinoa is cooking, prepare the vegetables by dicing the cucumber and bell peppers, halving the cherry tomatoes, and slicing the avocado.
- In a mixing bowl, combine the cooked quinoa, halved cherry tomatoes, diced bell peppers, diced cucumber, corn, and rinsed black beans. Drizzle with olive oil and lime juice, and season with salt and pepper to taste.
- Gently mix everything together until well combined and adjust seasoning if needed.
- Finish with a sprinkle of chopped cilantro on top.
To serve your Colorful Quinoa Bowls, layer or pile the quinoa and vegetable mixture into bowls. Add a few slices of avocado on top for a creamy texture, and garnish with fresh cilantro for a burst of flavor. A lime wedge on the side will allow for an extra squeeze of freshness just before eating!
Pair these Colorful Quinoa Bowls with a light and refreshing beverage like water infused with lemon or lime, or a glass of unsweetened iced tea to keep it healthy. For side dishes, consider a simple garden salad or some roasted vegetables to complete the meal, ensuring a deliciously well-rounded and nutritious dinner.
Cheesy Chicken and Broccoli Casserole
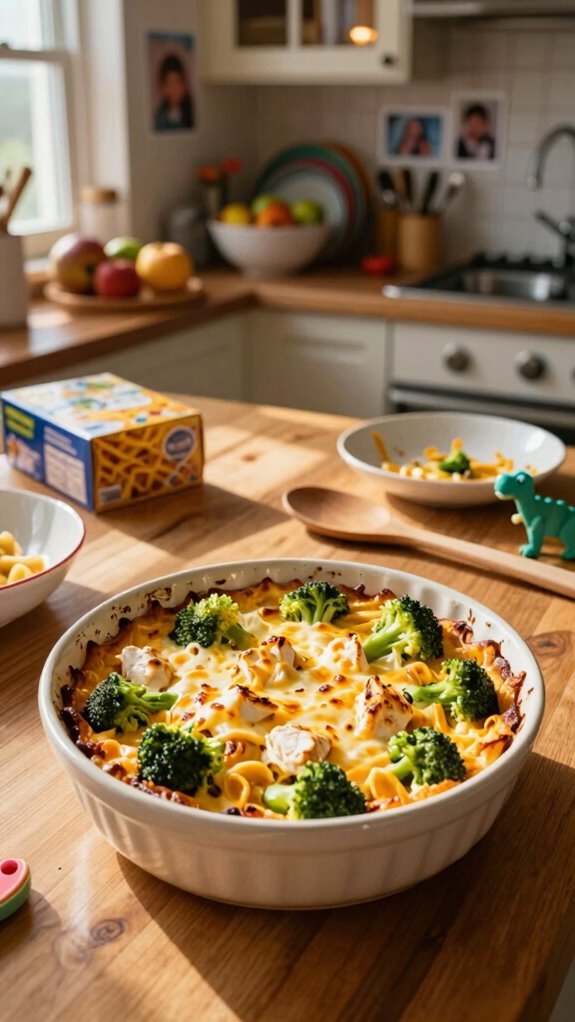
Cheesy Chicken and Broccoli Casserole is a comforting and delicious dish that combines tender chicken, vibrant green broccoli, and creamy cheese—all baked together to create a nutritious meal your kids will adore. This one-pot wonder is great for busy weeknights, as it’s hearty enough to satisfy hungry bellies while packing in essential nutrients.
| Total Time | Difficulty | Number of Servings | Main Ingredient/Unique Feature |
|---|---|---|---|
| 45 minutes | Easy | 6 | Chicken and broccoli in cheese sauce |
This recipe is simple to prepare, taking about 15 minutes for prep and 30 minutes for cooking. The difficulty is low, making it a great option for beginner cooks. For a seamless experience, consider using rotisserie chicken to save on prep time and pre-cook the broccoli to ensure it stays vibrant and tender throughout the baking process.
| Ingredients | Quantity |
|---|---|
| Cooked chicken, shredded | 3 cups |
| Fresh broccoli, chopped | 2 cups |
| Cooked rice (white or brown) | 2 cups |
| Cream of chicken soup | 1 can (10.5 oz) |
| Cheddar cheese, shredded | 2 cups |
| Milk | ½ cup |
| Garlic powder | 1 teaspoon |
| Onion powder | 1 teaspoon |
| Salt | To taste |
| Pepper | To taste |
| Bread crumbs (optional) | ½ cup |
Variations for this casserole can include switching out the chicken for shredded turkey or using quinoa instead of rice for a healthier grain option. You can also mix in different vegetables, such as bell peppers, carrots, or peas, to add more color and nutrients. For a twist, try using different types of cheese, like mozzarella or pepper jack, to enhance the flavor profile.
| Kitchen Tools | Use in Recipe |
|---|---|
| Baking dish | For baking the casserole |
| Mixing bowl | For combining all ingredients |
| Spoon | For stirring the mixture |
| Knife | For chopping broccoli |
| Measuring cups and spoons | For measuring ingredients |
| Aluminum foil | For covering during baking (if needed) |
Cooking Steps:
- Preheat your oven to 350°F (175°C).
- In a mixing bowl, combine the cooked shredded chicken, chopped broccoli, cooked rice, cream of chicken soup, milk, garlic powder, onion powder, salt, and pepper. Mix well until everything is evenly coated.
- Transfer the mixture into a greased baking dish and spread it out evenly.
- Sprinkle the shredded cheddar cheese on top of the mixture, ensuring it covers the entire surface.
- If desired, add bread crumbs on top for an extra crispy texture.
- Cover the baking dish with aluminum foil and bake in the preheated oven for 20 minutes.
- After 20 minutes, remove the foil and bake for an additional 10 minutes, or until the cheese is bubbly and golden.
- Let the casserole cool for a few minutes before serving.
To serve the Cheesy Chicken and Broccoli Casserole, dish it out onto individual plates or bowls, ensuring each portion has an even amount of chicken, broccoli, and melted cheese. For a colorful touch, garnish with freshly chopped parsley or additional cheese.
Pair this casserole with a simple side salad or some crusty bread to complete the meal. For drinks, consider serving milk for a classic option or a light fruit punch to keep it fun and appealing for the kids!
Sweet Potato Tacos
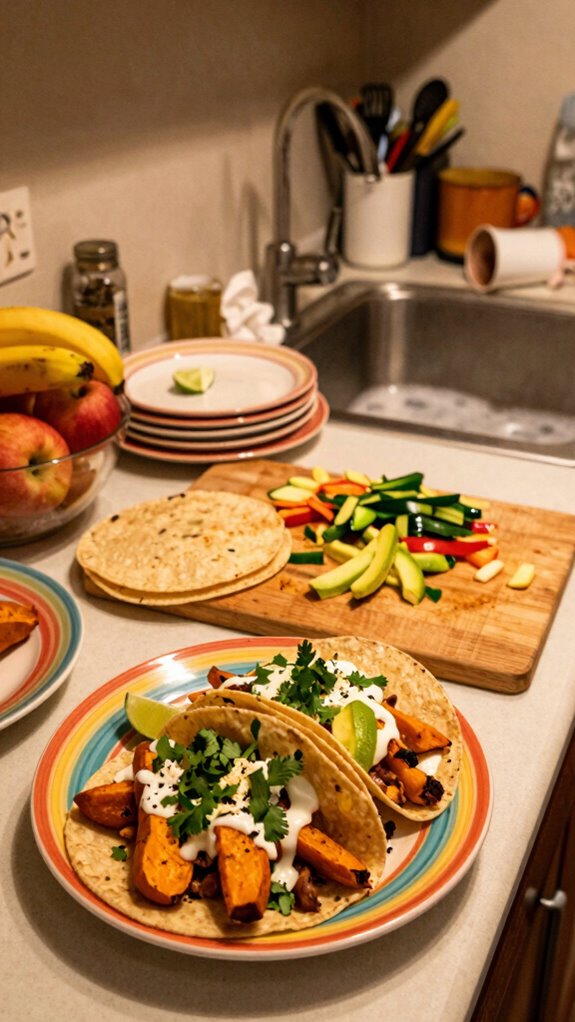
Sweet Potato Tacos are a vibrant and nutritious meal perfect for kids and the whole family. These tacos feature roasted sweet potatoes seasoned with spices, wrapped in soft tortillas, and topped with fresh ingredients like avocado and salsa. This dish is not only delicious but also packed with vitamins and minerals, making it a fantastic option for a healthy dinner.
| Total Time | Difficulty | Number of Servings | Main Ingredient/Unique Feature |
|---|---|---|---|
| 30 minutes | Easy | 4 | Roasted sweet potatoes in corn tortillas |
The preparation time for Sweet Potato Tacos is around 10 minutes, while cooking takes about 20 minutes, making it a quick and easy meal. The difficulty is low, making it accessible even for beginner cooks. To save time, you can roast the sweet potatoes ahead of time and reheat them when ready to serve.
| Ingredients | Quantity |
|---|---|
| Sweet potatoes, diced | 2 large |
| Olive oil | 2 tablespoons |
| Chili powder | 1 teaspoon |
| Cumin | 1 teaspoon |
| Salt | To taste |
| Black pepper | To taste |
| Corn tortillas | 8 small |
| Avocado, sliced | 1 |
| Salsa | 1 cup |
| Cilantro, chopped (optional) | ¼ cup |
| Lime wedges | For serving |
You can customize your Sweet Potato Tacos by incorporating different toppings, such as shredded cheese, black beans, or corn. For a bit of heat, consider adding jalapeños or a spicy salsa. If you’re looking for a twist, try using butternut squash in place of sweet potatoes or adding roasted bell peppers for added flavor and nutrition.
| Kitchen Tools | Use in Recipe |
|---|---|
| Baking sheet | For roasting sweet potatoes |
| Mixing bowl | For mixing sweet potatoes with oil and spices |
| Spoon | For stirring and serving |
| Knife | For chopping avocado and cilantro |
| Measuring spoons | For measuring ingredients |
| Cooking spatula | For flipping and serving sweet potatoes |
Cooking Steps:
- Preheat your oven to 425°F (220°C).
- In a mixing bowl, combine the diced sweet potatoes, olive oil, chili powder, cumin, salt, and black pepper. Toss until the sweet potatoes are evenly coated.
- Spread the seasoned sweet potatoes evenly on a baking sheet.
- Roast in the oven for 20 minutes or until the sweet potatoes are tender and lightly caramelized, stirring halfway through for even cooking.
- While the sweet potatoes are roasting, warm the corn tortillas either in a skillet over medium heat or wrapped in foil in the oven for a few minutes.
- Assemble the tacos by placing roasted sweet potatoes on each tortilla, then topping with sliced avocado, salsa, and cilantro if desired.
- Serve immediately with lime wedges on the side.
To present Sweet Potato Tacos beautifully, arrange them on a platter with the lime wedges and toppings served separately for customization. This invites everyone to build their own tacos, making the meal interactive and fun.
For pairing, consider serving these tacos with a side of black beans or a fresh green salad to round out the meal. To drink, serve with water infused with lime, or a light fruit juice, such as orange or pineapple, to complement the flavors of the tacos.
Meatball & Veggie Skewers
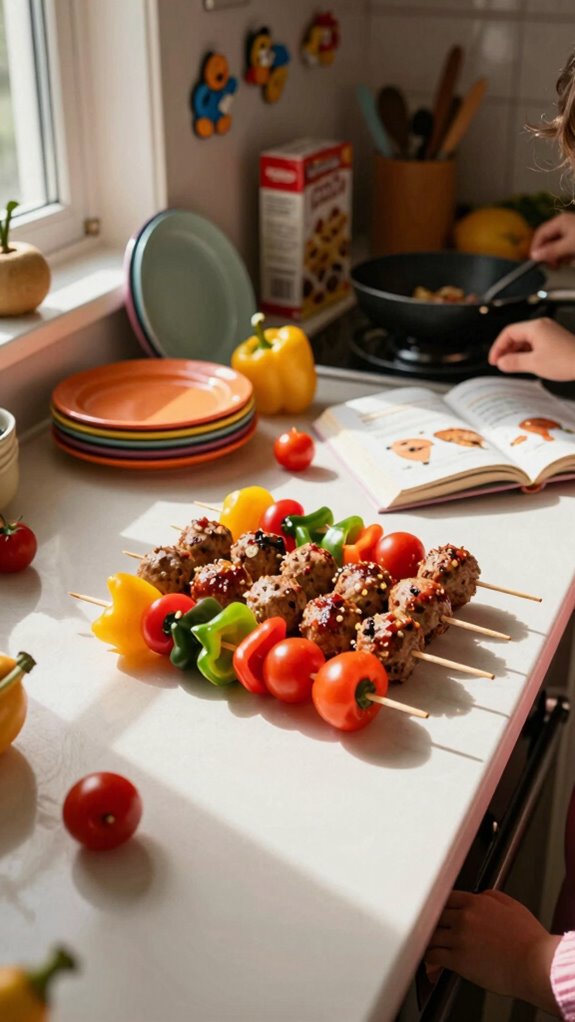
Meatball & Veggie Skewers are a fun and nutritious dinner option that kids will love. These skewers feature juicy meatballs made from ground meat, combined with colorful veggies like bell peppers and cherry tomatoes, all grilled to perfection. They’re not only visually appealing but also a great way to sneak in some vegetables while keeping dinner exciting.
| Total Time | Difficulty | Number of Servings | Main Ingredient/Unique Feature |
|---|---|---|---|
| 35 minutes | Easy | 4 | Juicy meatballs and vibrant veggies on skewers |
The preparation time for Meatball & Veggie Skewers is about 15 minutes, with cooking taking around 20 minutes. The dish is easy to assemble, making it suitable for novice cooks. To save time during busy weeknights, you can prepare the meatballs in advance and store them in the fridge until you’re ready to cook.
| Ingredients | Quantity |
|---|---|
| Ground beef or turkey | 1 pound |
| Bread crumbs | ½ cup |
| Parmesan cheese (grated) | ¼ cup |
| Egg | 1 |
| Garlic powder | 1 teaspoon |
| Salt | To taste |
| Black pepper | To taste |
| Bell peppers, cubed | 1 cup |
| Cherry tomatoes | 1 cup |
| Skewers | 8 (wooden or metal) |
You can customize your Meatball & Veggie Skewers using different types of ground meat like chicken or plant-based substitutes. Veggies can also be varied; try zucchini, mushrooms, or onions for added flavor and nutrition. For extra tastiness, consider marinating the skewers in your favorite sauce before grilling.
| Kitchen Tools | Use in Recipe |
|---|---|
| Mixing bowl | For combining meatball ingredients |
| Skewers | For assembling the meatballs and veggies |
| Baking sheet | For cooking the skewers in the oven |
| Grill or grill pan | For cooking the skewers on the stovetop |
| Measuring cups | For measuring ingredients |
| Cooking spatula | For flipping and serving |
Cooking Steps:
- Preheat the grill or oven to 400°F (200°C).
- In a mixing bowl, combine ground meat, bread crumbs, Parmesan cheese, egg, garlic powder, salt, and black pepper. Mix until well combined.
- Shape the mixture into small meatballs, about 1 inch in diameter.
- On the skewers, alternate threading meatballs with the cubed bell peppers and cherry tomatoes.
- Place the assembled skewers on a baking sheet or grill pan. If using the grill, lightly grease the grill grates.
- Cook the skewers for 15-20 minutes, turning occasionally, until meatballs are browned and cooked through (internal temperature should reach 160°F/70°C).
- Once cooked, remove the skewers from the heat and let them cool slightly before serving.
To serve Meatball & Veggie Skewers, present them on a large platter garnished with fresh herbs like parsley or cilantro for a pop of color. You can also serve them with dipping sauces such as marinara or tzatziki on the side, making it a fun and interactive meal for kids.
These skewers pair beautifully with a simple green salad or a side of rice. For drinks, consider serving refreshing fruit-infused water, lemonade, or a light sparkling soda to complement the meal and keep it engaging for kids.
Fun Fish Sticks With Homemade Dip
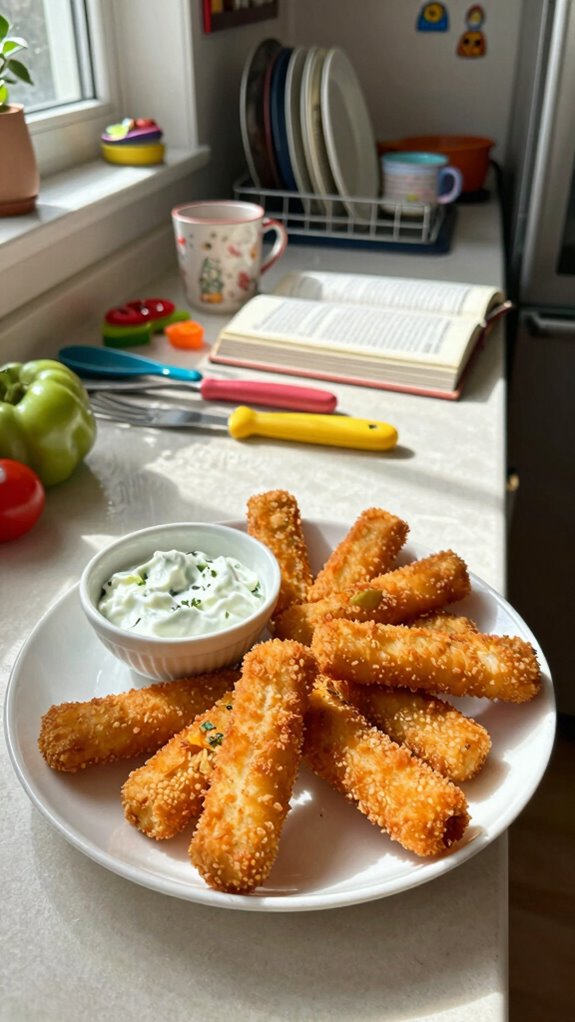
Fun Fish Sticks With Homemade Dip are a delightful and healthy twist on a classic favorite, perfect for kids who enjoy finger foods. These crispy, baked fish sticks are made from fresh fish fillets, coated in a crunchy breadcrumb mix, and served with a delicious homemade dip for added flavor. They are both a nutritious option and a hit among little ones, making mealtime enjoyable.
| Total Time | Difficulty | Number of Servings | Main Ingredient/Unique Feature |
|---|---|---|---|
| 30 minutes | Easy | 4 | Crispy baked fish with a homemade dip |
The preparation for Fun Fish Sticks takes about 15 minutes, while the cooking time is around 15 minutes. This dish is relatively simple to make, ideal for those new to cooking. To save time, you can prepare the fish sticks in advance and store them in the fridge until you’re ready to bake them, speeding up the dinner process.
| Ingredients | Quantity |
|---|---|
| Fresh white fish fillets | 1 pound |
| All-purpose flour | ½ cup |
| Eggs | 2 |
| Breadcrumbs | 1 cup |
| Salt | To taste |
| Black pepper | To taste |
| Paprika | 1 teaspoon |
| Olive oil | 2 tablespoons |
| Greek yogurt | 1 cup |
| Lemon juice | 1 tablespoon |
| Fresh dill (optional) | 1 tablespoon, chopped |
You can easily customize your Fun Fish Sticks by using different types of fish, such as cod, tilapia, or salmon. Additionally, you can experiment with various seasoning blends for the breadcrumbs, incorporating herbs or spices like garlic powder, Italian seasoning, or even a touch of cheese for extra flavor. The homemade dip can be tailored by substituting Greek yogurt with sour cream or adding different herbs like chives or parsley.
| Kitchen Tools | Use in Recipe |
|---|---|
| Baking sheet | For baking the fish sticks |
| Mixing bowls | For preparing the flour, egg, and breadcrumb mix |
| Whisk | For beating the eggs |
| Paper towels | For drying the fish fillets |
| Shallow dishes | For holding flour and breadcrumbs |
| Measuring cups | For measuring ingredients |
Cooking Steps:
- Preheat your oven to 425°F (220°C) and line a baking sheet with parchment paper.
- Pat the fish fillets dry with paper towels and cut them into stick-sized pieces, about 1 inch wide.
- Set up a dredging station by placing flour in one shallow dish, beaten eggs in another, and breadcrumbs mixed with salt, pepper, and paprika in a third dish.
- Dip each fish stick into the flour, shaking off the excess, then into the beaten eggs, and finally into the breadcrumb mixture, pressing gently to ensure they adhere.
- Place the coated fish sticks on the prepared baking sheet and drizzle olive oil over them.
- Bake in the preheated oven for about 12-15 minutes, or until golden brown and cooked through, flipping halfway for even cooking.
- For the homemade dip, whisk together Greek yogurt, lemon juice, and chopped fresh dill in a small bowl until well combined. Season with salt to taste.
To serve, plate the Fun Fish Sticks on a colorful platter alongside a small bowl of the homemade dip. You can garnish with lemon wedges for an added touch and extra freshness. For a fun presentation, consider using a toothpick or skewer for kids to easily grab their favorite fish sticks.
Pair these Fun Fish Sticks with a side of sweet potato fries or a fresh mixed salad for a complete meal. Drinks that complement this dish include lemonade or a mild fruit juice like apple or pear, balancing the savory flavors of the fish sticks perfectly.