When it comes to dinner, I’ve found that healthy Mexican recipes can be both satisfying and vibrant. I’ve gathered a selection of seven dishes that cater to different tastes and dietary needs. Whether you’re in the mood for something hearty or light, these meals promise to deliver flavor without compromising on health. Let’s uncover what these recipes have to offer and how they can elevate your weeknight dinners.
Grilled Veggie Tacos With Avocado Crema
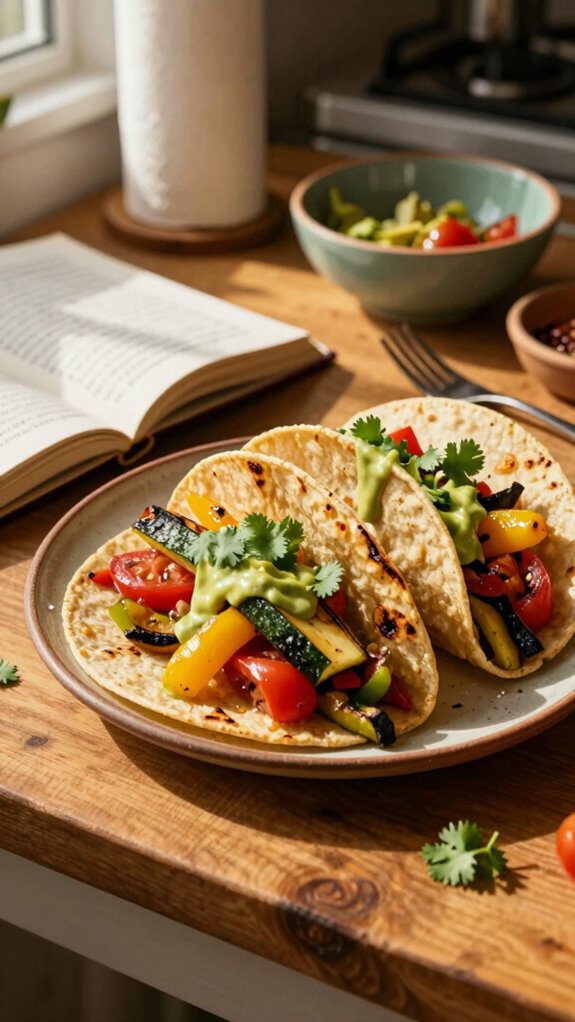
Grilled Veggie Tacos with Avocado Crema offer a vibrant and healthy twist on traditional Mexican tacos, featuring a delightful medley of fresh vegetables and a creamy avocado sauce. This dish is not only satisfying but also packed with nutrients, making it a perfect choice for a wholesome dinner option.
| Total Time | Difficulty | Number of Servings | Main Ingredient/Unique Feature |
|---|---|---|---|
| 30 minutes | Easy | 4 | Grilled Vegetables |
The recipe is easy to follow and takes about 30 minutes from start to finish, making it ideal for weeknight dinners. If you’re an inexperienced cook, don’t worry; the straightforward steps will guide you through the process. To streamline your cooking experience, chop your veggies and prepare the avocado crema while grilling the vegetables.
| Ingredient | Quantity |
|---|---|
| Corn tortillas | 8 |
| Zucchini | 1 medium |
| Red bell pepper | 1 |
| Yellow bell pepper | 1 |
| Red onion | 1 small |
| Olive oil | 2 tablespoons |
| Cumin | 1 teaspoon |
| Chili powder | 1 teaspoon |
| Salt | To taste |
| Avocado | 1 large |
| Lime juice | 2 tablespoons |
| Greek yogurt | 1/4 cup |
| Fresh cilantro | 1/4 cup |
You can easily customize these tacos by swapping in or adding your favorite vegetables, such as mushrooms or spinach. For a different flavor profile, try adding spices like smoked paprika or a dash of hot sauce. You can also replace Greek yogurt with a dairy-free alternative to cater to dietary preferences.
| Kitchen Tool | Usage |
|---|---|
| Grill or grill pan | For grilling vegetables until they are tender and charred. |
| Knife | For chopping vegetables and slicing avocados. |
| Cutting board | Provides a safe surface for chopping ingredients. |
| Mixing bowl | Used for combining the ingredients of the avocado crema. |
| Spatula | For flipping vegetables on the grill. |
| Serving platter | To present the tacos beautifully once assembled. |
Cooking Steps:
- Preheat your grill or grill pan over medium-high heat.
- While the grill is heating, wash and chop the zucchini, bell peppers, and red onion into bite-sized pieces.
- In a bowl, combine the chopped vegetables with olive oil, cumin, chili powder, and salt. Toss until well coated.
- Once the grill is ready, place the vegetables on it and grill for about 5-7 minutes, turning occasionally, until they are tender and slightly charred.
- Meanwhile, prepare the avocado crema by blending the avocado, lime juice, Greek yogurt, and a pinch of salt in a mixing bowl until smooth.
- Warm the corn tortillas on the grill for about 1 minute on each side or until soft and pliable.
- Assemble the tacos by adding the grilled vegetables on top of the tortillas and drizzling with avocado crema.
- Garnish with fresh cilantro.
To serve grilled veggie tacos at their best, arrange them on a colorful platter, drizzled generously with avocado crema. You can also add lime wedges on the side for an extra zing, and perhaps some additional fresh cilantro for garnish.
These delicious tacos pair excellently with a side of Mexican rice or a refreshing corn salad. For a beverage, consider serving them with a light beer, a margarita, or homemade hibiscus iced tea to complement the flavors beautifully.
Quinoa and Black Bean Stuffed Peppers
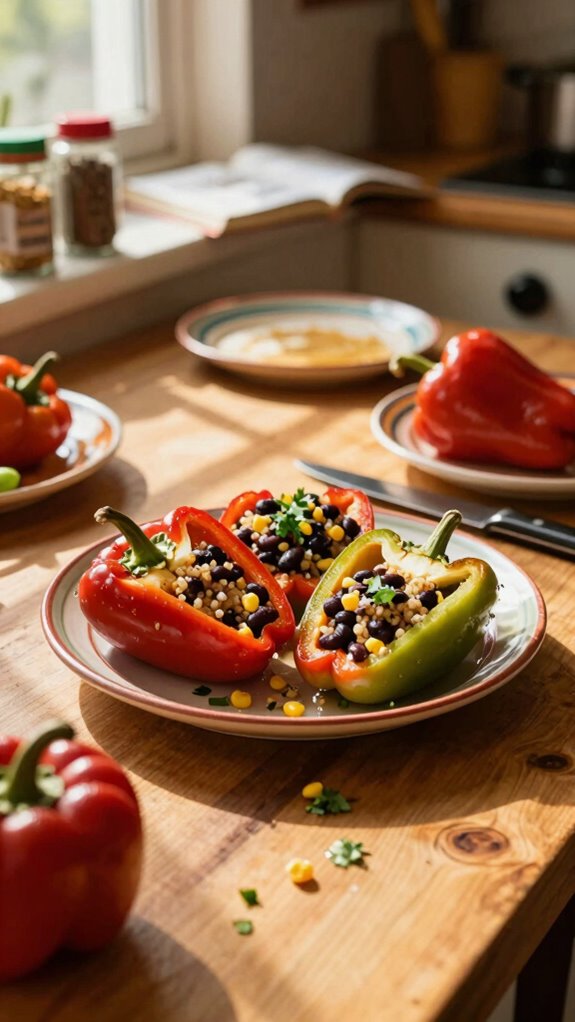
Quinoa and Black Bean Stuffed Peppers are a nutritious and colorful dish that makes for a hearty plant-based meal. These bell peppers are filled with a flavorful mix of quinoa, black beans, corn, and spices, providing a perfect combination of protein and fiber. They not only taste great but also bring a beautiful presentation to your dinner table.
| Total Time | Difficulty | Number of Servings | Main Ingredient/Unique Feature |
|---|---|---|---|
| 45 minutes | Easy | 4 | Quinoa and Black Beans |
This dish is quick to prepare, taking about 15 minutes of prep time and 30 minutes of cooking time. It is suitable for cooks of any skill level, thanks to its straightforward steps. For an efficient cooking experience, cook the quinoa while you chop the vegetables and prepare the stuffing mixture.
| Ingredient | Quantity |
|---|---|
| Bell peppers | 4 large |
| Quinoa | 1 cup |
| Black beans (canned) | 1 can (15 oz) |
| Corn (frozen or canned) | 1 cup |
| Onion | 1 small, diced |
| Garlic | 2 cloves, minced |
| Cumin | 1 teaspoon |
| Chili powder | 1 teaspoon |
| Olive oil | 2 tablespoons |
| Salt | To taste |
| Fresh cilantro | 1/4 cup, chopped |
| Lime juice | 2 tablespoons |
| Shredded cheese (optional) | 1/2 cup |
You can customize your stuffed peppers by swapping quinoa for other grains like brown rice or bulgur. Additionally, you can add other vegetables such as diced tomatoes or jalapeños for an extra kick. To cater to dietary preferences, feel free to substitute black beans with lentils or chickpeas.
| Kitchen Tool | Usage |
|---|---|
| Pot | For cooking the quinoa until fluffy. |
| Large skillet | Used to sauté onions, garlic, and mix the stuffing ingredients. |
| Baking dish | To bake the stuffed peppers in the oven. |
| Knife | For chopping vegetables and dicing the peppers. |
| Cutting board | Provides a safe surface for chopping ingredients. |
| Spoon | For mixing the stuffing and filling the peppers. |
Cooking Steps:
- Preheat your oven to 375°F (190°C).
- Rinse the quinoa under cold water and cook it according to package instructions (typically 1 part quinoa to 2 parts water; bring to a boil, then simmer covered until water is absorbed, about 15 minutes).
- While the quinoa cooks, heat olive oil in a large skillet over medium heat. Add diced onion and minced garlic, and sauté until softened, about 3-4 minutes.
- Stir in cooked quinoa, black beans, corn, cumin, chili powder, lime juice, salt, and chopped cilantro. Mix until well combined and heated through.
- Slice the tops off the bell peppers and carefully remove the seeds and membranes. Place them upright in a baking dish.
- Fill each pepper generously with the quinoa and black bean mixture, and if desired, top with shredded cheese.
- Add a splash of water to the bottom of the baking dish to create steam, then cover with aluminum foil.
- Bake in the preheated oven for 25-30 minutes, until the peppers are tender.
- Remove from oven and let cool for a few minutes before serving.
To present the dish beautifully, place each stuffed pepper upright on a plate, garnished with fresh cilantro and a wedge of lime on the side. For an appealing presentation, consider adding a dollop of Greek yogurt or sour cream on top.
For a complete meal, serve the stuffed peppers alongside a light green salad or Mexican rice. To enhance the flavors, pair this dish with a refreshing beverage like iced hibiscus tea or a light white wine such as Sauvignon Blanc.
Chicken Fajita Bowl With Cauliflower Rice
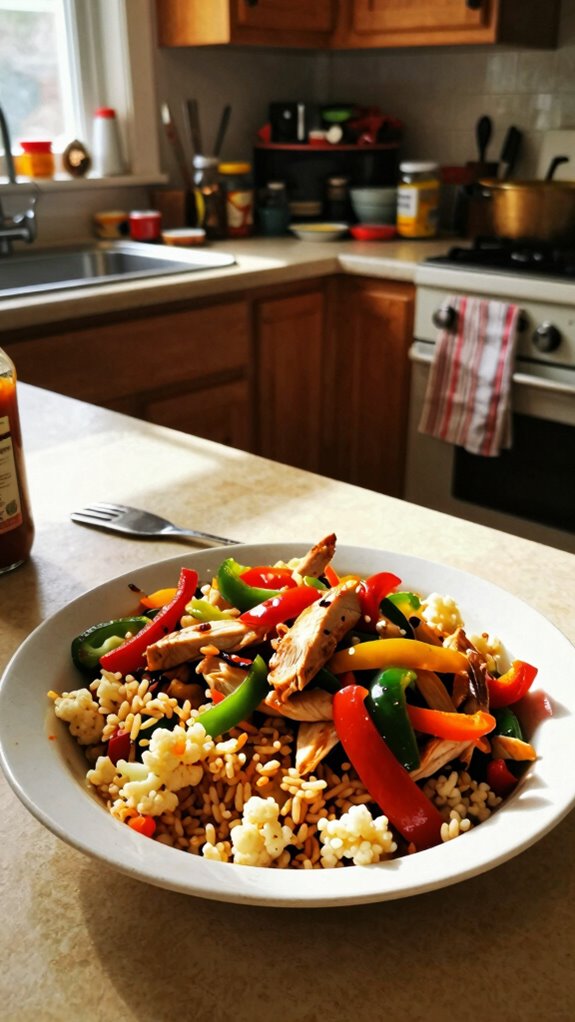
The Chicken Fajita Bowl with Cauliflower Rice is a delicious and healthy take on traditional fajitas, featuring tender chicken, bell peppers, and onions served over cauliflower rice instead of regular rice. This vibrant bowl packs a flavorful punch and is perfect for those looking to enjoy a lower-carb meal while still experiencing the satisfying taste of classic Mexican cuisine.
| Total Time | Difficulty | Number of Servings | Main Ingredient/Unique Feature |
|---|---|---|---|
| 30 minutes | Easy | 4 | Cauliflower Rice |
This dish is straightforward and can be prepared in just 10 minutes of preparation time followed by 20 minutes of cooking time. It is simple enough for beginner cooks, with just a few steps. For an efficient cooking process, you can start by dicing the chicken and vegetables while the cauliflower rice cooks.
| Ingredient | Quantity |
|---|---|
| Cauliflower | 1 large head |
| Chicken breast | 1 pound, sliced |
| Bell peppers | 2 large, sliced |
| Onion | 1 medium, sliced |
| Olive oil | 2 tablespoons |
| Chili powder | 1 teaspoon |
| Cumin | 1 teaspoon |
| Garlic powder | 1 teaspoon |
| Salt | To taste |
| Pepper | To taste |
| Fresh lime juice | 2 tablespoons |
| Cilantro | 1/4 cup, chopped |
To add some variety to your Chicken Fajita Bowl, you can substitute cauliflower rice with brown rice, quinoa, or any whole grain of your choice. Additionally, consider using shrimp or tofu instead of chicken for a different protein option. You can also customize the dish by adding different vegetables such as zucchini, mushrooms, or corn.
| Kitchen Tool | Usage |
|---|---|
| Large skillet | For cooking the chicken and vegetables. |
| Knife | To slice the chicken and vegetables. |
| Cutting board | Provides a safe surface for chopping ingredients. |
| Food processor | For making cauliflower rice (if not using pre-made). |
| Spatula | For stirring and flipping the chicken mixture. |
| Serving bowl | To present the finished dish. |
Cooking Instructions
- Start by making the cauliflower rice. Break the cauliflower into florets and pulse in a food processor until it resembles rice. Alternatively, you can use pre-made cauliflower rice. Set aside.
- Heat a large skillet over medium heat and add 1 tablespoon of olive oil.
- Once the oil is hot, add the sliced chicken breast to the skillet and season with salt, pepper, chili powder, cumin, and garlic powder. Cook for about 5-7 minutes until the chicken is browned and cooked through.
- Remove the chicken from the skillet and set it aside. In the same skillet, add another tablespoon of olive oil, followed by the sliced onions and bell peppers. Sauté for about 5 minutes until the vegetables are tender.
- Add the cooked chicken back into the skillet with the vegetables, and mix well to combine. Squeeze fresh lime juice over the top and stir.
- In a separate pan, sauté the cauliflower rice for about 5 minutes until heated through. Season with salt and pepper if desired.
- Assemble the bowls by placing a serving of cauliflower rice at the bottom and topping it with the chicken and veggie mixture. Garnish with chopped cilantro.
To serve and present the Chicken Fajita Bowl, create an appealing layered look by placing the cauliflower rice first and then adding the chicken and vegetable topping. Add additional toppings like avocado slices, lime wedges, or a sprinkle of feta cheese for an extra touch.
Pair the Chicken Fajita Bowl with a refreshing side salad or corn tortillas for a complete meal. For drinks, consider serving a classic margarita or a chilled glass of iced tea with lime for a refreshing complement to the flavors of the dish.
Zucchini Enchiladas With Salsa Verde
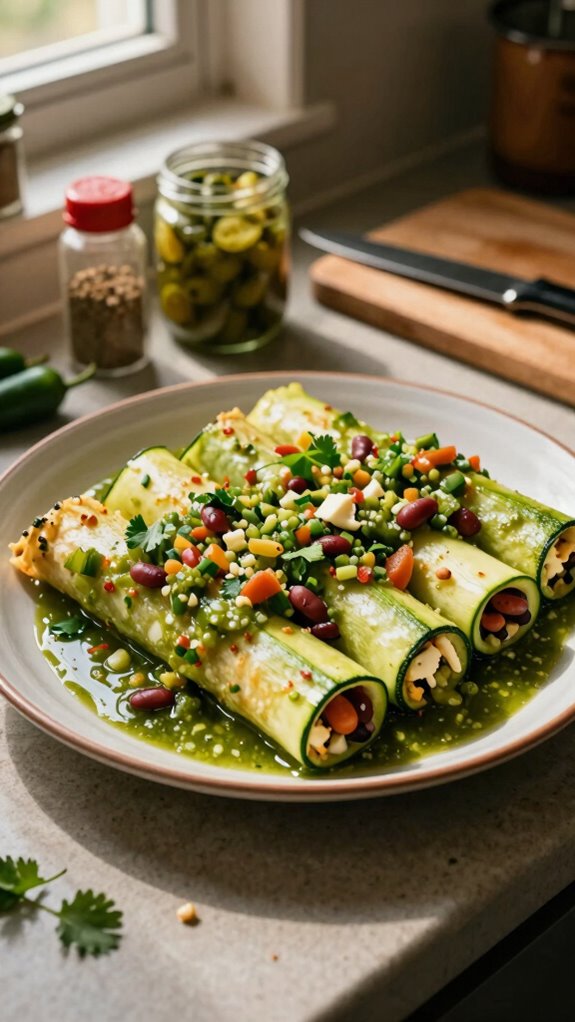
Zucchini Enchiladas with Salsa Verde are a fantastic, gluten-free take on the classic enchilada, using thinly sliced zucchini in place of tortillas. These enchiladas are filled with a savory mixture of cheese, black beans, and spices, then topped with a vibrant salsa verde for a refreshing kick. It’s a perfect dish for a healthy weeknight dinner or a fun gathering with friends.
| Total Time | Difficulty | Number of Servings | Main Ingredient/Unique Feature |
|---|---|---|---|
| 40 minutes | Easy | 4 | Zucchini instead of tortillas |
This dish is accessible for cooks of all levels and can be prepared in about 15 minutes, followed by 25 minutes of cooking time. To streamline your cooking process, consider preparing the filling while you slice the zucchini, and make sure to have your oven preheated while you assemble the enchiladas.
| Ingredient | Quantity |
|---|---|
| Zucchini | 3 large |
| Black beans (canned) | 1 can (15 oz) |
| Corn | 1 cup |
| Shredded cheese | 2 cups (cheddar or Monterey Jack) |
| Salsa verde | 1 cup |
| Olive oil | 1 tablespoon |
| Cumin | 1 teaspoon |
| Chili powder | 1 teaspoon |
| Salt | To taste |
| Pepper | To taste |
| Fresh cilantro | 1/4 cup, chopped |
Feel free to get creative with your Zucchini Enchiladas by adding other ingredients such as grilled chicken, sautéed onions, or even different beans like pinto beans. For a spicier option, consider incorporating jalapeños or adding diced green chiles into the filling.
| Kitchen Tool | Usage |
|---|---|
| Oven | To bake the enchiladas. |
| Baking dish | To assemble and cook the enchiladas. |
| Knife | For slicing zucchini and chopping ingredients. |
| Cutting board | Provides a safe surface for meal prep. |
| Mixing bowl | To combine the filling ingredients. |
| Spoon | For assembling and filling the enchiladas. |
Cooking Steps
- Preheat your oven to 375°F (190°C).
- Use a knife to slice the zucchini lengthwise into thin strips, about 1/8 inch thick. Set aside.
- In a mixing bowl, combine the drained black beans, corn, shredded cheese, cumin, chili powder, salt, and pepper. Mix well.
- Take a baking dish and pour a thin layer of salsa verde onto the bottom.
- Place a strip of zucchini on a flat surface, spoon a portion of the filling onto one end of the zucchini strip, and roll it up tightly. Place the rolled zucchini seam-side down in the baking dish.
- Repeat the filling and rolling process until all the zucchini strips are filled and arranged in the baking dish.
- Pour the remaining salsa verde over the top of the rolled enchiladas, then sprinkle additional cheese if desired.
- Cover the dish with foil and bake in the preheated oven for 20 minutes, then remove the foil and bake for an additional 5-10 minutes, or until the cheese is bubbling and golden.
Serving and Presentation
Enhance the presentation of your Zucchini Enchiladas by garnishing with freshly chopped cilantro and a squeeze of lime juice on top. Serve directly from the baking dish for a casual feel, or transfer to a large serving platter for a more polished look. Offering additional salsa verde and lime wedges on the side can further elevate the dining experience.
Pairings
These Zucchini Enchiladas pair beautifully with a light and refreshing side salad or a quinoa dish to create a more complete meal. For drinks, consider serving a crisp white wine, like Sauvignon Blanc, or a refreshing Mexican beer, such as a light lager or a michelada for a delicious contrast to the flavors of the enchiladas.
Shrimp Ceviche With Fresh Lime and Cilantro
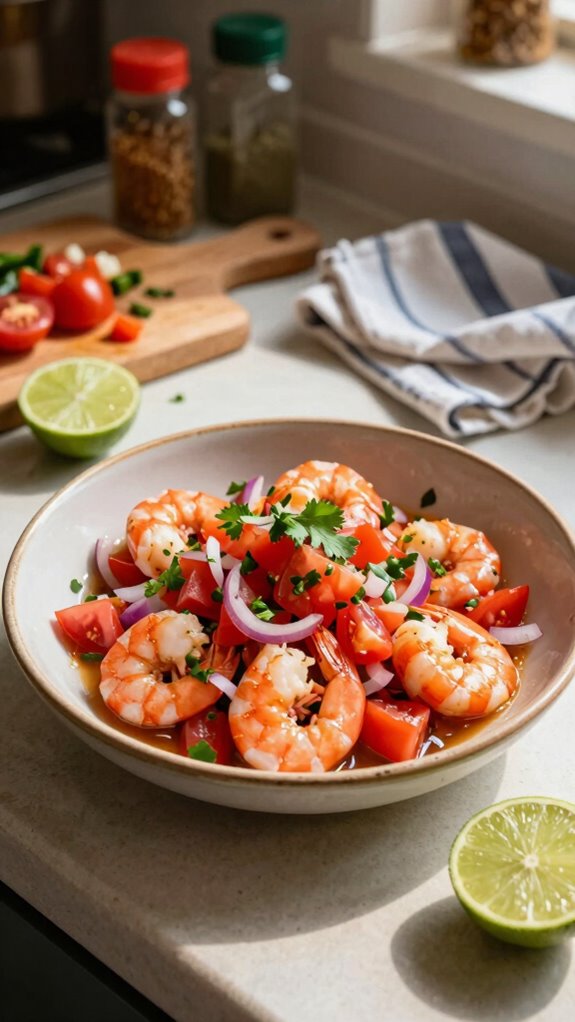
Shrimp Ceviche with Fresh Lime and Cilantro is a refreshing and zesty dish that brings the vibrant flavors of Mexican cuisine to your table. It’s perfect for a light dinner, appetizer, or even a summer party. The shrimp is “cooked” in fresh lime juice and combined with crunchy vegetables and herbs, making it both healthy and delicious.
| Total Time | Difficulty | Number of Servings | Main Ingredient/Unique Feature |
|---|---|---|---|
| 30 minutes | Easy | 4 | Shrimp “cooked” in lime juice |
This dish has a low level of difficulty, making it ideal for any cook, from beginner to experienced. Total preparation time is about 10 minutes, and it requires minimal cooking by simply marinating the shrimp. The longer you let the shrimp marinate, the more flavorful it will become. For best results, prepare the ceviche at least 15 minutes before serving.
| Ingredient | Quantity |
|---|---|
| Raw shrimp (peeled & deveined) | 1 lb |
| Fresh lime juice | 1/2 cup |
| Red onion | 1 small |
| Tomato | 1 medium |
| Jalapeño (seeded & minced) | 1 |
| Cilantro (fresh, chopped) | 1/4 cup |
| Salt | To taste |
| Avocado (optional) | 1 |
Feel free to customize your Shrimp Ceviche by adding different ingredients such as mango for a sweet twist, bell peppers for added crunch, or cucumber for extra freshness. Additionally, you can experiment with the level of spice by adjusting the amount of jalapeño or adding hot sauce.
| Kitchen Tool | Usage |
|---|---|
| Mixing bowl | To combine all the ceviche ingredients. |
| Knife | For chopping vegetables and deveining shrimp. |
| Cutting board | A safe surface for chopping. |
| Measuring cups | To measure lime juice accurately. |
| Zester | For adding lime zest if desired. |
| Serving dishes | To present the ceviche attractively. |
Cooking Steps
- Begin by cutting the raw shrimp into small, bite-sized pieces and place them in a mixing bowl.
- Squeeze fresh lime juice over the shrimp, ensuring they are fully submerged. Toss to coat.
- Finely chop the red onion, tomato, jalapeño, and cilantro. Add them to the bowl with the shrimp.
- Stir all ingredients together, seasoning with salt to taste, and let the ceviche marinate in the refrigerator for at least 15-20 minutes (or longer for a stronger flavor).
- If using avocado, cut it into cubes and gently fold it in just before serving to maintain its shape.
- Serve the ceviche chilled and still in the mixing bowl, or transfer it to a serving dish for a more formal presentation.
Serving Suggestions
To present your Shrimp Ceviche, serve it in a glass or bowl and garnish with additional chopped cilantro and lime wedges for a pop of color. Pair it with crispy tortilla chips or tostadas for added texture, offering a delightful crunch that contrasts beautifully with the refreshing ceviche.
Pairing Recommendations
For an excellent dining experience, consider serving Shrimp Ceviche alongside tacos or Mexican rice. Drinks that complement this dish wonderfully include light beers, such as a Mexican lager or crisp white wines like Sauvignon Blanc. A refreshing margarita can also enhance the zesty flavors of the ceviche perfectly.
Lentil Tacos With Spicy Chipotle Sauce
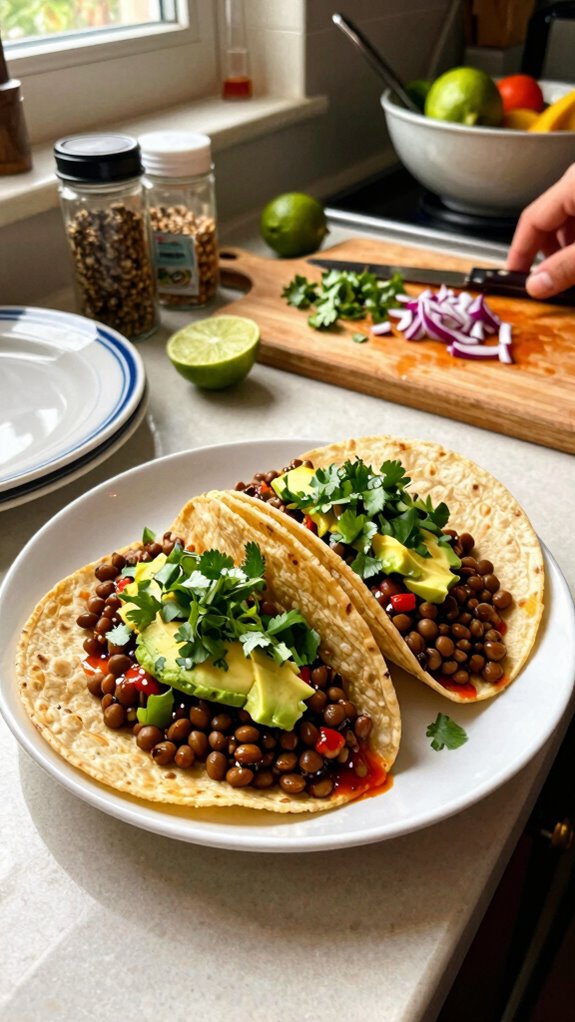
Lentil Tacos with Spicy Chipotle Sauce are a healthy and flavorful twist on traditional tacos, perfect for taco night or any casual gathering. Packed with protein and fiber, these tacos offer a satisfying texture and rich flavor, thanks to the spicy chipotle sauce that brings everything together. Enjoy them on soft tortillas or crispy shells for a delightful meal.
| Total Time | Difficulty | Number of Servings | Main Ingredient/Unique Feature |
|---|---|---|---|
| 40 minutes | Easy | 4 | Lentils as a filling |
This recipe has an easy level of difficulty, making it accessible for cooks of all skill levels. The total preparation time is around 10 minutes, with cooking time taking about 30 minutes. For the best results, make sure to rinse the lentils thoroughly before cooking. You can also prepare the spicy chipotle sauce in advance to enhance the flavors.
| Ingredient | Quantity |
|---|---|
| Dried green or brown lentils | 1 cup |
| Vegetable broth | 2 cups |
| Onion (diced) | 1 small |
| Garlic (minced) | 2 cloves |
| Cumin | 1 tsp |
| Smoked paprika | 1 tsp |
| Salt | To taste |
| Chipotle peppers in adobo sauce | 2 (or to taste) |
| Corn tortillas (or taco shells) | 8 |
| Fresh cilantro (for garnish) | 1/4 cup |
| Lime wedges | 2 |
For variations, feel free to substitute the lentils with black beans or chickpeas for a different flavor profile. Additionally, you can customize the toppings with diced avocado, shredded lettuce, or fresh salsa. Experiment with different sauces by using more or less chipotle, or incorporate other spices to suit your palate.
| Kitchen Tool | Usage |
|---|---|
| Pot | To cook lentils in vegetable broth. |
| Skillet | For sautéing onions and garlic. |
| Knife | For chopping vegetables. |
| Cutting board | A safe surface for chopping. |
| Measuring cups | To measure ingredients accurately. |
| Serving plates | For presenting tacos attractively. |
Cooking Steps
- Rinse the lentils under cold water and drain them.
- In a pot, add the lentils and vegetable broth. Bring to a boil, then reduce heat, cover, and simmer for 20-25 minutes, or until lentils are tender.
- While the lentils are cooking, heat a skillet over medium heat. Add diced onion and sauté until translucent.
- Stir in the minced garlic, cumin, smoked paprika, and salt, cooking for another minute until fragrant.
- Once the lentils are cooked, drain any excess liquid and add them to the skillet with the sautéed onions and spices.
- Finely chop the chipotle peppers in adobo and stir them into the lentil mixture, adjusting the amount to achieve your desired level of heat.
- Allow the mixture to cook for an additional 5 minutes, stirring occasionally.
- Warm the corn tortillas according to the package instructions or directly on a skillet until pliable.
- Assemble the tacos by spooning the lentil mixture into each tortilla and garnishing with fresh cilantro and a squeeze of lime.
To serve and present the Lentil Tacos, arrange them on a large platter or individual plates with lime wedges alongside. For added appeal, garnish with fresh cilantro and colorful vegetables like diced avocado or sliced radishes. This bright presentation will surely entice your guests!
For pairing options, consider serving these tacos with a side of Mexican rice or a fresh salad for a complete meal. Complementing your dinner with a refreshing drink such as agua fresca, iced tea, or a light beer like a Mexican lager will enhance the vibrant flavors of the dish. Enjoy!
Mexican Street Corn Salad With Lime Dressing
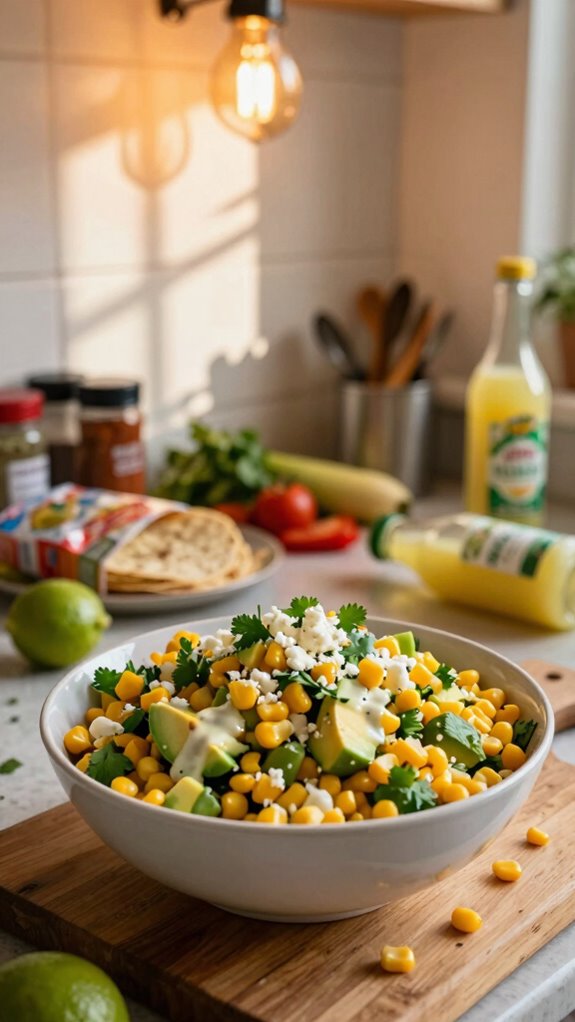
Mexican Street Corn Salad, also known as Esquites, is a vibrant and refreshing dish that brings the flavors of street food right to your table. This salad typically features sweet corn mixed with creamy dressing, lime juice, cilantro, and spices, making it a perfect side for barbecues, picnics, or any gathering. It’s easy to make and guaranteed to impress your guests with its delicious taste and appealing presentation.
| Total Time | Difficulty | Number of Servings | Main Ingredient/Unique Feature |
|---|---|---|---|
| 25 minutes | Easy | 4 | Grilled corn with a zesty dressing |
This recipe is easy to prepare, making it suitable for cooks of all levels. It takes about 10 minutes to prepare and 15 minutes to cook. For added sweetness and to maximize flavor, consider grilling the corn before cutting it off the cob. This simple step elevates the dish with more depth and character.
| Ingredient | Quantity |
|---|---|
| Fresh corn (on the cob) | 4 ears |
| Mayonnaise | 1/2 cup |
| Crumbled feta cheese | 1/2 cup |
| Lime juice | 2 tablespoons |
| Chili powder | 1 teaspoon |
| Fresh cilantro (chopped) | 1/4 cup |
| Salt | To taste |
| Black pepper | To taste |
For variations, you can substitute the mayonnaise with Greek yogurt for a lighter option or add diced jalapeño for an extra kick. You can also customize the toppings by including avocado slices or other cheeses like cotija or queso fresco.
| Kitchen Tool | Usage |
|---|---|
| Grill or grill pan | To grill the corn for extra flavor. |
| Knife | For cutting the corn off the cob. |
| Mixing bowl | To combine all the ingredients. |
| Spoon | For mixing and serving the salad. |
| Measuring cups | To measure ingredients accurately. |
| Serving bowl | For presenting your salad stylishly. |
Cooking Steps
- Preheat your grill or grill pan over medium-high heat.
- Place the ears of corn directly on the grill and cook for about 10 to 15 minutes, turning occasionally until they are charred and tender. Remove from the grill and let them cool slightly.
- Once the corn is cool enough to handle, carefully cut the kernels off the cob using a sharp knife and place them in a mixing bowl.
- In a separate bowl, mix together the mayonnaise, lime juice, chili powder, salt, and black pepper until well combined.
- Add the corn kernels to the dressing mixture and fold in the crumbled feta cheese and chopped cilantro until evenly coated.
- Taste and adjust seasoning if needed, then transfer the salad to a serving bowl.
To serve the Mexican Street Corn Salad beautifully, garnish with extra crumbled feta and a sprinkle of chili powder on top. Serve chilled or at room temperature alongside lime wedges for an added zesty touch.
This delightful salad pairs wonderfully with grilled chicken or fish, offering a refreshing contrast. For beverages, consider serving a chilled beer, a fruity margarita, or a classic limeade to complement the flavors of the dish beautifully.